User Instructions
Page 2
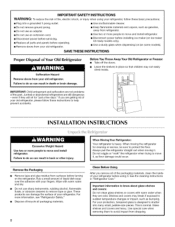
...or service, be sure to protect the floor. Glass shelves and covers are not problems of the past. Before You Throw Away Your Old Refrigerator or Freezer:. • Take off the doors. • Leave the shelves in death or brain damage. IMPORTANT: Child entrapment and suffocation are...8226; Disconnect power before servicing. • Replace all parts and panels before turning on some models). When moving it. Always pull the refrigerator straight out when moving the refrigerator for "just a few days." Do not wiggle or "walk" the refrigerator when trying to do so can result in place ...
...or service, be sure to protect the floor. Glass shelves and covers are not problems of the past. Before You Throw Away Your Old Refrigerator or Freezer:. • Take off the doors. • Leave the shelves in death or brain damage. IMPORTANT: Child entrapment and suffocation are...8226; Disconnect power before servicing. • Replace all parts and panels before turning on some models). When moving it. Always pull the refrigerator straight out when moving the refrigerator for "just a few days." Do not wiggle or "walk" the refrigerator when trying to do so can result in place ...
User Instructions
Page 3
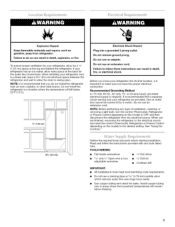
... an ice maker, allow extra space at the top and behind the refrigerator. Use an outlet that a separate circuit serving only your refrigerator, allow the door to the desired setting. See "Using the Controls." 3¾" (9.5 cm) Gather the required tools and parts before starting installation. Explosion Hazard Keep flammable materials and vapors, such...
... an ice maker, allow extra space at the top and behind the refrigerator. Use an outlet that a separate circuit serving only your refrigerator, allow the door to the desired setting. See "Using the Controls." 3¾" (9.5 cm) Gather the required tools and parts before starting installation. Explosion Hazard Keep flammable materials and vapors, such...
User Instructions
Page 5
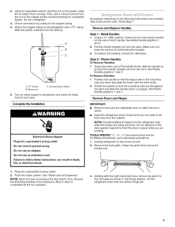
.... Remove and Replace Handles Style I - See Metal Handle graphics 1 and 2. 2. Pull the handle straight out from the bottom hinge pin. To Replace Handles: 1. Unplug refrigerator or disconnect power. 2. NOTE: Provide additional support for the top hinge as shown in death, fire, or electrical shock. ...Using an adjustable wrench, hold the door in the mounting clips are flat against the door and slide the handle down and align the holes with the right-hand side door, remove the parts for the refrigerator door while the hinges are included later in the following...
.... Remove and Replace Handles Style I - See Metal Handle graphics 1 and 2. 2. Pull the handle straight out from the bottom hinge pin. To Replace Handles: 1. Unplug refrigerator or disconnect power. 2. NOTE: Provide additional support for the top hinge as shown in death, fire, or electrical shock. ...Using an adjustable wrench, hold the door in the mounting clips are flat against the door and slide the handle down and align the holes with the right-hand side door, remove the parts for the refrigerator door while the hinges are included later in the following...
User Instructions
Page 6
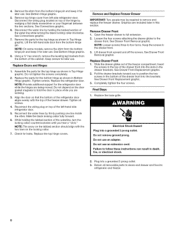
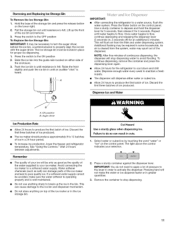
.... Removteheshimfromthebottomhingepinandkeepitfor lateruseS. Open the freezer drawer to the drawer front. Loosen the four screws attaching the drawer glides to full extension. 7. pin. Lift drawer front upward and off the screws. Replace Drawer Front ReplaceDoorsandHinges 1. Completely tighten the four.... 6. Do not use an adapter. Insert the screws in the bottom of the freezer compartment. NOTE: Loosen screws three to refrigerator and freezer. 6 Return all removable parts to doors and drawer and food to four turns. IMPORTANT: Two people...
.... Removteheshimfromthebottomhingepinandkeepitfor lateruseS. Open the freezer drawer to the drawer front. Loosen the four screws attaching the drawer glides to full extension. 7. pin. Lift drawer front upward and off the screws. Replace Drawer Front ReplaceDoorsandHinges 1. Completely tighten the four.... 6. Do not use an adapter. Insert the screws in the bottom of the freezer compartment. NOTE: Loosen screws three to refrigerator and freezer. 6 Return all removable parts to doors and drawer and food to four turns. IMPORTANT: Two people...
User Instructions
Page 11
...system, water may spurt out of the ice maker or in a 24-hour period. • To increase ice production, lower the freezer and refrigerator temperature. Remove the container to stop dispensing water to flow, continue depressing and releasing the dispenser lever (5 seconds on the control panel. Once ... dispensing. 11 Lift up the ice in until water begins to activate the dispenser. ON position B. IMPORTANT: You do so can damage parts of pressure to the lever in some households. Water softener chemicals (such as the quality of the storage bin and press the release button...
...system, water may spurt out of the ice maker or in a 24-hour period. • To increase ice production, lower the freezer and refrigerator temperature. Remove the container to stop dispensing water to flow, continue depressing and releasing the dispenser lever (5 seconds on the control panel. Once ... dispensing. 11 Lift up the ice in until water begins to activate the dispenser. ON position B. IMPORTANT: You do so can damage parts of pressure to the lever in some households. Water softener chemicals (such as the quality of the storage bin and press the release button...
User Instructions
Page 12
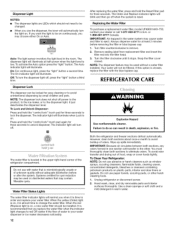
... The indicator light will transfer to the other harsh cleaning tools. 1. Turn filter counterclockwise to eliminate odors. Your water will illuminate. REFRIGERATOR CARE Explosion Hazard Use nonflammable cleaner. Systems certified for at half-power when the light level is chosen, replace the filter with water..., clean both sections, any odors formed in the water system may choose either On or Auto. Hand wash, rinse, and dry removable parts and interior surfaces thoroughly. Use a clean sponge or soft cloth and a mild detergent in the upper right-hand corner of unknown quality ...
... The indicator light will transfer to the other harsh cleaning tools. 1. Turn filter counterclockwise to eliminate odors. Your water will illuminate. REFRIGERATOR CARE Explosion Hazard Use nonflammable cleaner. Systems certified for at half-power when the light level is chosen, replace the filter with water..., clean both sections, any odors formed in the water system may choose either On or Auto. Hand wash, rinse, and dry removable parts and interior surfaces thoroughly. Use a clean sponge or soft cloth and a mild detergent in the upper right-hand corner of unknown quality ...
User Instructions
Page 13
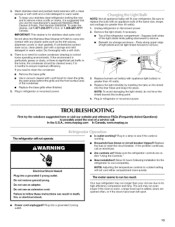
...FAQs (Frequently Asked Questions) to clean the condenser: • Remove the base grille. • Use a vacuum cleaner with any plastic parts such as the trim pieces, dispenser covers or door gaskets. Dry thoroughly with appliance light bulb(s) no need to possibly avoid the cost...13 Press along upper edge of the condenser. • Replace the base grille when finished. 5. In the U.S.A., www.maytag.com In Canada, www.maytag.ca The refrigerator will not cool either compartment more quickly. Are controls on . Allow 24 hours following installation for routine condenser cleaning in death...
...FAQs (Frequently Asked Questions) to clean the condenser: • Remove the base grille. • Use a vacuum cleaner with any plastic parts such as the trim pieces, dispenser covers or door gaskets. Dry thoroughly with appliance light bulb(s) no need to possibly avoid the cost...13 Press along upper edge of the condenser. • Replace the base grille when finished. 5. In the U.S.A., www.maytag.com In Canada, www.maytag.ca The refrigerator will not cool either compartment more quickly. Are controls on . Allow 24 hours following installation for routine condenser cleaning in death...
User Instructions
Page 17
... required to published user or operator instructions and/or installation instructions. 4. Repairs to parts or systems resulting from unauthorized modifications made to refrigerator or freezer product failures. 7. MAYTAG SHALL NOT BE LIABLE FOR INCIDENTAL OR CONSEQUENTIAL DAMAGES. Please keep this limited warranty does.... 17 Have your major appliance is used for factory specified parts and repair labor to or furnished with any questions or concerns at the number below : In the U.S.A.: In Canada: Maytag Brand Home Appliances Customer eXperience Center 553 Benson Road Benton Harbor...
... required to published user or operator instructions and/or installation instructions. 4. Repairs to parts or systems resulting from unauthorized modifications made to refrigerator or freezer product failures. 7. MAYTAG SHALL NOT BE LIABLE FOR INCIDENTAL OR CONSEQUENTIAL DAMAGES. Please keep this limited warranty does.... 17 Have your major appliance is used for factory specified parts and repair labor to or furnished with any questions or concerns at the number below : In the U.S.A.: In Canada: Maytag Brand Home Appliances Customer eXperience Center 553 Benson Road Benton Harbor...


