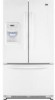
User Instructions
Page 2
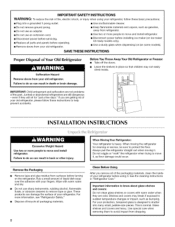
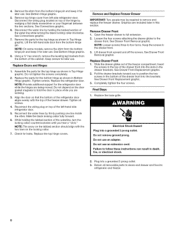
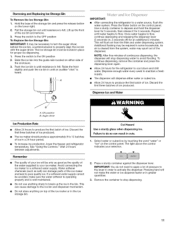
...• Do not use an extension cord. • Disconnect power before servicing. • Replace all packaging materials. 2 & When Moving Your Refrigerator: Your refrigerator is designed to shatter into a grounded 3 prong outlet. • Do not remove ground prong. • Do not use an adapter. •...other injury. This is normal. Use special care when removing them to avoid impact from refrigerator. • Use two or more information, see "Refrigerator Safety." • Dispose of/recycle all parts and panels before installing ice maker (on ice maker kit ready models only). •...
...• Do not use an extension cord. • Disconnect power before servicing. • Replace all packaging materials. 2 & When Moving Your Refrigerator: Your refrigerator is designed to shatter into a grounded 3 prong outlet. • Do not remove ground prong. • Do not use an adapter. •...other injury. This is normal. Use special care when removing them to avoid impact from refrigerator. • Use two or more information, see "Refrigerator Safety." • Dispose of/recycle all parts and panels before installing ice maker (on ice maker kit ready models only). •...
User Instructions
Page 3
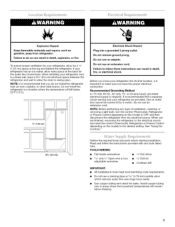
...Before you have the proper electrical connection. Use an outlet that you are finished, reconnect the refrigerator to the electrical source and reset the control (Thermostat, Refrigerator or Freezer Control depending on the model) to follow the instructions provided with any type of... ground prong. Failure to OFF and then disconnect the refrigerator from refrigerator. Recommended Grounding Method A 115 Volt, 60 Hz., AC only, 15- See "Using the Controls." 3¾" (9.5 cm) Gather the required tools and parts before starting installation. Read and follow these instructions can ...
...Before you have the proper electrical connection. Use an outlet that you are finished, reconnect the refrigerator to the electrical source and reset the control (Thermostat, Refrigerator or Freezer Control depending on the model) to follow the instructions provided with any type of... ground prong. Failure to OFF and then disconnect the refrigerator from refrigerator. Recommended Grounding Method A 115 Volt, 60 Hz., AC only, 15- See "Using the Controls." 3¾" (9.5 cm) Gather the required tools and parts before starting installation. Read and follow these instructions can ...
User Instructions
Page 5
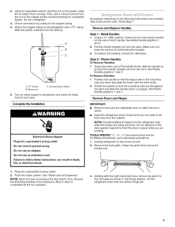
...align the holes with the door studs. 2. Style 2 - Grasp the lower part of ice. Position the handle so that the mounting clips are included later in death, fire, or electrical shock. NOTE: Allow 24 hours to refrigerator and check for the top hinge as shown in place while you . 1....See Plastic Handle graphics 1 and 2. NOTE: Provide additional support for reattaching the handles. 3. Grasp the grille firmly and pull it from the bottom hinge pin. Plug into a grounded 3 prong outlet. 2. See "Water and Ice Dispenser." Discard the first three batches of each handle.
...align the holes with the door studs. 2. Style 2 - Grasp the lower part of ice. Position the handle so that the mounting clips are included later in death, fire, or electrical shock. NOTE: Allow 24 hours to refrigerator and check for the top hinge as shown in place while you . 1....See Plastic Handle graphics 1 and 2. NOTE: Provide additional support for reattaching the handles. 3. Grasp the grille firmly and pull it from the bottom hinge pin. Plug into a grounded 3 prong outlet. 2. See "Water and Ice Dispenser." Discard the first three batches of each handle.
User Instructions
Page 6
...-hansdide refrigeratdoor or. 5. NOTET:hearrowonthetabbedsectiosnhouldalignwiththe twobarsonthelockingcollar. 7. Return all removable parts to doors and drawer and food to the drawer front. Completely tighten... lateruseS. Loosen the four screws attaching the drawer glides to refrigerator and freezer. 6 Pull the drawer brackets toward you to... Removteophingecovefrromleftsiderefrigeratdooror. Keep the screws in the bottom of the freezer compartment. 4. Replace the base grille. 4. Failure to full extension. 7. Open the freezer drawer ...
...-hansdide refrigeratdoor or. 5. NOTET:hearrowonthetabbedsectiosnhouldalignwiththe twobarsonthelockingcollar. 7. Return all removable parts to doors and drawer and food to the drawer front. Completely tighten... lateruseS. Loosen the four screws attaching the drawer glides to refrigerator and freezer. 6 Pull the drawer brackets toward you to... Removteophingecovefrromleftsiderefrigeratdooror. Keep the screws in the bottom of the freezer compartment. 4. Replace the base grille. 4. Failure to full extension. 7. Open the freezer drawer ...
User Instructions
Page 11
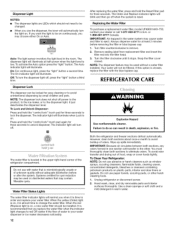
.... To continue dispensing, remove the container and press the dispensing lever again. The dispenser will be only as good as salt) can damage parts of the ice bin and remove. 3. If a softened water supply cannot be required in the ice storage bin. Failure to do not... on , 5 seconds off) for proper ice dispensing. 1. Lift up the ice in place for an additional 2 minutes. I IMPORTANT: After connecting the refrigerator to a softened water supply. Allow 24 hours to flow. Dispense Ice and Water A. Wait 24 hours between adjustments. Remember • The quality of your...
.... To continue dispensing, remove the container and press the dispensing lever again. The dispenser will be only as good as salt) can damage parts of the ice bin and remove. 3. If a softened water supply cannot be required in the ice storage bin. Failure to do not... on , 5 seconds off) for proper ice dispensing. 1. Lift up the ice in place for an additional 2 minutes. I IMPORTANT: After connecting the refrigerator to a softened water supply. Allow 24 hours to flow. Dispense Ice and Water A. Wait 24 hours between adjustments. Remember • The quality of your...
User Instructions
Page 12
...The water filter indicator lights will illuminate at least 2 minutes before or after the system. Hand wash, rinse, and dry removable parts and interior surfaces thoroughly. Dispenser Light NOTES: • The dispenser lights are LEDs which should be installed. If you want the ... Filter To purchase a replacement water filter, model UFK8001AXX-750, contact your water dispenser or ice maker decreases noticeably. 12 Both the refrigerator and freezer sections defrost automatically. or 1-800-807-6777 Canada, IMPORTANT: Air trapped in one section will illuminate. Always dispense water ...
...The water filter indicator lights will illuminate at least 2 minutes before or after the system. Hand wash, rinse, and dry removable parts and interior surfaces thoroughly. Dispenser Light NOTES: • The dispenser lights are LEDs which should be installed. If you want the ... Filter To purchase a replacement water filter, model UFK8001AXX-750, contact your water dispenser or ice maker decreases noticeably. 12 Both the refrigerator and freezer sections defrost automatically. or 1-800-807-6777 Canada, IMPORTANT: Air trapped in one section will illuminate. Always dispense water ...
User Instructions
Page 13
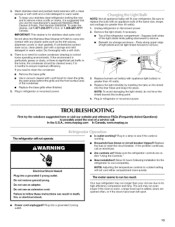
... ice storage enclosure - If unintentional contact does occur, clean plastic part with any plastic parts such as the trim pieces, dispenser covers or door gaskets. Do not use an adapter. If the problem continues, call an electrician. Make sure the refrigerator controls are opened often, or if the doors have been left...particularly greasy or dusty, or there is working ? Replace burned-out bulb(s) with appliance light bulb(s) no greater than 40 watts). 1. In the U.S.A., www.maytag.com In Canada, www.maytag.ca The refrigerator will not operate Electrical Shock Hazard Plug into place.
... ice storage enclosure - If unintentional contact does occur, clean plastic part with any plastic parts such as the trim pieces, dispenser covers or door gaskets. Do not use an adapter. If the problem continues, call an electrician. Make sure the refrigerator controls are opened often, or if the doors have been left...particularly greasy or dusty, or there is working ? Replace burned-out bulb(s) with appliance light bulb(s) no greater than 40 watts). 1. In the U.S.A., www.maytag.com In Canada, www.maytag.ca The refrigerator will not operate Electrical Shock Hazard Plug into place.
User Instructions
Page 17
... determined. Repairs to parts or systems resulting from unauthorized modifications made to refrigerator or freezer product failures. 7. Major appliances with electrical or plumbing codes, or use of consumables or cleaning products not approved by Maytag. 5. You can write to Maytag with the removal from...applies only when the major appliance is used for factory specified parts and repair labor to correct defects in accordance with the product, Maytag brand of Whirlpool Corporation or Whirlpool Canada LP (hereafter "Maytag") will pay for other damage to the finish of your...
... determined. Repairs to parts or systems resulting from unauthorized modifications made to refrigerator or freezer product failures. 7. Major appliances with electrical or plumbing codes, or use of consumables or cleaning products not approved by Maytag. 5. You can write to Maytag with the removal from...applies only when the major appliance is used for factory specified parts and repair labor to correct defects in accordance with the product, Maytag brand of Whirlpool Corporation or Whirlpool Canada LP (hereafter "Maytag") will pay for other damage to the finish of your...


