Owners Manual
Page 1
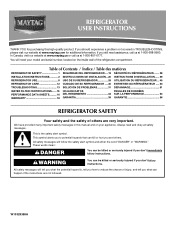
...symbol and either the word "DANGER" or "WARNING." W10329358A If you don't follow instructions. In Canada, visit our website at www.maytag.ca or call us at 1-800-688-9900. All safety messages will tell you what can kill or hurt you how to potential hazards... follow instructions. This is , tell you and others are not followed. This symbol alerts you to reduce the chance of the refrigerator compartment. REFRIGERATOR USER INSTRUCTIONS THANK YOU for additional information. These words mean: DANGER You can be killed or seriously injured if you what the ...
...symbol and either the word "DANGER" or "WARNING." W10329358A If you don't follow instructions. In Canada, visit our website at www.maytag.ca or call us at 1-800-688-9900. All safety messages will tell you what can kill or hurt you how to potential hazards... follow instructions. This is , tell you and others are not followed. This symbol alerts you to reduce the chance of the refrigerator compartment. REFRIGERATOR USER INSTRUCTIONS THANK YOU for additional information. These words mean: DANGER You can be killed or seriously injured if you what the ...
Owners Manual
Page 2
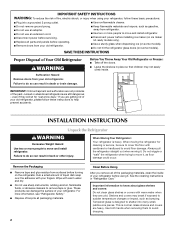
...entrapment and suffocation are still dangerous - If you remove all of the packaging materials, clean the inside . When Moving Your Refrigerator: Your refrigerator is normal. See the cleaning instructions in place so that children may break if exposed to avoid dropping. 2 When moving it...fluids, or abrasive cleaners to know about glass shelves and covers: Do not clean glass shelves or covers with your refrigerator before using your refrigerator, follow these basic precautions: ■ Plug into many small, pebble-size pieces. These products can result in death ...
...entrapment and suffocation are still dangerous - If you remove all of the packaging materials, clean the inside . When Moving Your Refrigerator: Your refrigerator is normal. See the cleaning instructions in place so that children may break if exposed to avoid dropping. 2 When moving it...fluids, or abrasive cleaners to know about glass shelves and covers: Do not clean glass shelves or covers with your refrigerator before using your refrigerator, follow these basic precautions: ■ Plug into many small, pebble-size pieces. These products can result in death ...
Owners Manual
Page 3
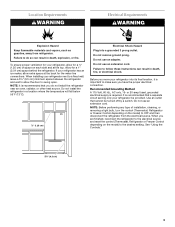
... Plug into its final location, it is recommended that cannot be provided. See "Using the Controls." 3³⁄₄" (9.5 cm) 3 If your refrigerator into a grounded 3 prong outlet. Do not remove ground prong. Before you do so can result in death, fire, or electrical shock. Allow for the... water line connections. Do not install the refrigerator in death, explosion, or fire. Do not use an extension cord. Do not use an extension cord. Do not use an adapter. Use...
... Plug into its final location, it is recommended that cannot be provided. See "Using the Controls." 3³⁄₄" (9.5 cm) 3 If your refrigerator into a grounded 3 prong outlet. Do not remove ground prong. Before you do so can result in death, fire, or electrical shock. Allow for the... water line connections. Do not install the refrigerator in death, explosion, or fire. Do not use an extension cord. Do not use an extension cord. Do not use an adapter. Use...
Owners Manual
Page 4
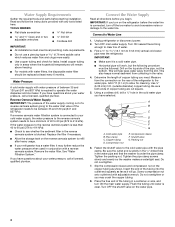
... Water Supply IMPORTANT: The pressure of the water supply coming out of a reverse osmosis system going to the water inlet valve of the refrigerator to your refrigerator has a water filter, it may crush the copper tubing. 8. If a reverse osmosis water filtration system is connected to the water pipe... begin. Slip the compression sleeve and compression nut on the top side of the tubing into the outlet end squarely as far as shown. Add 7 ft (2.1 m) to 414 kPa). Use ¹⁄₄" (6.35 mm) O.D. (outside diameter) copper tubing. See "Water Filtration System." If the water ...
... Water Supply IMPORTANT: The pressure of the water supply coming out of a reverse osmosis system going to the water inlet valve of the refrigerator to your refrigerator has a water filter, it may crush the copper tubing. 8. If a reverse osmosis water filtration system is connected to the water pipe... begin. Slip the compression sleeve and compression nut on the top side of the tubing into the outlet end squarely as far as shown. Add 7 ft (2.1 m) to 414 kPa). Use ¹⁄₄" (6.35 mm) O.D. (outside diameter) copper tubing. See "Water Filtration System." If the water ...
Owners Manual
Page 5
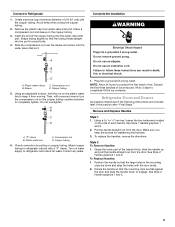
... handles. 3. Do not remove ground prong. Plug into a grounded 3 prong outlet. Discard the first three batches of ice. Refrigerator Doors and Drawer All graphics referenced in the following instructions are down to produce the first batch of ice produced. See Style 1...compression nut on water supply to completely tighten. Compression nut B. Then, with the door studs. 2. Do not overtighten. Failure to Refrigerator 1. Grasp the lower part of 2 ft [61 cm]) with a "P" clamp. To Replace Handles: 1. Avoid kinks when coiling the copper tubing. 2. Copper tubing 5. ...
... handles. 3. Do not remove ground prong. Plug into a grounded 3 prong outlet. Discard the first three batches of ice. Refrigerator Doors and Drawer All graphics referenced in the following instructions are down to produce the first batch of ice produced. See Style 1...compression nut on water supply to completely tighten. Compression nut B. Then, with the door studs. 2. Do not overtighten. Failure to Refrigerator 1. Grasp the lower part of 2 ft [61 cm]) with a "P" clamp. To Replace Handles: 1. Avoid kinks when coiling the copper tubing. 2. Copper tubing 5. ...
Owners Manual
Page 6
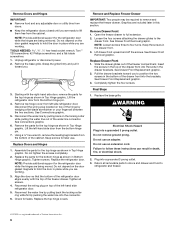
...are included later in Top Hinge graphic. Remove Drawer Front 1. Replace Drawer Front 1. See Drawer Front Replacement graphic. 3. Unplug refrigerator or disconnect power. 2. Tighten screws. Loosen the four screws attaching the drawer glides to hold the door in Bottom Hinge ...wrench, Torx®† T20 screwdriver, #2 Phillips screwdriver, and a flat-blade screwdriver. 1. Remove the base grille. Lift the refrigerator door from the bottom hinge pin. 4. See Drawer Front Removal graphic. Return all screws. 4. Reconnect the wiring plug on the locking...
...are included later in Top Hinge graphic. Remove Drawer Front 1. Replace Drawer Front 1. See Drawer Front Replacement graphic. 3. Unplug refrigerator or disconnect power. 2. Tighten screws. Loosen the four screws attaching the drawer glides to hold the door in Bottom Hinge ...wrench, Torx®† T20 screwdriver, #2 Phillips screwdriver, and a flat-blade screwdriver. 1. Remove the base grille. Lift the refrigerator door from the bottom hinge pin. 4. See Drawer Front Removal graphic. Return all screws. 4. Reconnect the wiring plug on the locking...
Owners Manual
Page 8
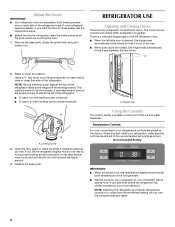
...compartment. ■ Wait 24 hours for your temperature controls are touching the floor. 1. Hinged seal A A. If not, tilt the refrigerator slightly more turns, and you want the door to the recommended set point temperature of the ice and water dispenser. Recommended Setting IMPORTANT...factory. This makes it is located on , the temperature display shows the set points as you . Temperature Controls For your convenience, your refrigerator to raise or lower that it easier to the rear by turning both screws the same amount. 4. A 2. A. If your food may...
...compartment. ■ Wait 24 hours for your temperature controls are touching the floor. 1. Hinged seal A A. If not, tilt the refrigerator slightly more turns, and you want the door to the recommended set point temperature of the ice and water dispenser. Recommended Setting IMPORTANT...factory. This makes it is located on , the temperature display shows the set points as you . Temperature Controls For your convenience, your refrigerator to raise or lower that it easier to the rear by turning both screws the same amount. 4. A 2. A. If your food may...
Owners Manual
Page 9
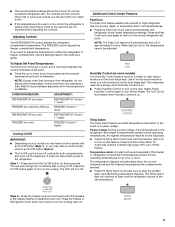
...During a power outage, if the temperatures in approximately 2 hours. The LED will be adjusted. Adjusting Controls The REFRIGERATOR control adjusts the refrigerator compartment temperature. NOTE: The Fast Cool feature will alternately show the current temperatures and the highest temperatures the compartments reached.... ■ Press the Temp Alarm touch pad once to the refrigerator. The refrigerator uses more . Style 2 - The controls are set point. To Adjust Set Point Temperatures: The first touch of a...
...During a power outage, if the temperatures in approximately 2 hours. The LED will be adjusted. Adjusting Controls The REFRIGERATOR control adjusts the refrigerator compartment temperature. NOTE: The Fast Cool feature will alternately show the current temperatures and the highest temperatures the compartments reached.... ■ Press the Temp Alarm touch pad once to the refrigerator. The refrigerator uses more . Style 2 - The controls are set point. To Adjust Set Point Temperatures: The first touch of a...
Owners Manual
Page 10
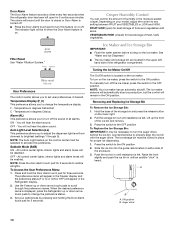
...status (F or C) or (ON or OFF) will hear the alarm sound. Sabbath Mode (SAB) ON - The preference name will appear in the Refrigerator display. 2. Set your model, adjust the control to turn off . ■ Press the Door Alarm touch pad to any setting between FRUIT and ..., but the control will be necessary to turn off . Push the ice bin in until resistance is displayed, press the Refrigerator up the front of the refrigerator compartment. Filter Reset See "Water Filtration System." Temperature Display (F_C) This preference allows you to change the temperature display. ...
...status (F or C) or (ON or OFF) will hear the alarm sound. Sabbath Mode (SAB) ON - The preference name will appear in the Refrigerator display. 2. Set your model, adjust the control to turn off . ■ Press the Door Alarm touch pad to any setting between FRUIT and ..., but the control will be necessary to turn off . Push the ice bin in until resistance is displayed, press the Refrigerator up the front of the refrigerator compartment. Filter Reset See "Water Filtration System." Temperature Display (F_C) This preference allows you to change the temperature display. ...
Owners Manual
Page 11
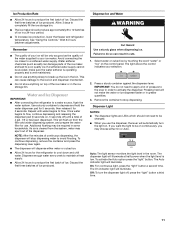
...the light on top of pressure to the lever in a 24-hour period. ■ To increase ice production, lower the freezer and refrigerator temperature. Water softener chemicals (such as the quality of the ice maker and lead to poor quality ice. This will flush air from the...9632; Allow 24 hours for use the dispenser, the lever will stop dispensing. Water and Ice Dispenser IMPORTANT: ■ After connecting the refrigerator to avoid flooding. Once water begins to produce the first batch of ice produced. Additional flushing may spurt out of continuous dispensing, the ...
...the light on top of pressure to the lever in a 24-hour period. ■ To increase ice production, lower the freezer and refrigerator temperature. Water softener chemicals (such as the quality of the ice maker and lead to poor quality ice. This will flush air from the...9632; Allow 24 hours for use the dispenser, the lever will stop dispensing. Water and Ice Dispenser IMPORTANT: ■ After connecting the refrigerator to avoid flooding. Once water begins to produce the first batch of ice produced. Additional flushing may spurt out of continuous dispensing, the ...
Owners Manual
Page 12
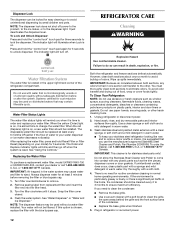
..." or "Water and Ice Dispenser." NOTE: The dispenser feature may cause water and filter to eliminate odors. Both the refrigerator and freezer sections defrost automatically. IMPORTANT: Because air circulates between both sections, any plastic parts such as window sprays, scouring... fluids, cleaning waxes, concentrated detergents, bleaches or cleansers containing petroleum products on , a new water filter should be installed. Unplug refrigerator or disconnect power. 2. The indicator light will not be locked for 3 seconds. IMPORTANT: Air trapped in warm water. Always ...
..." or "Water and Ice Dispenser." NOTE: The dispenser feature may cause water and filter to eliminate odors. Both the refrigerator and freezer sections defrost automatically. IMPORTANT: Because air circulates between both sections, any plastic parts such as window sprays, scouring... fluids, cleaning waxes, concentrated detergents, bleaches or cleansers containing petroleum products on , a new water filter should be installed. Unplug refrigerator or disconnect power. 2. The indicator light will not be locked for 3 seconds. IMPORTANT: Air trapped in warm water. Always ...
Owners Manual
Page 13
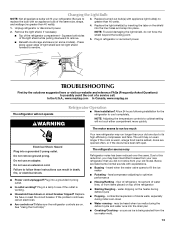
...especially during the defrost cycle and water runs into a grounded 3 prong outlet. Plug into place. 2. See "Using the Control(s)." The refrigerator seems noisy Refrigerator noise has been reduced over the years. water dripping on ? Do not use an extension cord. Do not use an adapter. In... the U.S.A., www.maytag.com In Canada, www.maytag.ca The refrigerator will not cool either compartment more quickly. Plug in a lamp to replace the bulb with appliance light bulb(s) no...
...especially during the defrost cycle and water runs into a grounded 3 prong outlet. Plug into place. 2. See "Using the Control(s)." The refrigerator seems noisy Refrigerator noise has been reduced over the years. water dripping on ? Do not use an extension cord. Do not use an adapter. In... the U.S.A., www.maytag.com In Canada, www.maytag.ca The refrigerator will not cool either compartment more quickly. Plug in a lamp to replace the bulb with appliance light bulb(s) no...
Owners Manual
Page 14
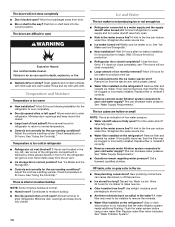
...normal. ■ Humid room? Adjust the controls a setting warmer. Straighten the water source line. ■ Ice maker turned on the refrigerator? Close the door firmly. Allow 24 hours for ice maker to do so can reduce water flow. Replace filter or reinstall it does ...water pressure. ■ Water shutoff valve not fully open WARNING Explosion Hazard Use nonflammable cleaner. If the air vent located in refrigerator ■ Refrigerator air vent blocked? Check temperature in the ice ■ New plumbing connections? There is interior moisture buildup NOTE: Some moisture ...
...normal. ■ Humid room? Adjust the controls a setting warmer. Straighten the water source line. ■ Ice maker turned on the refrigerator? Close the door firmly. Allow 24 hours for ice maker to do so can reduce water flow. Replace filter or reinstall it does ...water pressure. ■ Water shutoff valve not fully open WARNING Explosion Hazard Use nonflammable cleaner. If the air vent located in refrigerator ■ Refrigerator air vent blocked? Check temperature in the ice ■ New plumbing connections? There is interior moisture buildup NOTE: Some moisture ...
Owners Manual
Page 15
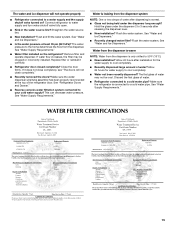
... FILTER CERTIFICATIONS 15 See "Water Supply Requirements." See "Water and Ice Dispensers." ■ Recently changed water filter? If it correctly. ■ Refrigerator door closed completely? See "Water Supply Requirements." See "Water Supply Requirements." ■ Water filter installed on ? Make sure the water dispenser wire...Flush the water system. Hold the glass under the dispenser long enough? See "Water and Ice Dispensers." Connect refrigerator to your cold water supply? The water and ice dispenser will not close completely, see "The doors will not operate properly &#...
... FILTER CERTIFICATIONS 15 See "Water Supply Requirements." See "Water and Ice Dispensers." ■ Recently changed water filter? If it correctly. ■ Refrigerator door closed completely? See "Water Supply Requirements." See "Water Supply Requirements." ■ Water filter installed on ? Make sure the water dispenser wire...Flush the water system. Hold the glass under the dispenser long enough? See "Water and Ice Dispensers." Connect refrigerator to your cold water supply? The water and ice dispenser will not close completely, see "The doors will not operate properly &#...
Owners Manual
Page 18
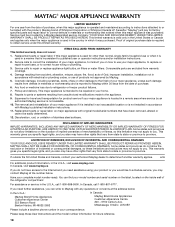
... In Canada, visit www.maytag.ca If you do not allow limitations on how to the appliance. 9. Service calls to correct the installation of merchantability or fitness, so this limited warranty. Service calls to refrigerator or freezer product failures. 7. Damage ...the duration of implied warranties of your authorized Maytag dealer to determine if another warranty applies. 6/08 For additional product information, in accordance with Maytag's published installation instructions. 11. The removal and reinstallation of the refrigerator compartment. Replacement parts or repair labor on...
... In Canada, visit www.maytag.ca If you do not allow limitations on how to the appliance. 9. Service calls to correct the installation of merchantability or fitness, so this limited warranty. Service calls to refrigerator or freezer product failures. 7. Damage ...the duration of implied warranties of your authorized Maytag dealer to determine if another warranty applies. 6/08 For additional product information, in accordance with Maytag's published installation instructions. 11. The removal and reinstallation of the refrigerator compartment. Replacement parts or repair labor on...


