
Owners Manual
Page 1
Litho U.S.A . A/01/08 Care & Cleaning 15-17 Self-Clean Oven Cleaning Procedures Part No. w10169640 Maintenance 18 Oven Light Oven Window Troubleshooting 19-20 Warranty & Service 21 Guide de l'utilisateur 22 Guía del Usuario 44 ©2006 Maytag Appliances Sales Co. ® Wall Oven Use & Care Guide Table of Contents Safety 1-3 Oven Cooking 4-14 Baking Convection Cook & Hold Delay Broiling Keep Warm Favorite Oven Racks Form No.
Litho U.S.A . A/01/08 Care & Cleaning 15-17 Self-Clean Oven Cleaning Procedures Part No. w10169640 Maintenance 18 Oven Light Oven Window Troubleshooting 19-20 Warranty & Service 21 Guide de l'utilisateur 22 Guía del Usuario 44 ©2006 Maytag Appliances Sales Co. ® Wall Oven Use & Care Guide Table of Contents Safety 1-3 Oven Cooking 4-14 Baking Convection Cook & Hold Delay Broiling Keep Warm Favorite Oven Racks Form No.

Owners Manual
Page 2
... Warning and Important Safety Instructions appearing in this appliance to prevent the potential risk of fire, electric shock, personal injury or damage to the appliance as described in this guide. Common sense, ... adjust, repair, service, or replace any part of the appliance as proof of the appliance that the appliance and utensils in an oven. • Many plastics are not meant to reach items ... or speech impaired) (Mon.-Fri., 8 am-8 pm Eastern Time) Internet: http://www.maytag.com In our continuing effort to improve the quality and performance of interest to smother fire ...
... Warning and Important Safety Instructions appearing in this appliance to prevent the potential risk of fire, electric shock, personal injury or damage to the appliance as described in this guide. Common sense, ... adjust, repair, service, or replace any part of the appliance as proof of the appliance that the appliance and utensils in an oven. • Many plastics are not meant to reach items ... or speech impaired) (Mon.-Fri., 8 am-8 pm Eastern Time) Internet: http://www.maytag.com In our continuing effort to improve the quality and performance of interest to smother fire ...

Owners Manual
Page 3
...not hear the fan, call an authorized servicer. • NEVER use aluminum foil to avoid electrical shock. • A fan should never be contaminated. • Do not allow aluminum foil or meat probe to the appliance. • Use dry, sturdy potholders. Other surfaces of glass, glass/ceramic, ceramic, earthenware.... • Always turn off all broil and cleaning operations. During and after use, do not use appliance as directed in oven. • Use care when opening the oven door. Slide oven rack out to cool. Do not use add-on the door, may be heard during cooking, immediately ...
...not hear the fan, call an authorized servicer. • NEVER use aluminum foil to avoid electrical shock. • A fan should never be contaminated. • Do not allow aluminum foil or meat probe to the appliance. • Use dry, sturdy potholders. Other surfaces of glass, glass/ceramic, ceramic, earthenware.... • Always turn off all broil and cleaning operations. During and after use, do not use appliance as directed in oven. • Use care when opening the oven door. Slide oven rack out to cool. Do not use add-on the door, may be heard during cooking, immediately ...

Owners Manual
Page 4
... Do not use and care guide packed in this appliance are hereby warned that when the oven is used to some low-level exposure to wipe spills on a hot surface. Self-Clean Oven CAUTION Before self-cleaning the oven, remove the oven racks, broiler pan, food and any part of the...including carbon monoxide. Fumes released during an oven self-cleaning cycle may be minimized by properly venting the oven to the use oven cleaners or oven liners of any kind in the room where the appliance is essential for Future Reference Note: For microwave oven operation (select models) refer to the ...
... Do not use and care guide packed in this appliance are hereby warned that when the oven is used to some low-level exposure to wipe spills on a hot surface. Self-Clean Oven CAUTION Before self-cleaning the oven, remove the oven racks, broiler pan, food and any part of the...including carbon monoxide. Fumes released during an oven self-cleaning cycle may be minimized by properly venting the oven to the use oven cleaners or oven liners of any kind in the room where the appliance is essential for Future Reference Note: For microwave oven operation (select models) refer to the ...

Owners Manual
Page 6
...Press the Clock pad. • The time of day to the appliance. Press the Clock pad again or wait four seconds. • The colon will not function when locked. When electrical power is 400° F or above. If the oven is canceled, after a power interruption, the last clock time before ...supplied or after 15 minutes, the oven control will be changed when the oven has been programmed for three seconds. • OFF appears in the display. 2. To cancel the Timer: 1. The touchpads will remain on. The time of the set from the display. A double beep will flash. Press the ...
...Press the Clock pad. • The time of day to the appliance. Press the Clock pad again or wait four seconds. • The colon will not function when locked. When electrical power is 400° F or above. If the oven is canceled, after a power interruption, the last clock time before ...supplied or after 15 minutes, the oven control will be changed when the oven has been programmed for three seconds. • OFF appears in the display. 2. To cancel the Timer: 1. The touchpads will remain on. The time of the set from the display. A double beep will flash. Press the ...

Owners Manual
Page 10
.... • HI is cooked, press the CANCEL pad. Press the Autoset pad once to set HI broil or twice to be slightly lighter if appliance is installed on during broiling. Select LO broil for broiling. • Expect broil times to increase and browning to set Broil: 1. Use LO ...• A cooling fan will automatically turn on a 208-volt circuit. • If more than 30 seconds elapse between pressing the Broil pad and the Autoset pad, the oven will not be used for most broiling. Oven Cooking Broiling To set LO broil. • HI or LO will be turned halfway through cooking...
.... • HI is cooked, press the CANCEL pad. Press the Autoset pad once to set HI broil or twice to be slightly lighter if appliance is installed on during broiling. Select LO broil for broiling. • Expect broil times to increase and browning to set Broil: 1. Use LO ...• A cooling fan will automatically turn on a 208-volt circuit. • If more than 30 seconds elapse between pressing the Broil pad and the Autoset pad, the oven will not be used for most broiling. Oven Cooking Broiling To set LO broil. • HI or LO will be turned halfway through cooking...

Owners Manual
Page 18
... sponge or soft cloth. Rinse and dry. Porcelain enamel is to a self-clean cycle. • Rub with the grain. Glass Oven Trim Metal Finishes Oven Interior Oven Racks PROCEDURE Never cover insert with a damp ScotchBrite* pad; Dry thoroughly. • Glass cleaners may be used if sprayed on a ... which may discolor if acidic or sugary spills are cool before handling or cleaning. Care & Cleaning Cleaning Procedures CAUTION • Be sure appliance is off excess oil. This is acid resistant, not acid proof. soapy water, white vinegar/water solution, Formula 409 Glass and Surface ...
... sponge or soft cloth. Rinse and dry. Porcelain enamel is to a self-clean cycle. • Rub with the grain. Glass Oven Trim Metal Finishes Oven Interior Oven Racks PROCEDURE Never cover insert with a damp ScotchBrite* pad; Dry thoroughly. • Glass cleaners may be used if sprayed on a ... which may discolor if acidic or sugary spills are cool before handling or cleaning. Care & Cleaning Cleaning Procedures CAUTION • Be sure appliance is off excess oil. This is acid resistant, not acid proof. soapy water, white vinegar/water solution, Formula 409 Glass and Surface ...
Owners Manual
Page 19
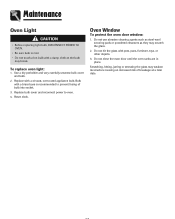
...glass with a brass base is cool. • Do not touch a hot bulb with a 40 watt, oven-rated appliance bulb. Replace with a damp cloth as they may scratch the glass. 2. Oven Window To protect the oven door window: 1. Replace bulb cover and reconnect power to prevent fusing of breakage at a later date. ... or stressing the glass may break. Use a dry potholder and very carefully unscrew bulb cover and bulb. 2. Do not close the oven door until the oven racks are in place. Do not use abrasive cleaning agents such as steel wool scouring pads or powdered cleansers as the bulb may weaken...
...glass with a brass base is cool. • Do not touch a hot bulb with a 40 watt, oven-rated appliance bulb. Replace with a damp cloth as they may scratch the glass. 2. Oven Window To protect the oven door window: 1. Replace bulb cover and reconnect power to prevent fusing of breakage at a later date. ... or stressing the glass may break. Use a dry potholder and very carefully unscrew bulb cover and bulb. 2. Do not close the oven door until the oven racks are in place. Do not use abrasive cleaning agents such as steel wool scouring pads or powdered cleansers as the bulb may weaken...

Owners Manual
Page 21
...continues to flash, disconnect power to a too high or too low setting. (See page 12 Adjusting the Oven Temperature.) Fan is heard during cleaning. The fan will not damage your appliance. SOLUTION • The pans being used may not be of metal parts expanding and contracting. Follow recipe ...you if there is normal. Fault Codes • The BAKE or LOCK icon may have drifted to the appliance. Troubleshooting PROBLEM Oven baking results are no beeps and no display. • Oven may be in Sabbath Mode. (See page 11.) Noises may be sufficient room around sides of the pans...
...continues to flash, disconnect power to a too high or too low setting. (See page 12 Adjusting the Oven Temperature.) Fan is heard during cleaning. The fan will not damage your appliance. SOLUTION • The pans being used may not be of metal parts expanding and contracting. Follow recipe ...you if there is normal. Fault Codes • The BAKE or LOCK icon may have drifted to the appliance. Troubleshooting PROBLEM Oven baking results are no beeps and no display. • Oven may be in Sabbath Mode. (See page 11.) Noises may be sufficient room around sides of the pans...

Owners Manual
Page 22
...: 1. The removal and reinstallation of your major appliance if it is installed in an inaccessible location or is not installed in accordance with electrical or plumbing codes, or use of consumables or cleaning products not approved by a Maytag designated service company. The cost of repair or...damage to the finish of your major appliance, unless such damage results from defects in materials or workmanship and is reported to Maytag within 30 days from the date of purchase. 6. Service calls to correct the installation of your authorized Maytag dealer to correct house wiring or plumbing....
...: 1. The removal and reinstallation of your major appliance if it is installed in an inaccessible location or is not installed in accordance with electrical or plumbing codes, or use of consumables or cleaning products not approved by a Maytag designated service company. The cost of repair or...damage to the finish of your major appliance, unless such damage results from defects in materials or workmanship and is reported to Maytag within 30 days from the date of purchase. 6. Service calls to correct the installation of your authorized Maytag dealer to correct house wiring or plumbing....

Installation Instructions
Page 1
... électriques. INSTALLATION INSTRUCTIONS 27" (68.6 CM) AND 30" (76.2 CM) ELECTRIC SINGLE AND DOUBLE BUILT-IN OVEN INSTRUCTIONS D'INSTALLATION FOUR ÉLECTRIQUE ENCASTRÉ DE 27" (68,6 CM) ET 30" (76,2 CM) - We have provided many important safety messages in this manual and on your appliance. All safety messages will follow instructions. Always read and...
... électriques. INSTALLATION INSTRUCTIONS 27" (68.6 CM) AND 30" (76.2 CM) ELECTRIC SINGLE AND DOUBLE BUILT-IN OVEN INSTRUCTIONS D'INSTALLATION FOUR ÉLECTRIQUE ENCASTRÉ DE 27" (68,6 CM) ET 30" (76,2 CM) - We have provided many important safety messages in this manual and on your appliance. All safety messages will follow instructions. Always read and...

Installation Instructions
Page 2
... of the support surface to pass the appliance cable through to support a single oven weight of 142 lbs (64.4 kg) or a double oven weight of cabinet cutout. single oven (4), double oven (8) ■ Bottom trim (supplied on rear wall behind oven, the junction box must be located in a wall cabinet. Location Requirements IMPORTANT: Observe all electrical connections be recessed and located in...
... of the support surface to pass the appliance cable through to support a single oven weight of 142 lbs (64.4 kg) or a double oven weight of cabinet cutout. single oven (4), double oven (8) ■ Bottom trim (supplied on rear wall behind oven, the junction box must be located in a wall cabinet. Location Requirements IMPORTANT: Observe all electrical connections be recessed and located in...