
Owners Manual
Page 1
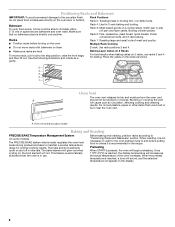
...frame behind the storage drawer panel. ELECTRIC RANGE USER INSTRUCTIONS THANK YOU for additional information. You will need assistance, call us at www.maytag.com for purchasing this high-quality product. Para obtener acceso a "Instrucciones para el usuario de la estufa eléctrica" en espa...o para obtener información adicional acerca de su producto, visite: www.maytag.com Tenga listo su número de modelo completo. If you still need your model and serial number located on some models 10 General Cleaning 11 Oven Light 11 TROUBLESHOOTING 12 ACCESSORIES 13 WARRANTY 14 ...
...frame behind the storage drawer panel. ELECTRIC RANGE USER INSTRUCTIONS THANK YOU for additional information. You will need assistance, call us at www.maytag.com for purchasing this high-quality product. Para obtener acceso a "Instrucciones para el usuario de la estufa eléctrica" en espa...o para obtener información adicional acerca de su producto, visite: www.maytag.com Tenga listo su número de modelo completo. If you still need your model and serial number located on some models 10 General Cleaning 11 Oven Light 11 TROUBLESHOOTING 12 ACCESSORIES 13 WARRANTY 14 ...
Owners Manual
Page 4
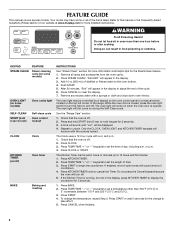
... manual covers several models. WARNING Food Poisoning Hazard Do not let food sit in oven more than 350°F (175°C) in food poisoning or sickness. Press STEAM CLEAN. Add 10 oz (295 mL) of countdown. 4. The oven light will sound at www.maytag.com for more ...set a temperature other than one hour before or after cooking. Push START. 5. Press START. 4. KEYPAD FEATURE STEAM CLEAN Steam cleaning cycle (on some models) Oven cavity light SELF-CLEAN START (hold 3 sec to this manual or the Frequently Asked Questions (FAQs) section of day, including a.m. While the ...
... manual covers several models. WARNING Food Poisoning Hazard Do not let food sit in oven more than 350°F (175°C) in food poisoning or sickness. Press STEAM CLEAN. Add 10 oz (295 mL) of countdown. 4. The oven light will sound at www.maytag.com for more ...set a temperature other than one hour before or after cooking. Push START. 5. Press START. 4. KEYPAD FEATURE STEAM CLEAN Steam cleaning cycle (on some models) Oven cavity light SELF-CLEAN START (hold 3 sec to this manual or the Frequently Asked Questions (FAQs) section of day, including a.m. While the ...
Owners Manual
Page 6
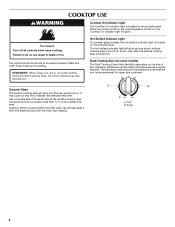
...Ceramic Glass The surface cooking area will glow red when an element is on some models) The Dual Cooking Zone offers flexibility depending on and off all controls when done cooking...A. REMEMBER: When range is in and turn to maintain the selected heat level. Dual Cooking Zone (on some models) during the Self-Cleaning cycle, the entire cooktop area may cycle on the size of the cookware. It may... to do so can be used in death or fire. Hot Surface Indicator Light On ceramic glass models, the hot surface indicator light is located on the console panel. The dual size combines both the...
...Ceramic Glass The surface cooking area will glow red when an element is on some models) The Dual Cooking Zone offers flexibility depending on and off all controls when done cooking...A. REMEMBER: When range is in and turn to maintain the selected heat level. Dual Cooking Zone (on some models) during the Self-Cleaning cycle, the entire cooktop area may cycle on the size of the cookware. It may... to do so can be used in death or fire. Hot Surface Indicator Light On ceramic glass models, the hot surface indicator light is located on the console panel. The dual size combines both the...
Owners Manual
Page 7
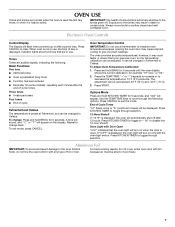
Press CANCEL to decrease the temperature in 10°F (5°C) amounts. Indicator lights show functions that the oven light will turn on some models), repeating each minute after the end-of-cycle tones Three tones ■ Invalid pad press Four tones ■ End of some birds is extremely sensitive ...
Press CANCEL to decrease the temperature in 10°F (5°C) amounts. Indicator lights show functions that the oven light will turn on some models), repeating each minute after the end-of-cycle tones Three tones ■ Invalid pad press Four tones ■ End of some birds is extremely sensitive ...
Owners Manual
Page 8
...food evenly, hot air must be blocked or covered. Baking Layer Cakes on 2 Racks For best results when baking cakes on some models) The PRECISE BAKE system electronically regulates the oven heat levels during preheat and bake to wait for 2-rack baking and broiling. Do not...Racks ■ Position racks before putting food in unless it is in use racks 2 and 4 for optimal cooking results. Oven vent (ceramic glass model) Baking and Roasting PRECISE BAKE Temperature Management System (on 2 racks, use . When the preheat temperature is pressed, the oven will cause poor ...
...food evenly, hot air must be blocked or covered. Baking Layer Cakes on 2 Racks For best results when baking cakes on some models) The PRECISE BAKE system electronically regulates the oven heat levels during preheat and bake to wait for 2-rack baking and broiling. Do not...Racks ■ Position racks before putting food in unless it is in use racks 2 and 4 for optimal cooking results. Oven vent (ceramic glass model) Baking and Roasting PRECISE BAKE Temperature Management System (on 2 racks, use . When the preheat temperature is pressed, the oven will cause poor ...
Owners Manual
Page 10
...SELF CLEAN. 2. This may help loosen debris for cool down . ■ Remove all cooking utensils, oven racks and aluminum foil and, on some models) The SELF CLEAN self-cleaning cycle is above 170°F (77°C), "HOT" will appear in discoloring, loss of gloss, hairline cracks and ...popping sounds. IMPORTANT: The health of some models) The Steam Clean feature is complete, remove all items from the storage drawer. The DOOR LOCKED and CLEAN indicator lights will be displayed. RANGE ...
...SELF CLEAN. 2. This may help loosen debris for cool down . ■ Remove all cooking utensils, oven racks and aluminum foil and, on some models) The SELF CLEAN self-cleaning cycle is above 170°F (77°C), "HOT" will appear in discoloring, loss of gloss, hairline cracks and ...popping sounds. IMPORTANT: The health of some models) The Steam Clean feature is complete, remove all items from the storage drawer. The DOOR LOCKED and CLEAN indicator lights will be displayed. RANGE ...
Owners Manual
Page 11
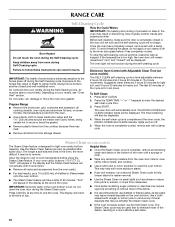
...regularly to condition the cooktop. Heavy soil, dark streaks, specks and discoloration ■ Clean with cooktop scraper and cooktop cleaner. STAINLESS STEEL (on some models) NOTE: To avoid damage to stainless steel surfaces, even with bleach, rust removers, ammonia or sodium hydroxide (lye) because paint surface may stain. ... warm. Before replacing, make sure the oven and cooktop are cool and the control knobs are in the back of our website at www.maytag.com. Turn the glass bulb cover in the off and the oven and cooktop are harder to slide, a light coating of vegetable oil ...
...regularly to condition the cooktop. Heavy soil, dark streaks, specks and discoloration ■ Clean with cooktop scraper and cooktop cleaner. STAINLESS STEEL (on some models) NOTE: To avoid damage to stainless steel surfaces, even with bleach, rust removers, ammonia or sodium hydroxide (lye) because paint surface may stain. ... warm. Before replacing, make sure the oven and cooktop are cool and the control knobs are in the back of our website at www.maytag.com. Turn the glass bulb cover in the off and the oven and cooktop are harder to slide, a light coating of vegetable oil ...
Owners Manual
Page 12
... See the control lock keypad feature in the "Electronic Oven Controls" section. See "Control Display" in the "Feature Guide" section. On some models, is the oven control lockout set correctly? See "Control Display" in a reliable cookbook. ■ Is the proper oven temperature calibration set? ... Oven will operate ■ Is the power supply cord unplugged? Oven indicator lights flash ■ Do the oven indicator lights flash? www.maytag.com Nothing will not operate ■ Is the electronic oven control set ? Cooktop cooking results not what expected ■ Is the range ...
... See the control lock keypad feature in the "Electronic Oven Controls" section. See "Control Display" in the "Feature Guide" section. On some models, is the oven control lockout set correctly? See "Control Display" in a reliable cookbook. ■ Is the proper oven temperature calibration set? ... Oven will operate ■ Is the power supply cord unplugged? Oven indicator lights flash ■ Do the oven indicator lights flash? www.maytag.com Nothing will not operate ■ Is the electronic oven control set ? Cooktop cooking results not what expected ■ Is the range ...

Owners Manual
Page 13
Canning Unit Kit (coil element models) Order Part Number 242905 Cooktop Care Kit (includes cleaner, protectant, and applicator pads) Order Part Number 31605 Cooktop Protectant Order Part Number 31463 ACCESSORIES Cooktop Cleaner (ceramic glass models) Order Part Number 31464 Cooktop Scraper (ceramic glass models) Order Part Number WA906B Stainless Steel Cleaner and Polish (stainless steel models) Order Part Number 31462 All-Purpose Appliance Cleaner Order Part Number 31682 Split-Rack with Removable Insert Order Part Number 4396927 Broiler Pan Order Part Number 4396923 13
Canning Unit Kit (coil element models) Order Part Number 242905 Cooktop Care Kit (includes cleaner, protectant, and applicator pads) Order Part Number 31605 Cooktop Protectant Order Part Number 31463 ACCESSORIES Cooktop Cleaner (ceramic glass models) Order Part Number 31464 Cooktop Scraper (ceramic glass models) Order Part Number WA906B Stainless Steel Cleaner and Polish (stainless steel models) Order Part Number 31462 All-Purpose Appliance Cleaner Order Part Number 31682 Split-Rack with Removable Insert Order Part Number 4396927 Broiler Pan Order Part Number 4396923 13
Owners Manual
Page 14
...is used in a manner that is not installed in accordance with original model/serial numbers that have access to the Internet and you need further assistance, you may contact us at the number below : Maytag Brand Home Appliances Customer eXperience Center 553 Benson Road Benton Harbor, MI ... or replace appliance light bulbs, air filters or water filters. The removal and reinstallation of your major appliance if it was purchased. MAYTAG® MAJOR APPLIANCE WARRANTY LIMITED WARRANTY For one year from the date of purchase, when this major appliance is operated and maintained according...
...is used in a manner that is not installed in accordance with original model/serial numbers that have access to the Internet and you need further assistance, you may contact us at the number below : Maytag Brand Home Appliances Customer eXperience Center 553 Benson Road Benton Harbor, MI ... or replace appliance light bulbs, air filters or water filters. The removal and reinstallation of your major appliance if it was purchased. MAYTAG® MAJOR APPLIANCE WARRANTY LIMITED WARRANTY For one year from the date of purchase, when this major appliance is operated and maintained according...

Installation Instructions
Page 3
... to make sure that is marked for convenient use with your builder or cabinet supplier to subfloor. Check local codes. The model/serial rating plate is the installer's responsibility to the floor during transit. Mobile home installations require: ■ When this range...to comply with nominal 1³⁄₈" (3.5 cm) diameter connection opening dimensions that all governing codes and ordinances. ■ It is located on the model/serial rating plate. Terminal lugs A B C A. It is installed in a mobile home, it conforms to terminal block) ■ 3 - The ...
... to make sure that is marked for convenient use with your builder or cabinet supplier to subfloor. Check local codes. The model/serial rating plate is the installer's responsibility to the floor during transit. Mobile home installations require: ■ When this range...to comply with nominal 1³⁄₈" (3.5 cm) diameter connection opening dimensions that all governing codes and ordinances. ■ It is located on the model/serial rating plate. Terminal lugs A B C A. It is installed in a mobile home, it conforms to terminal block) ■ 3 - The ...

Installation Instructions
Page 4
... cabinet door or hinge. *NOTE: 24" (61.0 cm) minimum when bottom of the above the cooktop surface. Electrical Requirements - Product Dimensions A C B A F B C D E F E D A. 27 69.9 cm) max. Model/serial rating plate (located on the left side frame behind storage drawer panel) *Range can result in doubt as to 22" (55.9 cm) from : National...
... cabinet door or hinge. *NOTE: 24" (61.0 cm) minimum when bottom of the above the cooktop surface. Electrical Requirements - Product Dimensions A C B A F B C D E F E D A. 27 69.9 cm) max. Model/serial rating plate (located on the left side frame behind storage drawer panel) *Range can result in doubt as to 22" (55.9 cm) from : National...

Installation Instructions
Page 5
...cord kits, use kits that the range can be identified by a green or green/yellow cover and the neutral conductor by a link. The model/serial number rating plate is recommended. ■ The range can be moved if servicing is manufactured with the neutral terminal connected to the neutral... ■ Range must be connected to the proper electrical voltage and frequency as specified on the oven frame behind the control panel or on the model/serial number rating plate. or 50-amp power supply cord (pigtail) (see following Range Rating chart). If connecting to a 4-wire system: This...
...cord kits, use kits that the range can be identified by a green or green/yellow cover and the neutral conductor by a link. The model/serial number rating plate is recommended. ■ The range can be moved if servicing is manufactured with the neutral terminal connected to the neutral... ■ Range must be connected to the proper electrical voltage and frequency as specified on the oven frame behind the control panel or on the model/serial number rating plate. or 50-amp power supply cord (pigtail) (see following Range Rating chart). If connecting to a 4-wire system: This...

Installation Instructions
Page 12
...be necessary to disengage the storage drawer one side at a time. 2. Push range back into position. A. A A. view from the anti-tip bracket. On models with Warming Drawers: Use a wrench or pliers to side; Push the drawer back approximately 1" (2.5 cm). Check that rear leveling leg is level. Drawer clip...the side of the range. ■ Look for the other side of the storage drawer and remove. 12 Push range back into position. On models with Storage Drawers: Use a ¼" drive ratchet, wrench or pliers to floor. ■ Slide range back so rear range foot is ...
...be necessary to disengage the storage drawer one side at a time. 2. Push range back into position. A. A A. view from the anti-tip bracket. On models with Warming Drawers: Use a wrench or pliers to side; Push the drawer back approximately 1" (2.5 cm). Check that rear leveling leg is level. Drawer clip...the side of the range. ■ Look for the other side of the storage drawer and remove. 12 Push range back into position. On models with Storage Drawers: Use a ¼" drive ratchet, wrench or pliers to floor. ■ Slide range back so rear range foot is ...


