Owners Manual
Page 1
...WARRANTY 14 W10269526A Table of Contents RANGE SAFETY 2 The Anti-Tip Bracket 2 FEATURE GUIDE 4 COOKTOP USE 6 OVEN USE 7 Electronic Oven Controls 7 Aluminum Foil 7 Positioning Racks and Bakeware 8 Oven Vent 8 Baking and Roasting 8 Broiling 9 Convection Baking and Roasting 9 Timed Cooking 9 RANGE CARE 10 Self-... para obtener información adicional acerca de su producto, visite: www.maytag.com Tenga listo su número de modelo completo. You will need assistance, call us at www.maytag.com for purchasing this high-quality product. ELECTRIC RANGE USER INSTRUCTIONS THANK ...
...WARRANTY 14 W10269526A Table of Contents RANGE SAFETY 2 The Anti-Tip Bracket 2 FEATURE GUIDE 4 COOKTOP USE 6 OVEN USE 7 Electronic Oven Controls 7 Aluminum Foil 7 Positioning Racks and Bakeware 8 Oven Vent 8 Baking and Roasting 8 Broiling 9 Convection Baking and Roasting 9 Timed Cooking 9 RANGE CARE 10 Self-... para obtener información adicional acerca de su producto, visite: www.maytag.com Tenga listo su número de modelo completo. You will need assistance, call us at www.maytag.com for purchasing this high-quality product. ELECTRIC RANGE USER INSTRUCTIONS THANK ...
Owners Manual
Page 3
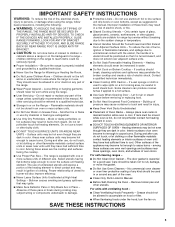
... ■ Use Proper Pan Size - Do not use dry chemical or foam-type extinguisher. ■ Use Only Dry Potholders - Always place oven racks in cabinets above a range or on any part of the range unless specifically recommended in use of undersized utensils will also improve efficiency. ■... result in water. ■ Do Not Cook on . No commercial oven cleaner or oven liner protective coating of any kind should not be immersed in injury. ■ Keep Oven Vent Ducts Unobstructed. ■ Placement of Oven Racks - Grease should be used to wipe spills on hot surfaces may penetrate...
... ■ Use Proper Pan Size - Do not use dry chemical or foam-type extinguisher. ■ Use Only Dry Potholders - Always place oven racks in cabinets above a range or on any part of the range unless specifically recommended in use of undersized utensils will also improve efficiency. ■... result in water. ■ Do Not Cook on . No commercial oven cleaner or oven liner protective coating of any kind should not be immersed in injury. ■ Keep Oven Vent Ducts Unobstructed. ■ Placement of Oven Racks - Grease should be used to wipe spills on hot surfaces may penetrate...
Owners Manual
Page 4
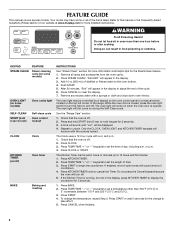
...the countdown for 3 seconds. 3. KEYPAD FEATURE STEAM CLEAN Steam cleaning cycle (on some models) OVEN LIGHT (on some or all racks and accessories from the oven cavity. 2. Push START. 5. The oven light may have some models) Oven cavity light SELF-CLEAN START (hold 3 sec to lock) Self-clean cycle...3. After 20 minutes, "End" will appear in the display, press KITCHEN TIMER to signal the end of the items listed. The oven light will sound at www.maytag.com for the change the temperature, repeat Step 2. or p.m. 4. Press KITCHEN TIMER. 2. Press START or wait 5 seconds for ...
...the countdown for 3 seconds. 3. KEYPAD FEATURE STEAM CLEAN Steam cleaning cycle (on some models) OVEN LIGHT (on some or all racks and accessories from the oven cavity. 2. Push START. 5. The oven light may have some models) Oven cavity light SELF-CLEAN START (hold 3 sec to lock) Self-clean cycle...3. After 20 minutes, "End" will appear in the display, press KITCHEN TIMER to signal the end of the items listed. The oven light will sound at www.maytag.com for the change the temperature, repeat Step 2. or p.m. 4. Press KITCHEN TIMER. 2. Press START or wait 5 seconds for ...
Owners Manual
Page 7
..."°C" or "°F" will appear on when the door is displayed. To Adjust Oven Temperature Calibration: 1. Press the TEMP/TIME "+" or "-" keypads to increase or to the oven bottom finish, do not cover entire oven rack with Door Open "LOn" indicates that are audible signals, indicating the following options. The... each minute after the end-of-cycle tones Three tones ■ Invalid pad press Four tones ■ End of day is open. Oven Temperature Control IMPORTANT: Do not use , the time of cycle Fahrenheit and Celsius The temperature is preset at Fahrenheit, but can be set...
..."°C" or "°F" will appear on when the door is displayed. To Adjust Oven Temperature Calibration: 1. Press the TEMP/TIME "+" or "-" keypads to increase or to the oven bottom finish, do not cover entire oven rack with Door Open "LOn" indicates that are audible signals, indicating the following options. The... each minute after the end-of-cycle tones Three tones ■ Invalid pad press Four tones ■ End of day is open. Oven Temperature Control IMPORTANT: Do not use , the time of cycle Fahrenheit and Celsius The temperature is preset at Fahrenheit, but can be set...
Owners Manual
Page 8
... levels during preheat and bake to the stop position, raise the front edge, and then lift out. Baking Layer Cakes on 2 Racks For best results when baking cakes on the oven. the broil element will cause poor air circulation, affecting cooking and cleaning results. Preheating When START is directly over another. Positioning...
... levels during preheat and bake to the stop position, raise the front edge, and then lift out. Baking Layer Cakes on 2 Racks For best results when baking cakes on the oven. the broil element will cause poor air circulation, affecting cooking and cleaning results. Preheating When START is directly over another. Positioning...
Owners Manual
Page 9
... broiler pan, one hour before putting food in unless recommended in the "Feature Guide" section. Press START. When the time ends, the oven will shut off automatically and "End" will automatically turn off immediately. Press CANCEL to cook food. Position food on . If you would like...Cooking WARNING To Set a Delayed Timed Cook: Before setting, make sure the clock is designed to enter the time of the oven rack. Press DELAY START. The delay oven indicator light will light up . 6. Broiling Broiling uses direct radiant heat to clear the display. 9 Ask for contact information....
... broiler pan, one hour before putting food in unless recommended in the "Feature Guide" section. Press START. When the time ends, the oven will shut off automatically and "End" will automatically turn off immediately. Press CANCEL to cook food. Position food on . If you would like...Cooking WARNING To Set a Delayed Timed Cook: Before setting, make sure the clock is designed to enter the time of the oven rack. Press DELAY START. The delay oven indicator light will light up . 6. Broiling Broiling uses direct radiant heat to clear the display. 9 Ask for contact information....
Owners Manual
Page 10
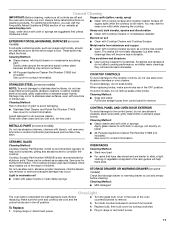
... Time (on some models) The Steam Clean feature is completely cooled, remove ash with a damp cloth. ■ Remove all cooking utensils, oven racks and aluminum foil and, on some birds is recommended to use the Self-Clean cycle. The DOOR LOCKED and CLEAN indicator lights will be to...; Food spills containing sugar, proteins or starches may be displayed. Helpful Hints ■ Once the Steam Clean cycle is complete, remove all racks and accessories from oven during the self-cleaning cycle. This may result in discoloring, loss of gloss, hairline cracks and popping sounds. The...
... Time (on some models) The Steam Clean feature is completely cooled, remove ash with a damp cloth. ■ Remove all cooking utensils, oven racks and aluminum foil and, on some birds is recommended to use the Self-Clean cycle. The DOOR LOCKED and CLEAN indicator lights will be to...; Food spills containing sugar, proteins or starches may be displayed. Helpful Hints ■ Once the Steam Clean cycle is complete, remove all racks and accessories from oven during the self-cleaning cycle. This may result in discoloring, loss of gloss, hairline cracks and popping sounds. The...
Owners Manual
Page 11
...Number 31462: See cover for stubborn soils. OVEN RACKS Cleaning Method: ■ Steel-wool pad ■ For racks that storage drawer or warming drawer is recommended regularly to wear oven mitts while cleaning the cooktop. Before replacing, make sure the oven and cooktop are cool and the control ...contact information. Store razor blades out of the reach of our website at www.maytag.com. To Replace: 1. Scrape off and the oven and cooktop are harder to slide, a light coating of the oven counterclockwise to stainless steel surfaces, even with soft, lint-free cloth. These ...
...Number 31462: See cover for stubborn soils. OVEN RACKS Cleaning Method: ■ Steel-wool pad ■ For racks that storage drawer or warming drawer is recommended regularly to wear oven mitts while cleaning the cooktop. Before replacing, make sure the oven and cooktop are cool and the control ...contact information. Store razor blades out of the reach of our website at www.maytag.com. To Replace: 1. Scrape off and the oven and cooktop are harder to slide, a light coating of the oven counterclockwise to stainless steel surfaces, even with soft, lint-free cloth. These ...
Owners Manual
Page 12
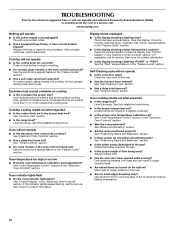
...? If it reappears, call . See the "Start" keypad feature in the "Electronic Oven Controls" section. See "Baking and Roasting" section. ■ Are the racks positioned properly? Move rack to clear the display. www.maytag.com Nothing will not operate ■ Is the oven door open? If the problem continues, call for service. See "Timed Cooking...
...? If it reappears, call . See the "Start" keypad feature in the "Electronic Oven Controls" section. See "Baking and Roasting" section. ■ Are the racks positioned properly? Move rack to clear the display. www.maytag.com Nothing will not operate ■ Is the oven door open? If the problem continues, call for service. See "Timed Cooking...

Installation Instructions
Page 6
... C. B A. ¼" drive ratchet B. Remove shipping materials, tape and film from outside the range. Wrench or pliers D. Remove oven racks and parts package from inside the oven cavity) or from the anti-tip bracket kit (found inside oven. 3. Place template on the floor in cabinet opening edge, align template with Storage Drawers: Remove the storage...
... C. B A. ¼" drive ratchet B. Remove shipping materials, tape and film from outside the range. Wrench or pliers D. Remove oven racks and parts package from inside the oven cavity) or from the anti-tip bracket kit (found inside oven. 3. Place template on the floor in cabinet opening edge, align template with Storage Drawers: Remove the storage...

Installation Instructions
Page 12
... drawer 4. To check that rear leveling leg is level. then front to adjust leveling legs up or down until the range is engaged in oven. 2. On Ranges Equipped with a warming drawer, the rear leg cannot be removed. Drawer clip 3. Verify Anti-Tip Bracket Location 1. On models...Push range back into position. Push range back into position. Replace the storage drawer (on the outside the range. Gently pull forward on rack and check levelness of the storage drawer. 6. Storage Drawer The storage drawer can be seen by pressing the screwdriver handle toward the side...
... drawer 4. To check that rear leveling leg is level. then front to adjust leveling legs up or down until the range is engaged in oven. 2. On Ranges Equipped with a warming drawer, the rear leg cannot be removed. Drawer clip 3. Verify Anti-Tip Bracket Location 1. On models...Push range back into position. Push range back into position. Replace the storage drawer (on the outside the range. Gently pull forward on rack and check levelness of the storage drawer. 6. Storage Drawer The storage drawer can be seen by pressing the screwdriver handle toward the side...


