
Owners Manual
Page 1
...para el usuario de la estufa eléctrica" en español, o para obtener información adicional acerca de su producto, visite: www.maytag.com Tenga listo su número de modelo completo. Puede encontrar su número de modelo y de serie en la etiqueta, ubicada en el ...high-quality product. If you still need your model and serial number located on some models 10 General Cleaning 11 Oven Light 11 TROUBLESHOOTING 12 ACCESSORIES 13 WARRANTY 14 W10269526A If you should experience a problem not covered in TROUBLESHOOTING, please visit our website at 1-800-688-9900. Table ...
...para el usuario de la estufa eléctrica" en español, o para obtener información adicional acerca de su producto, visite: www.maytag.com Tenga listo su número de modelo completo. Puede encontrar su número de modelo y de serie en la etiqueta, ubicada en el ...high-quality product. If you still need your model and serial number located on some models 10 General Cleaning 11 Oven Light 11 TROUBLESHOOTING 12 ACCESSORIES 13 WARRANTY 14 W10269526A If you should experience a problem not covered in TROUBLESHOOTING, please visit our website at 1-800-688-9900. Table ...
Owners Manual
Page 4
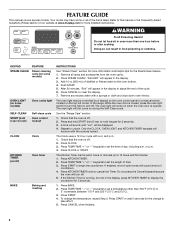
.... 1. Press and hold START (hold 3 sec to lock) Self-clean cycle Oven control lockout CLOCK Clock KITCHEN TIMER (on some or all racks and accessories from the oven cavity. 2. A tone will sound, and "Loc" will turn the light on during the Self-Clean cycle. Press TEMP/TIME "+" or.... Press START or wait 5 seconds for more detailed instructions. "Add H2O" will come on and off . 5. The oven light will sound at www.maytag.com for the change the temperature, repeat Step 2. Press CLOCK. 3. Press CLOCK or START. Press START. 4. Press START to set the time of time...
.... 1. Press and hold START (hold 3 sec to lock) Self-clean cycle Oven control lockout CLOCK Clock KITCHEN TIMER (on some or all racks and accessories from the oven cavity. 2. A tone will sound, and "Loc" will turn the light on during the Self-Clean cycle. Press TEMP/TIME "+" or.... Press START or wait 5 seconds for more detailed instructions. "Add H2O" will come on and off . 5. The oven light will sound at www.maytag.com for the change the temperature, repeat Step 2. Press CLOCK. 3. Press CLOCK or START. Press START. 4. Press START to set the time of time...
Owners Manual
Page 10
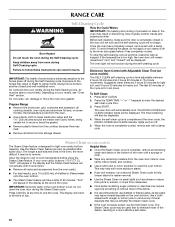
... Clean cycle to wipe the oven interior. Failure to certain birds. Prepare Range ■ Remove the broiler pan, grid, cookware and bakeware, all racks and accessories from the storage drawer. RANGE CARE Self-Cleaning Cycle WARNING How the Cycle Works IMPORTANT: The heating and cooling of porcelain on your oven cavity...
... Clean cycle to wipe the oven interior. Failure to certain birds. Prepare Range ■ Remove the broiler pan, grid, cookware and bakeware, all racks and accessories from the storage drawer. RANGE CARE Self-Cleaning Cycle WARNING How the Cycle Works IMPORTANT: The heating and cooling of porcelain on your oven cavity...
Owners Manual
Page 11
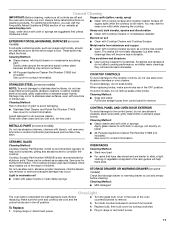
... 31464 is also recommended for stubborn soils. On some models) Food spills containing acids, such as vinegar and tomato, should be ordered as accessories. Turn bulb counterclockwise to remove from aluminum and copper ■ Clean with soft, lint-free cloth. Unplug range or disconnect power. 4. ...oven and cooktop are suggested first unless otherwise noted. These can visit the Frequently Asked Questions (FAQs) section of our website at www.maytag.com. Store razor blades out of the reach of the oven counterclockwise to remove. Cleaning Method: ■ Soap and water: Pull ...
... 31464 is also recommended for stubborn soils. On some models) Food spills containing acids, such as vinegar and tomato, should be ordered as accessories. Turn bulb counterclockwise to remove from aluminum and copper ■ Clean with soft, lint-free cloth. Unplug range or disconnect power. 4. ...oven and cooktop are suggested first unless otherwise noted. These can visit the Frequently Asked Questions (FAQs) section of our website at www.maytag.com. Store razor blades out of the reach of the oven counterclockwise to remove. Cleaning Method: ■ Soap and water: Pull ...
Owners Manual
Page 13
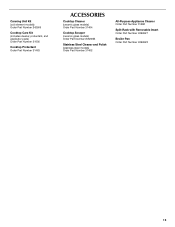
Canning Unit Kit (coil element models) Order Part Number 242905 Cooktop Care Kit (includes cleaner, protectant, and applicator pads) Order Part Number 31605 Cooktop Protectant Order Part Number 31463 ACCESSORIES Cooktop Cleaner (ceramic glass models) Order Part Number 31464 Cooktop Scraper (ceramic glass models) Order Part Number WA906B Stainless Steel Cleaner and Polish (stainless steel models) Order Part Number 31462 All-Purpose Appliance Cleaner Order Part Number 31682 Split-Rack with Removable Insert Order Part Number 4396927 Broiler Pan Order Part Number 4396923 13
Canning Unit Kit (coil element models) Order Part Number 242905 Cooktop Care Kit (includes cleaner, protectant, and applicator pads) Order Part Number 31605 Cooktop Protectant Order Part Number 31463 ACCESSORIES Cooktop Cleaner (ceramic glass models) Order Part Number 31464 Cooktop Scraper (ceramic glass models) Order Part Number WA906B Stainless Steel Cleaner and Polish (stainless steel models) Order Part Number 31462 All-Purpose Appliance Cleaner Order Part Number 31682 Split-Rack with Removable Insert Order Part Number 4396927 Broiler Pan Order Part Number 4396923 13