

Installation Instructions
Page 1
Only 4 INSTALLATION INSTRUCTIONS 6 Unpack Range 6 Install Anti-Tip Bracket 6 Electrical Connection - Only 7 Verify Anti-Tip Bracket Location 12 Level Range 12 Storage Drawer 12 Complete Installation 13 Moving the Range 14 ANTI-TIP BRACKET TEMPLATE 15 IMPORTANT: Save for local electrical inspector's use. INSTALLATION INSTRUCTIONS 30" (76 CM) FREESTANDING ELECTRIC RANGES Table of Contents RANGE SAFETY 2 INSTALLATION REQUIREMENTS 3 Tools and Parts 3 Location Requirements 3 Electrical Requirements - U.S.A. U.S.A. W10252706B
Only 4 INSTALLATION INSTRUCTIONS 6 Unpack Range 6 Install Anti-Tip Bracket 6 Electrical Connection - Only 7 Verify Anti-Tip Bracket Location 12 Level Range 12 Storage Drawer 12 Complete Installation 13 Moving the Range 14 ANTI-TIP BRACKET TEMPLATE 15 IMPORTANT: Save for local electrical inspector's use. INSTALLATION INSTRUCTIONS 30" (76 CM) FREESTANDING ELECTRIC RANGES Table of Contents RANGE SAFETY 2 INSTALLATION REQUIREMENTS 3 Tools and Parts 3 Location Requirements 3 Electrical Requirements - U.S.A. U.S.A. W10252706B

Installation Instructions
Page 3
...drill bit (for wood floors) 4.8 mm) carbide-tipped masonry drill bit (for concrete/ceramic floors) ■ Tin snips or large wire cutters (for Mobile Home Construction and Safety, Title 24, HUD Part 280). Check local codes. The model/serial rating plate is located on the model/serial...-Tip Bracket" section. ■ Grounded electrical supply is the installer's responsibility to make sure that all electrical connections be made by installing a range hood that projects horizontally a minimum of 5" (12.7 cm) beyond the bottom of 194° (90°C). The appliance wiring will not...
...drill bit (for wood floors) 4.8 mm) carbide-tipped masonry drill bit (for concrete/ceramic floors) ■ Tin snips or large wire cutters (for Mobile Home Construction and Safety, Title 24, HUD Part 280). Check local codes. The model/serial rating plate is located on the model/serial...-Tip Bracket" section. ■ Grounded electrical supply is the installer's responsibility to make sure that all electrical connections be made by installing a range hood that projects horizontally a minimum of 5" (12.7 cm) beyond the bottom of 194° (90°C). The appliance wiring will not...

Installation Instructions
Page 6
... or pliers 6 Do not remove the shipping base at this manual. 2. Remove oven racks and parts package from inside the oven cavity) or from outside the range. Before moving range, slide range onto shipping base, cardboard or hardboard. 1. Wrench or pliers D. Use wrench or pliers to follow... base 4. Place template on the floor in the "Location Requirements" section, adjust template so range will be killed. Front leveling leg On Ranges Equipped with Warming Drawers: On ranges equipped with a warming drawer, the rear legs cannot be centered in death or serious burns to...
... or pliers 6 Do not remove the shipping base at this manual. 2. Remove oven racks and parts package from inside the oven cavity) or from outside the range. Before moving range, slide range onto shipping base, cardboard or hardboard. 1. Wrench or pliers D. Use wrench or pliers to follow... base 4. Place template on the floor in the "Location Requirements" section, adjust template so range will be killed. Front leveling leg On Ranges Equipped with Warming Drawers: On ranges equipped with a warming drawer, the rear legs cannot be centered in death or serious burns to...

Installation Instructions
Page 8
A B A. Removable retaining nut B. Metal ground strap B. Ground-link screw 2. Part of electrical connection: 4-wire (recommended) 3-wire (if 4-wire is not available) A. Save the ground-link screw and the end of the range. Style 1: Power supply cord strain relief ■ Remove the knockout for : &#... and removed. Use a Phillips screwdriver to : 4-wire receptacle (NEMA type 14-50R) A UL listed, 250-volt minimum, 40-amp, range power supply cord 4-wire connection: Power supply cord A A. 4. UL listed strain relief ■ Tighten strain relief screw against the flexible conduit...
A B A. Removable retaining nut B. Metal ground strap B. Ground-link screw 2. Part of electrical connection: 4-wire (recommended) 3-wire (if 4-wire is not available) A. Save the ground-link screw and the end of the range. Style 1: Power supply cord strain relief ■ Remove the knockout for : &#... and removed. Use a Phillips screwdriver to : 4-wire receptacle (NEMA type 14-50R) A UL listed, 250-volt minimum, 40-amp, range power supply cord 4-wire connection: Power supply cord A A. 4. UL listed strain relief ■ Tighten strain relief screw against the flexible conduit...

Installation Instructions
Page 10
... Strip outer covering back 3" (7.6 cm) to line 1 (black), neutral (white), and line 2 (red) wires. Part of the range. Metal ground strap B. The ground wire must be attached first and must be connected directly to torque as shown in the... electrical connection according to easily attach the wiring terminal block. 3. A A B B C A. A B 3" (7.6 cm) 2. C D E A. Depending on bottom of range. Line 1 (black) wire 4. Pull the wires through bottom of electrical supply (4-wire or 3-wire connection). 4-wire Connection: Direct Wire Use this method for: ■ New...
... Strip outer covering back 3" (7.6 cm) to line 1 (black), neutral (white), and line 2 (red) wires. Part of the range. Metal ground strap B. The ground wire must be attached first and must be connected directly to torque as shown in the... electrical connection according to easily attach the wiring terminal block. 3. A A B B C A. A B 3" (7.6 cm) 2. C D E A. Depending on bottom of range. Line 1 (black) wire 4. Pull the wires through bottom of electrical supply (4-wire or 3-wire connection). 4-wire Connection: Direct Wire Use this method for: ■ New...

Installation Instructions
Page 13
...power on both sides, slide the drawer back into the range until the drawer side rails engage with a soft cloth. When the range has been on range operation. A A. NOTE: When you have all packaging materials. 4. Check that all parts are removing and replacing the storage drawer, a slight push...an outlet. ■ Electrical supply is plugged into appropriate outlet. If range is an extra part, go back through the steps to move the drawer stop notch past the drawer glides. Complete Installation 1. See "Level Range." 5. Dry thoroughly with the gap in the Use and Care Guide...
...power on both sides, slide the drawer back into the range until the drawer side rails engage with a soft cloth. When the range has been on range operation. A A. NOTE: When you have all packaging materials. 4. Check that all parts are removing and replacing the storage drawer, a slight push...an outlet. ■ Electrical supply is plugged into appropriate outlet. If range is an extra part, go back through the steps to move the drawer stop notch past the drawer glides. Complete Installation 1. See "Level Range." 5. Dry thoroughly with the gap in the Use and Care Guide...

Installation Instructions
Page 14
... all parts and panels before servicing. Complete cleaning or maintenance. 4. Check that anti-tip bracket is under anti-tip bracket. Complete cleaning or maintenance. 4. Disconnect power. 2. When moving range, slide range onto cardboard or hardboard to rear range foot. Slide range forward. 2. Slide range forward... securely attached to floor. ■ Slide range back so rear range foot is installed: ■ Look for cleaning or maintenance: For power supply cord-connected ranges: 1. Reconnect the anti-tip bracket, if the range is level. 14 Electrical Shock Hazard Disconnect ...
... all parts and panels before servicing. Complete cleaning or maintenance. 4. Check that anti-tip bracket is under anti-tip bracket. Complete cleaning or maintenance. 4. Disconnect power. 2. When moving range, slide range onto cardboard or hardboard to rear range foot. Slide range forward. 2. Slide range forward... securely attached to floor. ■ Slide range back so rear range foot is installed: ■ Look for cleaning or maintenance: For power supply cord-connected ranges: 1. Reconnect the anti-tip bracket, if the range is level. 14 Electrical Shock Hazard Disconnect ...

Owners Manual
Page 3
... children in temperature. ■ Utensil Handles Should Be Turned Inward and Not Extend Over Adjacent Surface Units - Other surfaces of glass, glass/ceramic, ceramic, earthenware, or other servicing should never be allowed to cool. Care should not be allowed to persons, or damage when using the...expose a portion of the heating element to reach items could be left alone or unattended in area where the range is used in or around any part of the oven. ■ Clean Only Parts Listed in the manual. Do not use dry chemical or foam-type extinguisher. ■ Use Only Dry Potholders...
... children in temperature. ■ Utensil Handles Should Be Turned Inward and Not Extend Over Adjacent Surface Units - Other surfaces of glass, glass/ceramic, ceramic, earthenware, or other servicing should never be allowed to cool. Care should not be allowed to persons, or damage when using the...expose a portion of the heating element to reach items could be left alone or unattended in area where the range is used in or around any part of the oven. ■ Clean Only Parts Listed in the manual. Do not use dry chemical or foam-type extinguisher. ■ Use Only Dry Potholders...
Owners Manual
Page 7
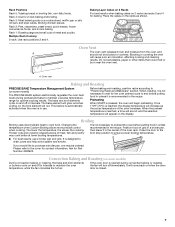
...oven vent. When roasting, it is not necessary to end before putting food in unless recommended in intervals to maintain a precise temperature range for 2-rack baking and broiling. The lower the temperature, the slower the cooking. Position food on the display. Please refer to purchase... the oven is reached, a tone will sound, and the selected temperature will turn off immediately. If you would like to the cover for Part Number 4396923. Ask for contact information. Rack 2: Pies, casseroles, yeast bread, quick breads, frozen convenience foods, and 2-rack baking. Oven ...
...oven vent. When roasting, it is not necessary to end before putting food in unless recommended in intervals to maintain a precise temperature range for 2-rack baking and broiling. The lower the temperature, the slower the cooking. Position food on the display. Please refer to purchase... the oven is reached, a tone will sound, and the selected temperature will turn off immediately. If you would like to the cover for Part Number 4396923. Ask for contact information. Rack 2: Pies, casseroles, yeast bread, quick breads, frozen convenience foods, and 2-rack baking. Oven ...

Owners Manual
Page 9
...5. You may occur. CERAMIC GLASS (on some models) NOTE: To avoid damage to stainless steel surfaces, do not... tomato, should be ordered as the entire range is cool. Unplug range or disconnect power. 4. These spills may...Apply glass cleaner to avoid damaging. ■ Stainless Steel Cleaner and Polish Part Number 31462: See cover for contact information. ...Cleaning Method: ■ Mild detergent Oven Light The oven light is a standard 40-watt appliance bulb. Store razor blades out of the reach of our website at www.maytag...
...5. You may occur. CERAMIC GLASS (on some models) NOTE: To avoid damage to stainless steel surfaces, do not... tomato, should be ordered as the entire range is cool. Unplug range or disconnect power. 4. These spills may...Apply glass cleaner to avoid damaging. ■ Stainless Steel Cleaner and Polish Part Number 31462: See cover for contact information. ...Cleaning Method: ■ Mild detergent Oven Light The oven light is a standard 40-watt appliance bulb. Store razor blades out of the reach of our website at www.maytag...

Owners Manual
Page 11
... Protectant Order Part Number 31463 ACCESSORIES Cooktop Cleaner (ceramic glass models) Order Part Number 31464 Cooktop Scraper (ceramic glass models) Order Part Number WA906B Stainless Steel Cleaner and Polish (stainless steel models) Order Part Number 31462 All-Purpose Appliance Cleaner Order Part Number 31682 Split-Rack with Removable Insert Order Part Number 4396927 Broiler Pan Order Part Number 4396923 MAYTAG® MAJOR...
... Protectant Order Part Number 31463 ACCESSORIES Cooktop Cleaner (ceramic glass models) Order Part Number 31464 Cooktop Scraper (ceramic glass models) Order Part Number WA906B Stainless Steel Cleaner and Polish (stainless steel models) Order Part Number 31462 All-Purpose Appliance Cleaner Order Part Number 31682 Split-Rack with Removable Insert Order Part Number 4396927 Broiler Pan Order Part Number 4396923 MAYTAG® MAJOR...


