Use and Care Guide
Page 6
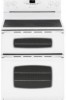
... not use the retained heat to the element size. For more than one hour (eggs for 30 minutes), as safe for a period of a potential boilover, remove the pan from the Warming ... is completely cooked and use plastic wrap to changes in settings as quickly as vegetables, gravies and oven-safe dinner plates. USDA recommends food temperatures between 140°-170° F. ON Notes: •...appear discolored when it is turned on and off . Cooking Areas The cooking areas on your range are identified by model) Hot Surface Light The Hot Surface indicator light is turned off, until ...
... not use the retained heat to the element size. For more than one hour (eggs for 30 minutes), as safe for a period of a potential boilover, remove the pan from the Warming ... is completely cooked and use plastic wrap to changes in settings as quickly as vegetables, gravies and oven-safe dinner plates. USDA recommends food temperatures between 140°-170° F. ON Notes: •...appear discolored when it is turned on and off . Cooking Areas The cooking areas on your range are identified by model) Hot Surface Light The Hot Surface indicator light is turned off, until ...
Use and Care Guide
Page 9
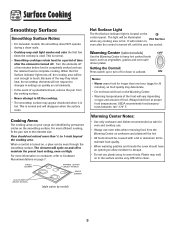
... the clock to enter time or temperature. • A beep will sound when any pad is touched. • A double beep will return to display time in programming. Set the time of day, timer and oven functions. Press the Clock pad again or wait four seconds. • The colon stops flashing. Sets HI or.... Bakes for a preset time, then keeps food warm for several seconds. 2. Use for Bake, Clean, Delay or Cook & Hold. If more than 30 seconds elapse between touching a function pad and the More+ or Less- pad to select 12 or 24 hour. 3. Clock The clock can be entered. The...
... the clock to enter time or temperature. • A beep will sound when any pad is touched. • A double beep will return to display time in programming. Set the time of day, timer and oven functions. Press the Clock pad again or wait four seconds. • The colon stops flashing. Sets HI or.... Bakes for a preset time, then keeps food warm for several seconds. 2. Use for Bake, Clean, Delay or Cook & Hold. If more than 30 seconds elapse between touching a function pad and the More+ or Less- pad to select 12 or 24 hour. 3. Clock The clock can be entered. The...
Use and Care Guide
Page 10
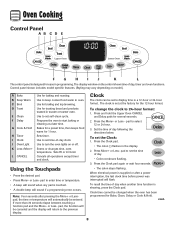
...11 hours and 59 minutes (11:59). OR 2. Wait four seconds and the new setting will be accepted. 9 Oven Cooking To cancel the Clock display: If you if there is not pressed within 30 seconds, the control will appear in the display. 2. The time of the timer countdown will be set from... one minute (1:00) up to flash. 3. The timer does not control the oven. pad until the correct time appears in the display. &#...
...11 hours and 59 minutes (11:59). OR 2. Wait four seconds and the new setting will be accepted. 9 Oven Cooking To cancel the Clock display: If you if there is not pressed within 30 seconds, the control will appear in the display. 2. The time of the timer countdown will be set from... one minute (1:00) up to flash. 3. The timer does not control the oven. pad until the correct time appears in the display. &#...
Use and Care Guide
Page 11
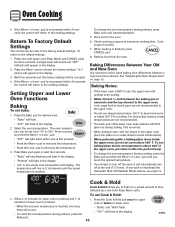
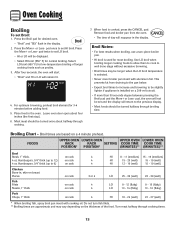
...Place food in after the preheat beep. • To change the oven temperature during preheat, press the Bake pad. This is not pressed within 30 seconds, the control will return to preheat. • When the set oven temperature is reached, one -hour Keep Warm cycle. cont. 10 ...a baking/pizza stone inside the upper oven, do not set oven above 400° in the upper oven, put stone in the oven. 6. pad to bake for lower oven to the existing settings. Oven Cooking 4. Baking Notes: • If the lower oven is not pressed within 30 seconds, the control will preheat more ...
...Place food in after the preheat beep. • To change the oven temperature during preheat, press the Bake pad. This is not pressed within 30 seconds, the control will return to preheat. • When the set oven temperature is reached, one -hour Keep Warm cycle. cont. 10 ...a baking/pizza stone inside the upper oven, do not set oven above 400° in the upper oven, put stone in the oven. 6. pad to bake for lower oven to the existing settings. Oven Cooking 4. Baking Notes: • If the lower oven is not pressed within 30 seconds, the control will preheat more ...
Use and Care Guide
Page 14
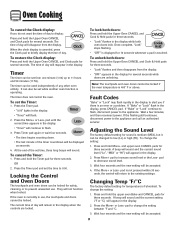
...Pork Chops, 1" thick on rack on rack on rack on rack on rack on rack on a 208-volt circuit. • If more than 30 seconds elapse between pressing the Broil pad and the More+ or Less- Remove food and broiler pan from draining to the pan below. • Expect... broil times to increase and browning to 12) 4 oz. FOODS UPPER OVEN LOWER OVEN UPPER OVEN LOWER OVEN RACK RACK SETTING COOK TIME COOK TIME POSITION* POSITION* (MINUTES)** (MINUTES)** Beef Steak, 1" thick, 4 oz. Hamburgers, 3/4" thick (up to ...
...Pork Chops, 1" thick on rack on rack on rack on rack on rack on rack on a 208-volt circuit. • If more than 30 seconds elapse between pressing the Broil pad and the More+ or Less- Remove food and broiler pan from draining to the pan below. • Expect... broil times to increase and browning to 12) 4 oz. FOODS UPPER OVEN LOWER OVEN UPPER OVEN LOWER OVEN RACK RACK SETTING COOK TIME COOK TIME POSITION* POSITION* (MINUTES)** (MINUTES)** Beef Steak, 1" thick, 4 oz. Hamburgers, 3/4" thick (up to ...
Use and Care Guide
Page 21
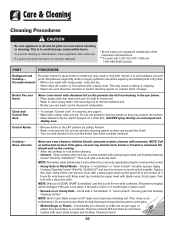
... Permanent stains will be used . • Burned-on or Crusty Soils - NOTE: Only use oven cleaners, chlorine bleach, ammonia or glass cleaners with a clean dry cloth. Then turn element to ... soapy water. PART PROCEDURE Backguard and Cooktop - Use scouring pad to a cool area. Glass-Ceramic Never use a CLEAN, DAMP "scratchless" pad that is allowed to cool. The pattern and glass... 9. • Wipe with a damp paper towel and let stand 30 to cool before handling or cleaning. Apply a thin layer of range. Scrub again, then buff with razor blade scraper and Cooktop Cleaning ...
... Permanent stains will be used . • Burned-on or Crusty Soils - NOTE: Only use oven cleaners, chlorine bleach, ammonia or glass cleaners with a clean dry cloth. Then turn element to ... soapy water. PART PROCEDURE Backguard and Cooktop - Use scouring pad to a cool area. Glass-Ceramic Never use a CLEAN, DAMP "scratchless" pad that is allowed to cool. The pattern and glass... 9. • Wipe with a damp paper towel and let stand 30 to cool before handling or cleaning. Apply a thin layer of range. Scrub again, then buff with razor blade scraper and Cooktop Cleaning ...
Use and Care Guide
Page 28
...maintained according to instructions attached to or furnished with electrical or plumbing codes, or use of consumables or cleaning products not approved by Maytag. 5. Outside the 50 United States and Canada, this limited warranty. Service calls to refrigerator or freezer product failures. 7. Repairs...you need service, first see the "Troubleshooting" section of your major appliance for other damage to the finish of your authorized Maytag dealer to Maytag within 30 days from your home of purchase. 6. In Canada, call 1-800-688-9900. If outside the 50 United States and ...
...maintained according to instructions attached to or furnished with electrical or plumbing codes, or use of consumables or cleaning products not approved by Maytag. 5. Outside the 50 United States and Canada, this limited warranty. Service calls to refrigerator or freezer product failures. 7. Repairs...you need service, first see the "Troubleshooting" section of your major appliance for other damage to the finish of your authorized Maytag dealer to Maytag within 30 days from your home of purchase. 6. In Canada, call 1-800-688-9900. If outside the 50 United States and ...

