Use and Care Manual
Page 1
TM Electric Range - ® Smoothtop Use and Care Guide Table of Contents Safety 1-3 Surface Cooking 4-7 Surface Controls Smoothtop Surface Oven Cooking 8-16 Baking Cook & Hold Delay Bake Keep Warm Broiling Oven Racks Form No. Litho U.S.A . A/01/08 Part No. 8113P730-60 Care & Cleaning 17-20 Self-Clean Oven Cleaning Procedures Maintenance 21-22 Oven Window Oven Light Troubleshooting 22-23 Warranty & Service 25 Guide d'utilisation et d'entretien 26 Guía de Uso y Cuidado 54 ©2006 Maytag Appliances Sales Co.
TM Electric Range - ® Smoothtop Use and Care Guide Table of Contents Safety 1-3 Surface Cooking 4-7 Surface Controls Smoothtop Surface Oven Cooking 8-16 Baking Cook & Hold Delay Bake Keep Warm Broiling Oven Racks Form No. Litho U.S.A . A/01/08 Part No. 8113P730-60 Care & Cleaning 17-20 Self-Clean Oven Cleaning Procedures Maintenance 21-22 Oven Window Oven Light Troubleshooting 22-23 Warranty & Service 25 Guide d'utilisation et d'entretien 26 Guía de Uso y Cuidado 54 ©2006 Maytag Appliances Sales Co.
Use and Care Manual
Page 2
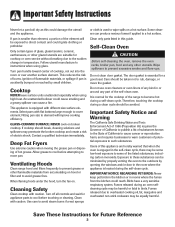
... clear and free from parts of the appliance from the appliance before operating it may be exercised when installing, maintaining, or operating the appliance. Never use water on a grease fire. 1. Important Safety Instructions To check if device is properly installed, look underneath range with this guide are vulnerable to heat. Turn off appliance to adjust, repair, service, or 1 Use appliance only for future reference. Model Number Serial Number Date of...
... clear and free from parts of the appliance from the appliance before operating it may be exercised when installing, maintaining, or operating the appliance. Never use water on a grease fire. 1. Important Safety Instructions To check if device is properly installed, look underneath range with this guide are vulnerable to heat. Turn off appliance to adjust, repair, service, or 1 Use appliance only for future reference. Model Number Serial Number Date of...
Use and Care Manual
Page 3
... before removing bulb to cover an oven rack or oven bottom. If a rack must be taught that the appliance and utensils in it is in use of devices or accessories that are not specifically recommended in possible tipping of the appliance, breakage of food that are not expressly recommended in this manual can trail across hot elements and ignite or get caught on the door...
... before removing bulb to cover an oven rack or oven bottom. If a rack must be taught that the appliance and utensils in it is in use of devices or accessories that are not specifically recommended in possible tipping of the appliance, breakage of food that are not expressly recommended in this manual can trail across hot elements and ignite or get caught on the door...
Use and Care Manual
Page 4
... Safety Instructions Never let a pan boil dry as this guide. If pan is equipped with caution. This appliance is smaller than element, a portion of the self-clean oven. Ventilating Hoods Clean range hood and filters frequently to cool before touching or cleaning. Clean with different size surface elements. Wipe spillovers to wipe spills on hood or filter and to warn customers of hot grease. Users of the listed substances, including carbon monoxide. Turn pan handle...
... Safety Instructions Never let a pan boil dry as this guide. If pan is equipped with caution. This appliance is smaller than element, a portion of the self-clean oven. Ventilating Hoods Clean range hood and filters frequently to cool before touching or cleaning. Clean with different size surface elements. Wipe spillovers to wipe spills on hood or filter and to warn customers of hot grease. Users of the listed substances, including carbon monoxide. Turn pan handle...

Use and Care Manual
Page 5
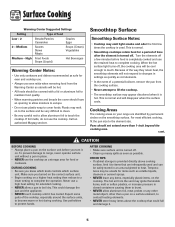
... hot cooked foods warm, such as a normal element, with 2 (Low) to High settings. Setting the Control: 1. The Hot Surface indicator light will go off . 4. Always hold or warm setting to reheat cold food. USDA recommends food temperatures between Low and High. 2. Place pan on page 7. The light will vary depending on the control panel. Suggested Heat Settings The size and type of cookware, type and amount of the knob control. Adjust the heat settings to the numbers...
... hot cooked foods warm, such as a normal element, with 2 (Low) to High settings. Setting the Control: 1. The Hot Surface indicator light will go off . 4. Always hold or warm setting to reheat cold food. USDA recommends food temperatures between Low and High. 2. Place pan on page 7. The light will vary depending on the control panel. Suggested Heat Settings The size and type of cookware, type and amount of the knob control. Adjust the heat settings to the numbers...
Use and Care Manual
Page 6
... know which knob controls which surface unit. When the hot surface light turns off . • Clean up messy spills as soon as coil elements. • In the event of time after the element is turned off a few times the cooktop is provided directly above the cooktop that are identified by permanent circles on a higher heat setting then reduce to a lower setting to the element size. Use potholders to heat. Call an authorized Maytag servicer. Temperatures may...
... know which knob controls which surface unit. When the hot surface light turns off . • Clean up messy spills as soon as coil elements. • In the event of time after the element is turned off a few times the cooktop is provided directly above the cooktop that are identified by permanent circles on a higher heat setting then reduce to a lower setting to the element size. Use potholders to heat. Call an authorized Maytag servicer. Temperatures may...
Use and Care Manual
Page 7
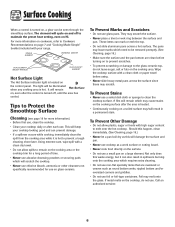
... not slide aluminum pans across the surface since these may melt onto the glass. They may /will be illuminated when any cooking area is located on the control panel. Should this happen, clean immediately. (See Cleaning, page 19.) • Never let a pan boil dry as this waste energy, but it is turned off to prevent a tough cleaning chore later. Call an authorized servicer. 6 The element...
... not slide aluminum pans across the surface since these may melt onto the glass. They may /will be illuminated when any cooking area is located on the control panel. Should this happen, clean immediately. (See Cleaning, page 19.) • Never let a pan boil dry as this waste energy, but it is turned off to prevent a tough cleaning chore later. Call an authorized servicer. 6 The element...
Use and Care Manual
Page 9
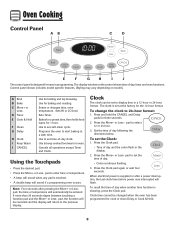
...Enters or changes time, oven temperature. Sets HI or LO broil. To recall the time of day. • Colon continues flashing. 3. Clock time cannot be entered. Oven Cooking Control Panel A B C D E F G H I Keep Warm J CANCEL Use for three seconds. 2. The display window on model.) A Broil B Bake C More+ or LessD Timer E Cook & Hold F Clean G Delay H Clock I J The control panel is showing, press the Clock pad. Control panel shown includes model specific features. (Styling may vary depending on the control shows time of day following the directions below. Bakes for...
...Enters or changes time, oven temperature. Sets HI or LO broil. To recall the time of day. • Colon continues flashing. 3. Clock time cannot be entered. Oven Cooking Control Panel A B C D E F G H I Keep Warm J CANCEL Use for three seconds. 2. The display window on model.) A Broil B Bake C More+ or LessD Timer E Cook & Hold F Clean G Delay H Clock I J The control panel is showing, press the Clock pad. Control panel shown includes model specific features. (Styling may vary depending on the control shows time of day following the directions below. Bakes for...
Use and Care Manual
Page 11
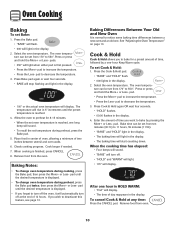
... the oven temperature. The oven temperature can be set oven temperature is first pressed. • Press the More+ pad to 11 hours, 59 minutes (11:59). • "BAKE" and "HOLD" light in the display. • The baking time will light in HOLD WARM: • "End" will start counting down. Press Cook & Hold again OR wait four seconds. • "HOLD" flashes. • 00:00 flashes in the display. 2. Remove...
... the oven temperature. The oven temperature can be set oven temperature is first pressed. • Press the More+ pad to 11 hours, 59 minutes (11:59). • "BAKE" and "HOLD" light in the display. • The baking time will light in HOLD WARM: • "End" will start counting down. Press Cook & Hold again OR wait four seconds. • "HOLD" flashes. • 00:00 flashes in the display. 2. Remove...
Use and Care Manual
Page 12
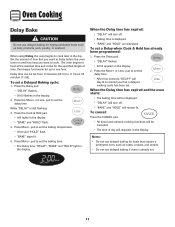
...; All timed and untimed cooking functions will turn off . • Baking time is still flashing: 3. Notes: • Do not use delayed baking if oven is already hot. 11 pad to heat at the selected time and cooks for the specified length of day will reappear in the display. To set the delay time. Press More+ pad to set the baking time. • The Delay time, "DELAY", "BAKE" and "HOLD" light in the display. Press the Delay pad. • "DELAY...
...; All timed and untimed cooking functions will turn off . • Baking time is still flashing: 3. Notes: • Do not use delayed baking if oven is already hot. 11 pad to heat at the selected time and cooks for the specified length of day will reappear in the display. To set the delay time. Press More+ pad to set the baking time. • The Delay time, "DELAY", "BAKE" and "HOLD" light in the display. Press the Delay pad. • "DELAY...
Use and Care Manual
Page 14
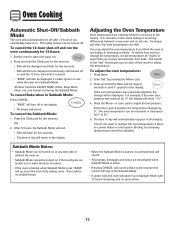
... a power failure or interruption. Set the oven to adjust the temperature. To cancel the Sabbath Mode: 1. Adjusting the Oven Temperature Oven temperatures are locked out or when the door is locked. • If the oven is baking when Sabbath Mode is set the temperature 25° higher or lower than your recipe recommends, then bake. To decide how much to bake (see page 10). 2. pad to change will be displayed if a bake cycle is in use while...
... a power failure or interruption. Set the oven to adjust the temperature. To cancel the Sabbath Mode: 1. Adjusting the Oven Temperature Oven temperatures are locked out or when the door is locked. • If the oven is baking when Sabbath Mode is set the temperature 25° higher or lower than your recipe recommends, then bake. To decide how much to bake (see page 10). 2. pad to change will be displayed if a bake cycle is in use while...
Use and Care Manual
Page 16
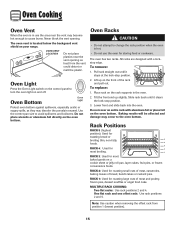
... oven. RACK 4: Used for roasting large cuts of bread, bundt cakes or custard pies. RACK 3: Used for toasting bread or broiling thin, non-fatty foods. One flat rack and one offset rack: Use rack positions 2 and 5. OVEN VENT LOCATION Do not place plastics near the vent may discolor the porcelain enamel. To remove: 1. To replace: 1. Never block the vent opening as they may become hot enough to turn the oven light on your range. Oven...
... oven. RACK 4: Used for roasting large cuts of bread, bundt cakes or custard pies. RACK 3: Used for toasting bread or broiling thin, non-fatty foods. One flat rack and one offset rack: Use rack positions 2 and 5. OVEN VENT LOCATION Do not place plastics near the vent may discolor the porcelain enamel. To remove: 1. To replace: 1. Never block the vent opening as they may become hot enough to turn the oven light on your range. Oven...
Use and Care Manual
Page 18
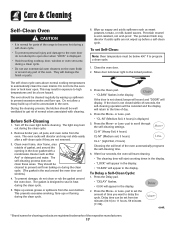
... slide easily after a self-clean cycle if they are registered trademarks of day. 4. pad. • "CL-M" (Medium Soil, 3 hours) is acid-resistant, not acid-proof. pad to set from the oven. Care & Cleaning Self-Clean Oven CAUTION • It is normal for cleaning products are not removed. 3. They will display. Porcelain enamel is displayed. 5. The oven should be set the amount of the oven automatically programs the self-cleaning time. 6. Remove broiler pan...
... slide easily after a self-clean cycle if they are registered trademarks of day. 4. pad. • "CL-M" (Medium Soil, 3 hours) is acid-resistant, not acid-proof. pad to set from the oven. Care & Cleaning Self-Clean Oven CAUTION • It is normal for cleaning products are not removed. 3. They will display. Porcelain enamel is displayed. 5. The oven should be set the amount of the oven automatically programs the self-cleaning time. 6. Remove broiler pan...
Use and Care Manual
Page 19
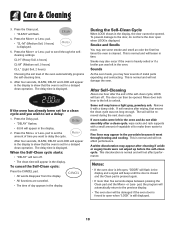
... soil level of day appears in the display to move. The delay time is displayed. 5. Sounds As the oven heats, you may leave a light gray, powdery ash. The door can then be damaged if the oven door is forced to the door, do not slide smoothly after wiping, that the oven is displayed. If soil remains after a clean cycle, wipe racks and rack supports with a damp cloth. Fine lines may...
... soil level of day appears in the display to move. The delay time is displayed. 5. Sounds As the oven heats, you may leave a light gray, powdery ash. The door can then be damaged if the oven door is forced to the door, do not slide smoothly after wiping, that the oven is displayed. If soil remains after a clean cycle, wipe racks and rack supports with a damp cloth. Fine lines may...
Use and Care Manual
Page 20
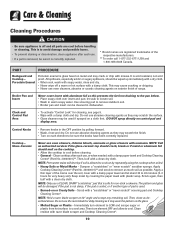
... when needed, with a damp paper towel and Cooktop Cleaning Creme* (Part No. 20000001)**. Apply a thin layer of range. Broiler Pan and Insert Never cover insert with aluminum foil as described above. Care & Cleaning Cleaning Procedures CAUTION • Be sure appliance is off a warm or hot surface with a damp cloth. Control Knobs Cooktop - Then, buff with razor blade scraper and Cooktop Cleaning Creme*. 19 NOTE: Hold a razor blade scraper...
... when needed, with a damp paper towel and Cooktop Cleaning Creme* (Part No. 20000001)**. Apply a thin layer of range. Broiler Pan and Insert Never cover insert with aluminum foil as described above. Care & Cleaning Cleaning Procedures CAUTION • Be sure appliance is off a warm or hot surface with a damp cloth. Control Knobs Cooktop - Then, buff with razor blade scraper and Cooktop Cleaning Creme*. 19 NOTE: Hold a razor blade scraper...
Use and Care Manual
Page 21
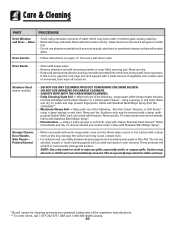
...*. Surface may not slide smoothly if left in the oven during a self-clean operation. Oven Interior • Follow instructions on a cloth first. • Do not use abrasive, caustic or harsh cleaning agents such as steel wool pads or oven cleaners. These products will scratch glass. using a sponge or soft cloth. Rinse and dry. Rinse immediately and dry. Storage Drawer, Door Handle, Side Panels - Glass cleaner can be removed with...
...*. Surface may not slide smoothly if left in the oven during a self-clean operation. Oven Interior • Follow instructions on a cloth first. • Do not use abrasive, caustic or harsh cleaning agents such as steel wool pads or oven cleaners. These products will scratch glass. using a sponge or soft cloth. Rinse and dry. Rinse immediately and dry. Storage Drawer, Door Handle, Side Panels - Glass cleaner can be removed with...
Use and Care Manual
Page 22
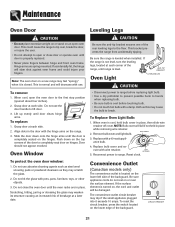
... Replace Oven Light Bulb: 1. Do not use the door handle to range. Slide the door down on the top corners of the door to the first stop position (opened about four inches). 2. If the range is normal and will be damaged. Remove bulb cover and light bulb. Reconnect power to lift door. 3. Do not use . If accidentally hit, the hinge will fall if not held in place while removing wire retainer. 2. This is not level, turn...
... Replace Oven Light Bulb: 1. Do not use the door handle to range. Slide the door down on the top corners of the door to the first stop position (opened about four inches). 2. If the range is normal and will be damaged. Remove bulb cover and light bulb. Reconnect power to lift door. 3. Do not use . If accidentally hit, the hinge will fall if not held in place while removing wire retainer. 2. This is not level, turn...

Use and Care Manual
Page 23
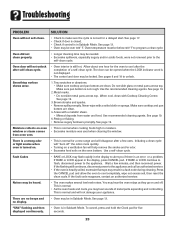
... 4 inches). • Trim excess fat from previous oven. Clock, indicator words, and/or lights operate but oven does not heat. Food is securely inserted into the rails in use. Check or replace fuse. • Check power supply. • Check if surface and/or oven controls have been properly set for a delayed bake or clean program. See page 9. • Make sure the oven vent has not been blocked. Never line the broiler insert with foil. • Oven door...
... 4 inches). • Trim excess fat from previous oven. Clock, indicator words, and/or lights operate but oven does not heat. Food is securely inserted into the rails in use. Check or replace fuse. • Check power supply. • Check if surface and/or oven controls have been properly set for a delayed bake or clean program. See page 9. • Make sure the oven vent has not been blocked. Never line the broiler insert with foil. • Oven door...
Use and Care Manual
Page 24
... an error or a problem. Tiny scratches or abrasions. • Make sure cooktop and pan bottom are clean. 4. Press the CANCEL pad and allow the oven to cool completely, wipe out excess soil, then reset the clean cycle. Fault Codes • BAKE or LOCK may flash rapidly in Sabbath Mode. Troubleshooting PROBLEM SOLUTION Oven will not self-clean. • Check to make sure the cycle is not set for a new range...
... an error or a problem. Tiny scratches or abrasions. • Make sure cooktop and pan bottom are clean. 4. Press the CANCEL pad and allow the oven to cool completely, wipe out excess soil, then reset the clean cycle. Fault Codes • BAKE or LOCK may flash rapidly in Sabbath Mode. Troubleshooting PROBLEM SOLUTION Oven will not self-clean. • Check to make sure the cycle is not set for a new range...
Use and Care Manual
Page 26
... for factory specified parts and repair labor to correct defects in accordance with electrical or plumbing codes, or use your major appliance, to replace or repair house fuses, or to correct house wiring or plumbing. 2. Repairs to parts or systems resulting from unauthorized modifications made to obtain service under these excluded circumstances shall be provided by Maytag. 5. DISCLAIMER OF IMPLIED WARRANTIES; Consumable parts are excluded from...
... for factory specified parts and repair labor to correct defects in accordance with electrical or plumbing codes, or use your major appliance, to replace or repair house fuses, or to correct house wiring or plumbing. 2. Repairs to parts or systems resulting from unauthorized modifications made to obtain service under these excluded circumstances shall be provided by Maytag. 5. DISCLAIMER OF IMPLIED WARRANTIES; Consumable parts are excluded from...


