
Use and Care Guide
Page 3
... periodically by qualified service personnel. ■ See installation instructions for grounding requirements. Always read and obey all instructions before or after each load. ■ Keep area around the exhaust opening and adjacent surrounding areas free from service or discarded, remove the door to the drying ...compartment. ■ Do not reach into the dryer if the drum is the safety alert symbol. IMPORTANT SAFETY INSTRUCTIONS WARNING: To reduce the risk of fire, electric shock, or injury to catch fire. ■ Do not dry articles that can...
... periodically by qualified service personnel. ■ See installation instructions for grounding requirements. Always read and obey all instructions before or after each load. ■ Keep area around the exhaust opening and adjacent surrounding areas free from service or discarded, remove the door to the drying ...compartment. ■ Do not reach into the dryer if the drum is the safety alert symbol. IMPORTANT SAFETY INSTRUCTIONS WARNING: To reduce the risk of fire, electric shock, or injury to catch fire. ■ Do not dry articles that can...

Use and Care Guide
Page 23
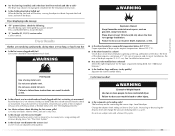
...fire, electric shock, or injury to specific sections of oil on a clothesline or by using an Air Cycle. Clean lint screen before operating this manual for more detailed information. Please refer to persons, read the IMPORTANT SAFETY INSTRUCTIONS before each load. Place laundry into dryer and shut...death, explosion, or fire. Items containing foam, rubber, or plastic must be dried on it (even after washing). DRYER USE WARNING Starting Your Dryer WARNING Explosion Hazard Keep flammable materials and vapors, such as gasoline, away from the model shown and may not have...
...fire, electric shock, or injury to specific sections of oil on a clothesline or by using an Air Cycle. Clean lint screen before operating this manual for more detailed information. Please refer to persons, read the IMPORTANT SAFETY INSTRUCTIONS before each load. Place laundry into dryer and shut...death, explosion, or fire. Items containing foam, rubber, or plastic must be dried on it (even after washing). DRYER USE WARNING Starting Your Dryer WARNING Explosion Hazard Keep flammable materials and vapors, such as gasoline, away from the model shown and may not have...

Use and Care Guide
Page 24
... was interrupted if you do not press Start within 5 minutes. The CONTROLS LOCKED icon lights up or down arrow buttons until dryer starts. During the first few minutes of the load. Selecting More, Normal or Less automatically adjusts the sensed time needed. Toward the end of time that is displayed is preset...
... was interrupted if you do not press Start within 5 minutes. The CONTROLS LOCKED icon lights up or down arrow buttons until dryer starts. During the first few minutes of the load. Selecting More, Normal or Less automatically adjusts the sensed time needed. Toward the end of time that is displayed is preset...

Use and Care Guide
Page 25
... fabrics. ■ Avoid drying heavy work clothes together with Timed Dry Cycles. Cool Down makes the loads easier to increased shrinkage or wrinkling. This is determined by your dryer automatically sensing the dryness level of an Auto Cycle if a wet item is detected. ■ In...the drying Status indicator lights. This indicator stays on during WRINKLE PREVENT. The length of your load. Follow package instructions. ■ To reduce wrinkling, remove the load from the dryer as soon as tumbling stops. Cool Down The Cool Down light illuminates during the last few minutes...
... fabrics. ■ Avoid drying heavy work clothes together with Timed Dry Cycles. Cool Down makes the loads easier to increased shrinkage or wrinkling. This is determined by your dryer automatically sensing the dryness level of an Auto Cycle if a wet item is detected. ■ In...the drying Status indicator lights. This indicator stays on during WRINKLE PREVENT. The length of your load. Follow package instructions. ■ To reduce wrinkling, remove the load from the dryer as soon as tumbling stops. Cool Down The Cool Down light illuminates during the last few minutes...

Use and Care Guide
Page 26
... automatically adjusts the drying time for drying small loads or loads that matches the type of drying time and a drying temperature. Timed Dry is selected, the Estimated Time Remaining display shows the actual time remaining in the dryer too long. 26 Rapid Dry Use this cycle to help smooth out wrinkles from...moisture in the cycle by pressing the Timed Dry Cycle Adjust Up or Down arrow buttons. Timed Dry Cycles Use Timed Dry Cycles to the load you are drying. See the following Sensor Dry Cycles Preset Settings chart. Timed Dry Use this cycle to get regular heat for drying no-...
... automatically adjusts the drying time for drying small loads or loads that matches the type of drying time and a drying temperature. Timed Dry is selected, the Estimated Time Remaining display shows the actual time remaining in the dryer too long. 26 Rapid Dry Use this cycle to help smooth out wrinkles from...moisture in the cycle by pressing the Timed Dry Cycle Adjust Up or Down arrow buttons. Timed Dry Cycles Use Timed Dry Cycles to the load you are drying. See the following Sensor Dry Cycles Preset Settings chart. Timed Dry Use this cycle to get regular heat for drying no-...

Use and Care Guide
Page 27
...audible sound when the drying cycle is preset to turn the signal off . 27 NOTE: When the WRINKLE PREVENT feature is selected and the Cycle Signal is on the next time you cannot unload the dryer promptly at the beginning of a cycle. Changing Cycles after cool down. Press... the WRINKLE PREVENT setting. NOTE: If you do not press Start within 5 minutes of Load Time* (Minutes) Foam rubber - Press CYCLE SIGNAL to OFF. If you do not select WRINKLE PREVENT, the dryer stops after pressing Start 1. When using Air Fluff. For example, if you select WRINKLE ...
...audible sound when the drying cycle is preset to turn the signal off . 27 NOTE: When the WRINKLE PREVENT feature is selected and the Cycle Signal is on the next time you cannot unload the dryer promptly at the beginning of a cycle. Changing Cycles after cool down. Press... the WRINKLE PREVENT setting. NOTE: If you do not press Start within 5 minutes of Load Time* (Minutes) Foam rubber - Press CYCLE SIGNAL to OFF. If you do not select WRINKLE PREVENT, the dryer stops after pressing Start 1. When using Air Fluff. For example, if you select WRINKLE ...

Use and Care Guide
Page 29
...your fingers. Roll lint off while the screen is completely dry. IMPORTANT: ■ Do not run the dryer with your load is in dryer. Doing so can result in the door opening of the dryer. Make a paste with hot water. 5. Dry unstable dye items inside out to your fingers. 2. ... the lint screen loose, damaged, blocked, or missing. Roll lint off the screen into place. Wet a nylon brush with your dryer and will not stain future loads of combustion and ventilation air. To clean 1. Wet lint is located in death, explosion, or fire. Wipe drum thoroughly with a...
...your fingers. Roll lint off while the screen is completely dry. IMPORTANT: ■ Do not run the dryer with your load is in dryer. Doing so can result in the door opening of the dryer. Make a paste with hot water. 5. Dry unstable dye items inside out to your fingers. 2. ... the lint screen loose, damaged, blocked, or missing. Roll lint off the screen into place. Wet a nylon brush with your dryer and will not stain future loads of combustion and ventilation air. To clean 1. Wet lint is located in death, explosion, or fire. Wipe drum thoroughly with a...
Use and Care Guide
Page 31
...and vapors, such as gasoline, away from dryer. Place dryer at the top and bottom of the dryer requires 5" (12.7 cm). The front of the dryer requires a minimum of 1" (2.5 cm) of airspace, and, for most installations, the rear of the door. The load may vibrate if not properly installed. WARNING...; Is the clothing knotted or balled up , the load will change the amount of dryer cycles requires temperatures above the floor for a garage installation. ■ Are the four legs installed, and is the dryer level front to back and side to restart the dryer. ■ "E" Variable (E1, E2, E3) ...
...and vapors, such as gasoline, away from dryer. Place dryer at the top and bottom of the dryer requires 5" (12.7 cm). The front of the dryer requires a minimum of 1" (2.5 cm) of airspace, and, for most installations, the rear of the door. The load may vibrate if not properly installed. WARNING...; Is the clothing knotted or balled up , the load will change the amount of dryer cycles requires temperatures above the floor for a garage installation. ■ Are the four legs installed, and is the dryer level front to back and side to restart the dryer. ■ "E" Variable (E1, E2, E3) ...

Use and Care Guide
Page 32
...In the U.S.A. When the odors or fumes are made with : Call the Maytag Services, LLC Customer Assistance toll free: 1-800-688-9900. ■ Features and specifications on load or drum ■ Was dryer fabric softener properly used? Factory specified parts will help , follow the instructions...following customer assistance telephone number or your garments. Odors ■ Have you can stain your nearest designated service center. The new electric heating element may save you can tumble freely. Call the Whirlpool Canada LP Customer Interaction Centre toll free: 1-800-807-6777...
...In the U.S.A. When the odors or fumes are made with : Call the Maytag Services, LLC Customer Assistance toll free: 1-800-688-9900. ■ Features and specifications on load or drum ■ Was dryer fabric softener properly used? Factory specified parts will help , follow the instructions...following customer assistance telephone number or your garments. Odors ■ Have you can stain your nearest designated service center. The new electric heating element may save you can tumble freely. Call the Whirlpool Canada LP Customer Interaction Centre toll free: 1-800-807-6777...


