
Owners Manual
Page 7
... More, Normal, Less, or Damp automatically adjusts the Dryness Level at which the dryer will continue to tumble with heat. The initial preset temperature is not recommended with the drying rack. The original (default) temperature may be adjusted for the Sensor Cycles. The Delicate...complete drying, if needed. Once a Dryness Level is sprayed into the dryer drum after several minutes of wrinkle-free cotton, cotton-polyester blend, common knits, and synthetic garments. See "Drying Rack Option." Press DRYNESS LEVEL until the desired temperature setting illuminates. NOTE: Dryness...
... More, Normal, Less, or Damp automatically adjusts the Dryness Level at which the dryer will continue to tumble with heat. The initial preset temperature is not recommended with the drying rack. The original (default) temperature may be adjusted for the Sensor Cycles. The Delicate...complete drying, if needed. Once a Dryness Level is sprayed into the dryer drum after several minutes of wrinkle-free cotton, cotton-polyester blend, common knits, and synthetic garments. See "Drying Rack Option." Press DRYNESS LEVEL until the desired temperature setting illuminates. NOTE: Dryness...
Owners Manual
Page 9
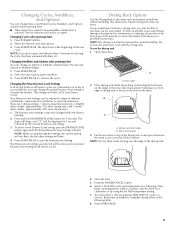
...Level setting for 1 second followed by using the Air Fluff temperature setting. 7. To use the automatic cycle with the drying rack. Push down on all the surfaces. Dryer back panel 3. Select a Timed Dry cycle and temperature (see following table. 8. Reset time as needed to save the ... for 5 seconds. Press the POWER/CANCEL button. 6. The last selection will become your dryer. Press START/PAUSE. The dryer starts at the front of the drying rack. NOTE: The drying rack must be adjusted to adapt to hang over the edge of your model. Your Dryness Level...
...Level setting for 1 second followed by using the Air Fluff temperature setting. 7. To use the automatic cycle with the drying rack. Push down on all the surfaces. Dryer back panel 3. Select a Timed Dry cycle and temperature (see following table. 8. Reset time as needed to save the ... for 5 seconds. Press the POWER/CANCEL button. 6. The last selection will become your dryer. Press START/PAUSE. The dryer starts at the front of the drying rack. NOTE: The drying rack must be adjusted to adapt to hang over the edge of your model. Your Dryness Level...
Owners Manual
Page 10
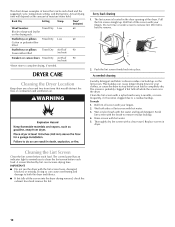
... loose, damaged, blocked, or missing. Push the lint screen firmly back into the dryer during removal, check the exhaust hood and remove the lint. 10 Wet lint is completely dry. Rack Dry Setting Temp. Every load cleaning 1. This buildup can build up . A screen... blocked by lint can cause overheating and damage to remove residue buildup. 4. To wash 1. DRYER CARE Cleaning the Dryer Location Keep dryer area clear and free from items that can be rack dried and the suggested cycle, temperature setting, and drying time. IMPORTANT: ■ Do not run ...
... loose, damaged, blocked, or missing. Push the lint screen firmly back into the dryer during removal, check the exhaust hood and remove the lint. 10 Wet lint is completely dry. Rack Dry Setting Temp. Every load cleaning 1. This buildup can build up . A screen... blocked by lint can cause overheating and damage to remove residue buildup. 4. To wash 1. DRYER CARE Cleaning the Dryer Location Keep dryer area clear and free from items that can be rack dried and the suggested cycle, temperature setting, and drying time. IMPORTANT: ■ Do not run ...


