Maytag MEDB200VQ Support Question
Maytag MEDB200VQ Support Question
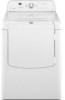
Find answers below for this question about Maytag MEDB200VQ - Bravos Series 29-in Electric Dryer.Need a Maytag MEDB200VQ manual? We have 2 online manuals for this item!
Question posted by Russlefler on June 7th, 2017
Dryer Powers Up But Won't Start
After pushing power button, no display is shown and will not start, several led,s flashing, put in diagnostic mode and after 888 is displayed get a code F P3 flashes
Current Answers
Answer #1: Posted by Odin on June 7th, 2017 11:53 AM
Odin

Member since:
April 10th, 2010 Points: 41,236,690

Member since:
April 10th, 2010 Points: 41,236,690
Hope this is useful. Please don't forget to click the Accept This Answer button if you do accept it. My aim is to provide reliable helpful answers, not just a lot of them. See https://www.helpowl.com/profile/Odin.
Related Maytag MEDB200VQ Manual Pages
Owners Manual - Page 2
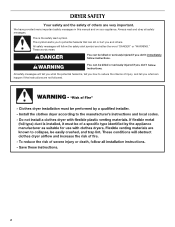
DRYER SAFETY
Your safety and the safety of injury, and tell you what the potential hazard is the safety alert symbol.
WARNING
You can be killed ...
Owners Manual - Page 3
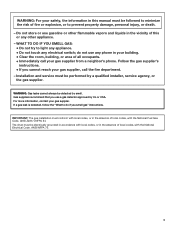
...Do not try to do not use any phone in the absence of local codes, with the National Electrical Code, ANSI/NFPA 70.
3 Gas suppliers recommend that you use gasoline or other..., the information in the absence of local codes, with the National Fuel Gas Code, ANSI Z223.1/NFPA 54.
The dryer must be electrically grounded in accordance with local codes, or in your building. • Clear...
Owners Manual - Page 4
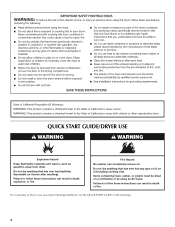
Failure to use your dryer following installation, see the QUICK START GUIDE on it (even after washing). For a summary of oil on the next page.
4 Do not dry ... in death or fire.
Do not dry anything flammable on a clothesline or by using an Air Cycle.
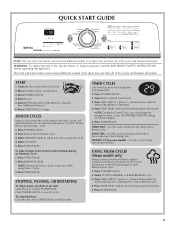
QUICK START GUIDE/DRYER USE
WARNING
WARNING
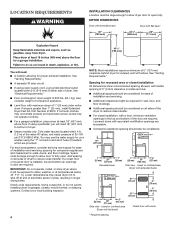
Explosion Hazard
Keep flammable materials and vapors, such as gasoline, away from...
Owners Manual - Page 5
...settings for more detail on some models) - Press START/PAUSE until the desired drying time is displayed.
4. Press TIME ADJUST + (plus ) or - (minus) buttons until dryer starts. RAPID DRY - Use this appliance.
Press START/PAUSE.
5
Press START/PAUSE. TIMED DRY - FRESHEN UP (on each load. 2. Press POWER/CANCEL. 4. Press START/PAUSE to the Dryness and/or Options during an...
Owners Manual - Page 6
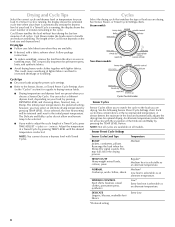
... (in the drying process. Adjust the temperature of a Timed Cycle by pressing the TEMP LEVEL button. This step will be selected.
■ If you are available.
■ If desired, add... level or temperature for optimal drying. This is running , the display shows the estimated cycle time when your dryer is selectable as an alternate temperature. The initial preset temperature is ...
Owners Manual - Page 7

...have been left in the dryer too long. The initial preset temperature is selected, the Estimated Time Remaining display shows the actual time remaining in the dryer too long. The Delicate and...some models)
Helps to smooth out
wrinkles
Additional Features
Sensor Cycle Modifiers
Use the DRYNESS LEVEL button to select a specific amount of water is not available with the Timed or Steam Cycles...
Owners Manual - Page 9
... can be accepted. The Dryness Level settings cannot be changed while the dryer is shown.
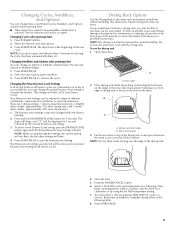
Front edge
2.
Drying rack front edge B. Press the POWER/CANCEL button. 6. You must select a time by using the Air Fluff temperature setting. 7. Changing Modifiers and Options after pressing Start 1. Changing the Preset Dryness Level Settings If all of your loads...
Owners Manual - Page 11

... unstable dyes, such as denim blue jeans or brightly colored cotton items, may stay in the hoses, freezing can result in death or electrical shock.
1. Unplug dryer or disconnect power. 2. Disconnect power. 2. Unplug dryer or disconnect power. 2. Wipe drum thoroughly with a soft cloth until stain is removed.
2. Tumble a load of clean cloths or towels to your...
Owners Manual - Page 12

... run when this diagnostic code is free of the power outage, you are intact and tight, or that both fuses are using.
Select a Timed Cycle, and restart the dryer. Replace the bulb with the screw.
4. Replace the fuse or reset the circuit breaker. Electric dryers use two household fuses or breakers. Dryer displaying code message
■ "PF" (power failure), check...
Installation Instructions - Page 3
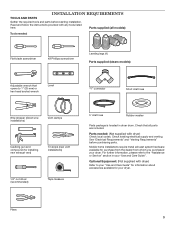
... Requirements" before starting installation. Check existing electrical supply and venting. For further information, please refer to 1" (25 mm) or hex-head socket wrench
Level
"Y" connector
Short inlet hose
Wire stripper (direct wire installations)
Vent clamps
Caulking gun and compound (for your dryer. Pliers 3 Optional Equipment: (Not supplied with dryer) Check local codes. Check that...
Installation Instructions - Page 4
...■■ Additional spacing should be considered on all sides of dryer. Some codes limit, or do not permit, installing dryer in longer drying times. Spacing for recessed area or closet installation All... washer using power supply cord, a grounded electrical outlet located within 4 ft. (1.2 m) of the water fill valves, and water pressure of 5" (127 mm) clearance behind dryer for walls,...
Installation Instructions - Page 5
... is installed in ring terminals or spade terminals with all local codes and ordinances.
For further information, see "Optional 3-wire connection" section.
■■ A 4-wire power supply connection must be plugged into dryer. The National Electrical Code requires a 4-wire power supply connection for purchase from : National Fire Protection Association, One Batterymarch Park, Quincy...
Installation Instructions - Page 6
...
1.
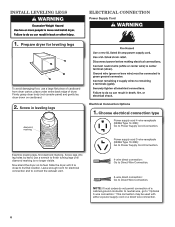
Install Leveling Legs
Electrical Connection
Power Supply Cord
1. place under entire back edge of cardboard from dryer carton; NOTE: If local codes do not permit connection of a cabinet-ground conductor to neutral wire, go to Power Supply Cord Connection.
Screw legs into leg holes by hand, use a large flat piece of dryer.
Power supply cord 3-wire receptacle...
Installation Instructions - Page 7
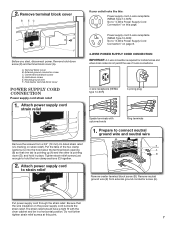
...start, disconnect power. Center terminal block screw D. Hold-down screw (D) and terminal block cover (A). Attach power supply cord
strain relief
A B C D
Power supply cord 3-wire receptacle (NEMA Type 10-30R): Go to "4-Wire Power Supply Cord Connection" on page 8.
4-wire Power... the dryer cabinet and be in place. Remove hold the two clamp sections (C) together.
2. A. Attach power supply ...
Installation Instructions - Page 8
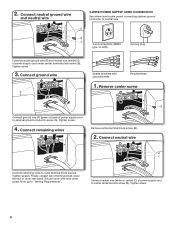
... codes permit connecting cabinet-ground conductor to outer terminal block screws. Connect neutral wire
B C
Connect remaining wires to neutral wire. 2. Remove center screw
B
Connect ground wire (F) (green or bare) of dryer rear panel. Tighten screw.
3. E
B
C
3-wire receptacle (NEMA
3-prong plug
type 10-30R)
Connect neutral ground wire (E) and neutral wire (white) (C) of power...
Installation Instructions - Page 11
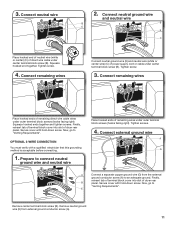
Squeeze hooked end together. Connect remaining wires
Place hooked ends of dryer rear
B
panel.
Now, go to
"Venting Requirements". Squeeze hooked ...wire
and neutral wire
B
B
C
E
C
Place hooked end of neutral wire (white or center) (C) of power supply cord or cable under outer terminal block screws (hooks facing right). Connect remaining wires
Connect neutral ground wire (E) ...
Installation Instructions - Page 13

...18" (460 mm) mismatch
P art Number 4396011 - 18" (460 mm) to 29" (737 mm) mismatch
Part Number 4396014 - 29" (737 mm) to 50" (1270 mm) mismatch
Special provisions for your local dealer....elbows H. Wall D.
Part Number 8212503
If you prefer, dryer may be securely fastened to have dryer converted. Other installations are shown. Select the type best for mobile homes:
Exhaust vent must...
Installation Instructions - Page 14

... (14.6 m)
2
Rigid metal 44 ft. (13.4 m) 38 ft. (11.6 m)
3
Rigid metal 35 ft. (10.7 m) 29 ft. (8.8 m)
4
Rigid metal 27 ft. (8.2 m) 21 ft. (6.4 m)
NOTE: Bottom exhaust installations have a 90° turn ... mm)
2. The Vent System Chart provides venting requirements that extend into interior of dryer.
■■ Reduce performance, resulting in the "Y" connector. Determine vent path:...
Installation Instructions - Page 17
...• Start button has been pushed firmly.
• Dryer is an extra part, go away.
If you receive an L2 code, there ... cycle, and start of its first cycle. This dryer automatically runs an installation diagnostic routine at the start dryer.
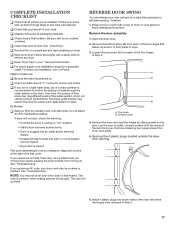
REVERSE DOOR... materials. See "Level Dryer". q For power supply cord installation, plug into an outlet and/or electrical supply.
• Household...
Installation Instructions - Page 19

... there may not have heat. Electric dryers require a 240-volt power supply. The drum may be two household fuses or circuit breakers for 5-10 minutes. Elelctric dryers use it only once.
■■ Is the exhaust vent the correct length?
Press and hold START/PAUSE to restart the dryer.
■■ "L2" Diagnostic Code (low or no line...
Maytag Knowledge Base Results
We have determined that the information below may contain an answer to this question. If you find an answer, please remember to return to this page and add it here using the "I KNOW THE ANSWER!" button above. It's that easy to earn points!-
My dishwasher will not start
... display, the control displays "- -" during a cycle if the door is not latched. Check for cycles selected will flash if the door is installed backward will also cause incomplete door closure. Is the door open the door after the last cycle. Open and close the door, and then press Start/Resume. Is there power... -
How do I open the lid?- Top-Load HE with Dispenser Drawer
If you started , press Start/Pause/Unlock. Press the Power button to resume the cycle. The lid will reset the lock. Under certain conditions, the lid may take several minutes if the load is flashing - Wait until the lid lock light turns off . Top-load HE washer with Dispenser Drawer The door will not... -
How do I remove odors from my Top-loading HE washer? Top-load HE with Dispensing Drawer
...Use of water seems too low - Press Start. - the lid will lock, and the... do I remove odors from my Bravos High Efficiency washer? If using liquid chlorine bleach...does not sufficiently improve washer freshness, evaluate your laundry room is not working correctly - Add cleaning ...which should be cancelled by pressing the Power button once. If the Clean Washer cycle is ...
Similar Questions

Maytag Gas Dryer Repair Bravos Series 300 How To Attach Blower Belr
(Posted by RyokMARYL 9 years ago)

Maytage Epicz Dryer. After Pushing Power Button And Start Button It Makes A Clic
Click noise what is solution?
Click noise what is solution?
(Posted by villarrealdebbie1 10 years ago)

Broken Female Part, Dryer Door
How Do I Order The Replacement Part For My Bravo Dryer
How Do I Order The Replacement Part For My Bravo Dryer
(Posted by AKRS13 10 years ago)

My Maytag Quiet Series 300 Dryer Medb200vq Is Not Blowing Air.
I paid to have the fan put back on once already My brother says he will come do what he can but I a...
I paid to have the fan put back on once already My brother says he will come do what he can but I a...
(Posted by sookrazy 10 years ago)

Dryer Rack For Med200vq
Can a dryer rack be used with the Maytag model MED200VQ and, if so, what is the part number?
Can a dryer rack be used with the Maytag model MED200VQ and, if so, what is the part number?
(Posted by bethhintz 12 years ago)