
User Guide
Page 6
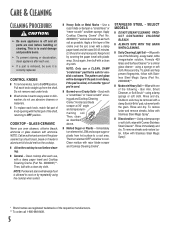
...registered trademarks of the following - Keep moist by repeatedly using the cooktop when soiled. ❚ Heavy Soils or Metal Marks - Clean residue with plastic wrap. Clean cooktop after each knob, match flat part of knob opening with the flat part of the following - Care & Cleaning... Cleaning Procedures CAUTION: ➢ Be sure appliance is allowed to cool. Hold a razor blade scraper at 30° angle and scrape any ...
...registered trademarks of the following - Keep moist by repeatedly using the cooktop when soiled. ❚ Heavy Soils or Metal Marks - Clean residue with plastic wrap. Clean cooktop after each knob, match flat part of knob opening with the flat part of the following - Care & Cleaning... Cleaning Procedures CAUTION: ➢ Be sure appliance is allowed to cool. Hold a razor blade scraper at 30° angle and scrape any ...

Parts List
Page 2
...−60 Use & Care Guide Safer Cooking Tips 9762761 English W10065852 French Wiring Diagram 8119P207−60 English 8119P208−60 French 2 Cooktop 7920P211−60 Black/Stainless 7920P212−60 White 3 7101P309−60 Screw 4 8008P068−60 Grommet, Wire 5 8008P076−60... Grommet 6 4011F508−51 Box, Burner 7 Knob, Control (4) 7737P389−60 White 7737P388−60 Black/Stainless 8 Switch, Infinite 7403P754−60 LR/LF 7403P755−60 RR 7403P816&#...
...−60 Use & Care Guide Safer Cooking Tips 9762761 English W10065852 French Wiring Diagram 8119P207−60 English 8119P208−60 French 2 Cooktop 7920P211−60 Black/Stainless 7920P212−60 White 3 7101P309−60 Screw 4 8008P068−60 Grommet, Wire 5 8008P076−60... Grommet 6 4011F508−51 Box, Burner 7 Knob, Control (4) 7737P389−60 White 7737P388−60 Black/Stainless 8 Switch, Infinite 7403P754−60 LR/LF 7403P755−60 RR 7403P816&#...
Installation Instructions
Page 3
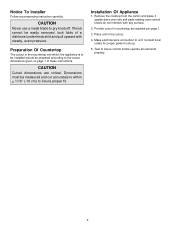
... dimensions are critical. Provide cutout in the cutout. 4. Test to unit. Notice To Installer Follow accompanying instruction carefully. Make electrical wire connection to insure control knobs operate all elements properly. 3 Consult local codes for proper power hook-up. 5. CAUTION Never use a metal blade to... the cutout dimensions given on page 1 of a dishtowel under knob skirt and pull upward with any surface. 2. Dimensions must be easily removed, tuck folds of these instructions. Remove the cooktop from the carton and place it upside down over two soft pads making...
... dimensions are critical. Provide cutout in the cutout. 4. Test to unit. Notice To Installer Follow accompanying instruction carefully. Make electrical wire connection to insure control knobs operate all elements properly. 3 Consult local codes for proper power hook-up. 5. CAUTION Never use a metal blade to... the cutout dimensions given on page 1 of a dishtowel under knob skirt and pull upward with any surface. 2. Dimensions must be easily removed, tuck folds of these instructions. Remove the cooktop from the carton and place it upside down over two soft pads making...


