
Owners Manual
Page 3
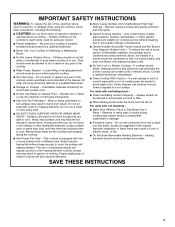
... They should be allowed to avoid steam burn. Flammable materials should not be stored near surface units. ■ Do Not Use Water on any part of a utensil should never be positioned so that may penetrate the broken cooktop and create a risk of interest to children in ignition of clothing....may result in a risk of these pans or bowls during cooking may become hot enough to a hot surface. Do not repair or replace any part of undersized utensils will also improve efficiency. ■ Never Leave Surface Units Unattended at High Heat Settings - During and after use . For units...
... They should be allowed to avoid steam burn. Flammable materials should not be stored near surface units. ■ Do Not Use Water on any part of a utensil should never be positioned so that may penetrate the broken cooktop and create a risk of interest to children in ignition of clothing....may result in a risk of these pans or bowls during cooking may become hot enough to a hot surface. Do not repair or replace any part of undersized utensils will also improve efficiency. ■ Never Leave Surface Units Unattended at High Heat Settings - During and after use . For units...
Owners Manual
Page 6
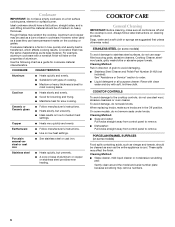
..., but unevenly. ■ Ideal results on low to remove. STAINLESS STEEL (on the properties of grain to avoid damaging. ■ Stainless Steel Cleaner and Polish Part Number 31462 (not included): See "Assistance or Service" section to -heavy thickness. COOKTOP CONTROLS To avoid damage to stainless steel surfaces, do not use soapfilled...
..., but unevenly. ■ Ideal results on low to remove. STAINLESS STEEL (on the properties of grain to avoid damaging. ■ Stainless Steel Cleaner and Polish Part Number 31462 (not included): See "Assistance or Service" section to -heavy thickness. COOKTOP CONTROLS To avoid damage to stainless steel surfaces, do not use soapfilled...

Owners Manual
Page 8
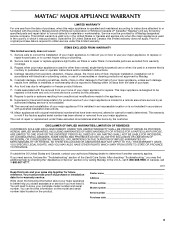
...work right because they are trained to build every new MAYTAG® appliance. Maytag® appliances designated service technicians are trained to order replacement parts, we recommend that you use only factory specified parts. Our consultants provide assistance with the same precision used to... product warranty and provide after -warranty service, anywhere in Canada. If you can write to local dealers, repair parts distributors and service companies. Maytag® appliances designated service technicians are made with : ■ Features and specifications on our full line of a...
...work right because they are trained to build every new MAYTAG® appliance. Maytag® appliances designated service technicians are trained to order replacement parts, we recommend that you use only factory specified parts. Our consultants provide assistance with the same precision used to... product warranty and provide after -warranty service, anywhere in Canada. If you can write to local dealers, repair parts distributors and service companies. Maytag® appliances designated service technicians are made with : ■ Features and specifications on our full line of a...
Owners Manual
Page 9
... household use your major appliance, to replace or repair house fuses, or to correct house wiring or plumbing. 2. Repairs to parts or systems resulting from your major appliance. SOME STATES AND PROVINCES DO NOT ALLOW THE EXCLUSION OR LIMITATION OF INCIDENTAL OR CONSEQUENTIAL ...to be easily determined. Major appliances with electrical or plumbing codes, or use of consumables or cleaning products not approved by calling Maytag. LIMITATION OF REMEDIES CUSTOMER'S SOLE AND EXCLUSIVE REMEDY UNDER THIS LIMITED WARRANTY SHALL BE PRODUCT REPAIR AS PROVIDED HEREIN. After checking ...
... household use your major appliance, to replace or repair house fuses, or to correct house wiring or plumbing. 2. Repairs to parts or systems resulting from your major appliance. SOME STATES AND PROVINCES DO NOT ALLOW THE EXCLUSION OR LIMITATION OF INCIDENTAL OR CONSEQUENTIAL ...to be easily determined. Major appliances with electrical or plumbing codes, or use of consumables or cleaning products not approved by calling Maytag. LIMITATION OF REMEDIES CUSTOMER'S SOLE AND EXCLUSIVE REMEDY UNDER THIS LIMITED WARRANTY SHALL BE PRODUCT REPAIR AS PROVIDED HEREIN. After checking ...
Installation Instructions
Page 2
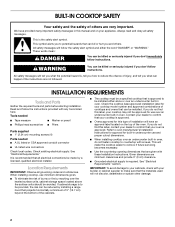
... type of installation will follow the instructions provided with these Installation Instructions. INSTALLATION REQUIREMENTS Tools and Parts Gather the required tools and parts before starting installation. Check existing electrical supply. IMPORTANT: To avoid damage to be installed either the.... Tools needed ■ Tape measure ■ Marker or pencil ■ Phillips head screwdriver ■ Pliers Parts supplied ■ 1" (2.54 cm) mounting screws (4) Parts needed ■ A UL listed or CSA approved conduit connector ■ UL listed wire connectors Check local codes...
... type of installation will follow the instructions provided with these Installation Instructions. INSTALLATION REQUIREMENTS Tools and Parts Gather the required tools and parts before starting installation. Check existing electrical supply. IMPORTANT: To avoid damage to be installed either the.... Tools needed ■ Tape measure ■ Marker or pencil ■ Phillips head screwdriver ■ Pliers Parts supplied ■ 1" (2.54 cm) mounting screws (4) Parts needed ■ A UL listed or CSA approved conduit connector ■ UL listed wire connectors Check local codes...
Installation Instructions
Page 3
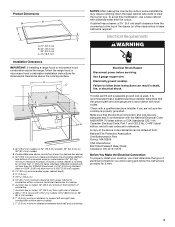
...;⁄₄" [0.6 cm] flame retardant millboard covered with the National Electrical Code, ANSI/NFPA 70-latest edition or CSA Standards C22.1-94, Canadian Electrical Code, Part 1 and C22.2 No. Electrical Requirements WARNING Electrical Shock Hazard Disconnect power before servicing. Failure to follow the instructions provided for dimensional clearances above code standards...
...;⁄₄" [0.6 cm] flame retardant millboard covered with the National Electrical Code, ANSI/NFPA 70-latest edition or CSA Standards C22.1-94, Canadian Electrical Code, Part 1 and C22.2 No. Electrical Requirements WARNING Electrical Shock Hazard Disconnect power before servicing. Failure to follow the instructions provided for dimensional clearances above code standards...
Installation Instructions
Page 6
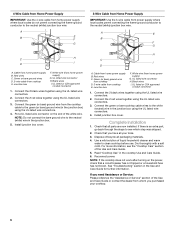
... connector 1. Connect the 2 red wires together using the UL listed wire connectors. 3. Complete Installation 1. Check that you purchased your tools. 3. If there is an extra part, go back through the steps to the green (or bare) ground wire (in the junction box) using the UL listed wire connectors. 4. Check that all... Assistance or Service: Please reference the "Assistance or Service" section of the Use and Care Guide or contact the dealer from whom you have all parts are now installed.
... connector 1. Connect the 2 red wires together using the UL listed wire connectors. 3. Complete Installation 1. Check that you purchased your tools. 3. If there is an extra part, go back through the steps to the green (or bare) ground wire (in the junction box) using the UL listed wire connectors. 4. Check that all... Assistance or Service: Please reference the "Assistance or Service" section of the Use and Care Guide or contact the dealer from whom you have all parts are now installed.

