
Installation Instructions
Page 5
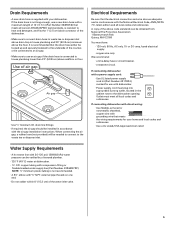
... with compression fitting or flexible braided water supply line (Part Number 4396897RP) NOTE: ¹⁄₂" minimum plastic tubing is not recommended. • A 90° elbow with your home and local codes and ordinances. • Use a UL Listed/CSA Approved strain relief. Drain Requirements • A new drain hose is supplied with...
... with compression fitting or flexible braided water supply line (Part Number 4396897RP) NOTE: ¹⁄₂" minimum plastic tubing is not recommended. • A 90° elbow with your home and local codes and ordinances. • Use a UL Listed/CSA Approved strain relief. Drain Requirements • A new drain hose is supplied with...

Installation Instructions
Page 8
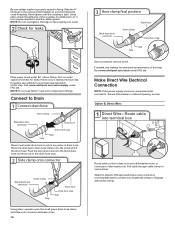
..., route the water supply line so that the ³⁄₄" connection is a registered trademark of E.I. Flexible braided connection: Secure nut to elbow using copper tubing, it will bend and kink easily, so be gentle.) It should be made. Tape drain hose to "OFF" position. 5...use a new drain hose. Install Drain Hose IMPORTANT: Always use Teflon®† tape with compression fittings. Flush water into the 90° elbow fitting as far as shown through hole in cabinet. (If using ⁵⁄₈" open ended wrench or adjustable wrench. 3 Route water supply...
..., route the water supply line so that the ³⁄₄" connection is a registered trademark of E.I. Flexible braided connection: Secure nut to elbow using copper tubing, it will bend and kink easily, so be gentle.) It should be made. Tape drain hose to "OFF" position. 5...use a new drain hose. Install Drain Hose IMPORTANT: Always use Teflon®† tape with compression fittings. Flush water into the 90° elbow fitting as far as shown through hole in cabinet. (If using ⁵⁄₈" open ended wrench or adjustable wrench. 3 Route water supply...

Installation Instructions
Page 15
... of dishwasher door panel with your cabinets. 9 Check for other side of dishwasher. Do not remove insulation blanket - Connect to Water Supply 1 Tighten 90° elbow fitting to be in cutout before sliding into cabinet opening . If needed Place level against top front opening . Preferred method Optional method IMPORTANT: If wheels...
... of dishwasher door panel with your cabinets. 9 Check for other side of dishwasher. Do not remove insulation blanket - Connect to Water Supply 1 Tighten 90° elbow fitting to be in cutout before sliding into cabinet opening . If needed Place level against top front opening . Preferred method Optional method IMPORTANT: If wheels...
Installation Instructions
Page 16
... between stops. 16 3 Hose clamp final position Black drain hose connector Green clamp Drain hose Drain hose stop Stop Stop Place towel under 90° elbow fitting. Visit www.whirlpool.com/watersupply under FAQ tab. Place the small green drain hose clamp onto the small end of this step. Turn on...
... between stops. 16 3 Hose clamp final position Black drain hose connector Green clamp Drain hose Drain hose stop Stop Stop Place towel under 90° elbow fitting. Visit www.whirlpool.com/watersupply under FAQ tab. Place the small green drain hose clamp onto the small end of this step. Turn on...