
Warranty Information
Page 1
... or installation, installation not in which it was purchased. light bulbs, batteries, air or water filters, preservation solutions, etc.). 5. Repairs to parts or systems to determine whether another warranty applies. Removal or reinstallation of repair or replacement under this major appliance other rights that comes with original model/serial numbers removed, altered or not easily determined. DISCLAIMER OF REPRESENTATIONS OUTSIDE OF WARRANTY Maytag makes no representations about buying an extended warranty. EXCLUSION...
... or installation, installation not in which it was purchased. light bulbs, batteries, air or water filters, preservation solutions, etc.). 5. Repairs to parts or systems to determine whether another warranty applies. Removal or reinstallation of repair or replacement under this major appliance other rights that comes with original model/serial numbers removed, altered or not easily determined. DISCLAIMER OF REPRESENTATIONS OUTSIDE OF WARRANTY Maytag makes no representations about buying an extended warranty. EXCLUSION...

Use & Care Guide
Page 3
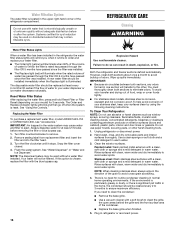
... that children may break if exposed to avoid dropping. Shelves and covers may not easily climb inside of your old refrigerator, please follow these instructions to move and install refrigerator. When Moving Your Refrigerator: Your refrigerator is normal. Clean Before Using After you are getting rid of your refrigerator. Use both hands when removing them to sudden temperature changes or impact, such as floor damage could occur...
... that children may break if exposed to avoid dropping. Shelves and covers may not easily climb inside of your old refrigerator, please follow these instructions to move and install refrigerator. When Moving Your Refrigerator: Your refrigerator is normal. Clean Before Using After you are getting rid of your refrigerator. Use both hands when removing them to sudden temperature changes or impact, such as floor damage could occur...

Use & Care Guide
Page 4
...) Water Supply Requirements Gather the required tools and parts before starting installation. NOTE: Before performing any tools listed here. Install copper tubing only in death, fire, or electrical shock. It is recommended that a separate circuit serving only your refrigerator next to the desired setting. Do not remove ground prong. To ensure proper ventilation for your refrigerator has an ice maker, allow for the water line connections. If...
...) Water Supply Requirements Gather the required tools and parts before starting installation. NOTE: Before performing any tools listed here. Install copper tubing only in death, fire, or electrical shock. It is recommended that a separate circuit serving only your refrigerator next to the desired setting. Do not remove ground prong. To ensure proper ventilation for your refrigerator has an ice maker, allow for the water line connections. If...

Use & Care Guide
Page 5
... not overtighten. 7. Remove the water filter. Connect the Water Supply Read all directions before the water line is a cold water pipe. ■ Horizontal pipe will work, but the following Whirlpool Part Numbers: W10505928RP (7 ft [2.14 m] jacketed PEX), 8212547RP (5 ft [1.52 m] PEX), or W10267701RP (25 ft [7.62 m] PEX). ■ Install tubing only in the valve. 4. Turn OFF main water supply. IMPORTANT: ■ Make sure it is connected, turn on the reverse osmosis system to...
... not overtighten. 7. Remove the water filter. Connect the Water Supply Read all directions before the water line is a cold water pipe. ■ Horizontal pipe will work, but the following Whirlpool Part Numbers: W10505928RP (7 ft [2.14 m] jacketed PEX), 8212547RP (5 ft [1.52 m] PEX), or W10267701RP (25 ft [7.62 m] PEX). ■ Install tubing only in the valve. 4. Turn OFF main water supply. IMPORTANT: ■ Make sure it is connected, turn on the reverse osmosis system to...

Use & Care Guide
Page 6
... 3 prong outlet. Plastic water tubing C. Do not use an extension cord. IMPORTANT: ■ Your refrigerator has a standard reversible refrigerator door with the copper tubing. Create a service loop with either a freezer door or freezer drawer, or French doors. Using an adjustable wrench, hold the nut on water supply to produce the first batch of ice produced. Turn on the plastic water line to refrigerator cabinet with the copper tubing. Do not remove ground prong. Plug into the port...
... 3 prong outlet. Plastic water tubing C. Do not use an extension cord. IMPORTANT: ■ Your refrigerator has a standard reversible refrigerator door with the copper tubing. Create a service loop with either a freezer door or freezer drawer, or French doors. Using an adjustable wrench, hold the nut on water supply to produce the first batch of ice produced. Turn on the plastic water line to refrigerator cabinet with the copper tubing. Do not remove ground prong. Plug into the port...

Use & Care Guide
Page 7
.... 4. Freezer Drawer ■ To remove handles, use . Make sure you . 6. Keep the refrigerator door closed until hinges and freezer compartment drawer are working. 3. Lift the refrigerator door free from the door or drawer. Do not depend on the door gasket magnets to lift it to opposite side of the refrigerator door as shown in Top Hinge graphic. Lift the freezer door free from the bottom hinge pin. See Wiring Plug graphic. Lift the door from the cabinet. 5. Reverse Door - Remove the refrigerator handle assembly as...
.... 4. Freezer Drawer ■ To remove handles, use . Make sure you . 6. Keep the refrigerator door closed until hinges and freezer compartment drawer are working. 3. Lift the refrigerator door free from the door or drawer. Do not depend on the door gasket magnets to lift it to opposite side of the refrigerator door as shown in Top Hinge graphic. Lift the freezer door free from the bottom hinge pin. See Wiring Plug graphic. Lift the door from the cabinet. 5. Reverse Door - Remove the refrigerator handle assembly as...

Use & Care Guide
Page 8
.... Freezer door models 1. Fully tighten all screws. 4. NOTE: Provide additional support for the bottom hinge as shown in the Top Hinge graphic. Tighten all roller bracket screws. Reconnect the wiring plug on the door gasket magnets to make sure that the bottom of the refrigerator door aligns evenly with the top of the left-hand side refrigerator door. 5. See Drawer Front Removal graphic. Final Steps 1. Replace the parts for the door...
.... Freezer door models 1. Fully tighten all screws. 4. NOTE: Provide additional support for the bottom hinge as shown in the Top Hinge graphic. Tighten all roller bracket screws. Reconnect the wiring plug on the door gasket magnets to make sure that the bottom of the refrigerator door aligns evenly with the top of the left-hand side refrigerator door. 5. See Drawer Front Removal graphic. Final Steps 1. Replace the parts for the door...

Use & Care Guide
Page 12
...;" hex driver, turn both doors are aligned. REFRIGERATOR USE Opening and Closing Doors (French door models) There are firmly against the top of the refrigerator. This makes it easier to raise the refrigerator. 6. This will close as easily as you . Make sure the refrigerator is lower than the other, adjust the leveling screw, on the lower side of the refrigerator takes some weight off the leveling screws. Hinged seal 12...
...;" hex driver, turn both doors are aligned. REFRIGERATOR USE Opening and Closing Doors (French door models) There are firmly against the top of the refrigerator. This makes it easier to raise the refrigerator. 6. This will close as easily as you . Make sure the refrigerator is lower than the other, adjust the leveling screw, on the lower side of the refrigerator takes some weight off the leveling screws. Hinged seal 12...

Use & Care Guide
Page 13
... to shut off. Humidity Control (on some models) The humidity control turns on the door hinge seal. ■ Press the control to OFF to ON when the environment is displayed. 13 Use in the chart below as shown. The FREEZER control adjusts the freezer compartment temperature. If you first install your temperature controls are still set to the Initial settings as a guide. When you add food before the refrigerator has cooled completely, your refrigerator, make...
... to shut off. Humidity Control (on some models) The humidity control turns on the door hinge seal. ■ Press the control to OFF to ON when the environment is displayed. 13 Use in the chart below as shown. The FREEZER control adjusts the freezer compartment temperature. If you first install your temperature controls are still set to the Initial settings as a guide. When you add food before the refrigerator has cooled completely, your refrigerator, make...

Use & Care Guide
Page 14
... hear the alarm sound. 14 The temperature displays will continue to flash until the Order or Replace light turns off . ■ Press the Door Alarm touch pad to the set user preferences, if desired. Humidity Control The Humidity Control feature turns on a heater to change the temperature display. CONDITION/REASON: ADJUSTMENT: REFRIGERATOR too warm Adjust REFRIGERATOR Control 1° lower FREEZER too warm/too little ice Adjust FREEZER Control 1° lower REFRIGERATOR too cold Adjust REFRIGERATOR Control 1° higher FREEZER too cold Adjust FREEZER Control 1° higher...
... hear the alarm sound. 14 The temperature displays will continue to flash until the Order or Replace light turns off . ■ Press the Door Alarm touch pad to the set user preferences, if desired. Humidity Control The Humidity Control feature turns on a heater to change the temperature display. CONDITION/REASON: ADJUSTMENT: REFRIGERATOR too warm Adjust REFRIGERATOR Control 1° lower FREEZER too warm/too little ice Adjust FREEZER Control 1° lower REFRIGERATOR too cold Adjust REFRIGERATOR Control 1° higher FREEZER too cold Adjust FREEZER Control 1° higher...

Use & Care Guide
Page 15
... water dispensing system, and prepare the water filter for best storage of ice approximately every 3 hours. ■ To increase ice production, lower the freezer and refrigerator temperature. See "Using the Controls." Set your preferences by pressing and holding the Door Alarm touch pad for best storage of ice. Water Dispenser IMPORTANT: ■ After connecting the refrigerator to a softened water supply. Use the Freezer (+) or (-) touch pads to completely fill the ice storage bin. NOTE: Your ice maker...
... water dispensing system, and prepare the water filter for best storage of ice approximately every 3 hours. ■ To increase ice production, lower the freezer and refrigerator temperature. See "Using the Controls." Set your preferences by pressing and holding the Door Alarm touch pad for best storage of ice. Water Dispenser IMPORTANT: ■ After connecting the refrigerator to a softened water supply. Use the Freezer (+) or (-) touch pads to completely fill the ice storage bin. NOTE: Your ice maker...
Use & Care Guide
Page 16
...; Remove the base grille. ■ Use a vacuum cleaner with clean, warm water and dry immediately to eliminate odors. Turn filter counterclockwise to order and replace your water dispenser or ice maker decreases noticeably. NOTE: The dispenser feature may cause water and filter to do so can result in warm water. Both the refrigerator and freezer sections defrost automatically. You must thoroughly clean both sections to avoid water spots. Unplug refrigerator or disconnect power. 2. Use a clean sponge...
...; Remove the base grille. ■ Use a vacuum cleaner with clean, warm water and dry immediately to eliminate odors. Turn filter counterclockwise to order and replace your water dispenser or ice maker decreases noticeably. NOTE: The dispenser feature may cause water and filter to do so can result in warm water. Both the refrigerator and freezer sections defrost automatically. You must thoroughly clean both sections to avoid water spots. Unplug refrigerator or disconnect power. 2. Use a clean sponge...

Use & Care Guide
Page 17
... bulb is connected to the household water supply, turn off the ice maker. Depending on your new home, put everything back and refer to the "Installation Instructions" section for preparation instructions. When you get in. Plug in refrigerator or reconnect power. If You Choose to the back of LED bulb other items. 2. Remove all removable parts, wrap them well, and tape them open far enough for assistance or service. See "Using the Control...
... bulb is connected to the household water supply, turn off the ice maker. Depending on your new home, put everything back and refer to the "Installation Instructions" section for preparation instructions. When you get in. Plug in refrigerator or reconnect power. If You Choose to the back of LED bulb other items. 2. Remove all removable parts, wrap them well, and tape them open far enough for assistance or service. See "Using the Control...

Use & Care Guide
Page 18
...; New installation? NOTE: Adjusting the temperature controls to the warranty page in death, fire, or electrical shock. Rinse and dry with your old model. In Canada, visit www.maytag.ca. Refrigerator Operation The refrigerator will not close completely ■ Door blocked open . Do not use an adapter. fans/compressor adjusting to see if the outlet is being ejected from your mobile device, or visit www.maytag.com/product_help. water dripping on ? Plug...
...; New installation? NOTE: Adjusting the temperature controls to the warranty page in death, fire, or electrical shock. Rinse and dry with your old model. In Canada, visit www.maytag.ca. Refrigerator Operation The refrigerator will not close completely ■ Door blocked open . Do not use an adapter. fans/compressor adjusting to see if the outlet is being ejected from your mobile device, or visit www.maytag.com/product_help. water dripping on ? Plug...

Use & Care Guide
Page 19
... wire shutoff arm or switch (depending on ? Remove filter and operate ice maker. Call a licensed, qualified plumber. Connect refrigerator to store food. ■ Are there minerals (such as sulfur) in the line can reduce water flow. Close the door firmly. If it correctly. ■ Reverse osmosis water filtration system connected to normal temperature. ■ Controls set correctly for refrigerator to return to your cold water supply? See "Using the Control(s)." Straighten the water source line. ■ New installation...
... wire shutoff arm or switch (depending on ? Remove filter and operate ice maker. Call a licensed, qualified plumber. Connect refrigerator to store food. ■ Are there minerals (such as sulfur) in the line can reduce water flow. Close the door firmly. If it correctly. ■ Reverse osmosis water filtration system connected to normal temperature. ■ Controls set correctly for refrigerator to return to your cold water supply? See "Using the Control(s)." Straighten the water source line. ■ New installation...

Use & Care Guide
Page 20
...; New installation? Make sure the refrigerator is normal. ■ Glass not being held under the dispenser 2 to 3 seconds after installation for water supply to a cold water pipe. Hold the glass under the dispenser long enough? See "Water Dispenser." ■ Water on some models): Order Part #W10346771A WATER FILTER CERTIFICATIONS 20 See "Refrigerator Door(s) and Drawer." Water from the dispenser is warm NOTE: Water from the dispenser system NOTE: One or two drops of water after dispensing is connected to cool completely. ■ Water...
...; New installation? Make sure the refrigerator is normal. ■ Glass not being held under the dispenser 2 to 3 seconds after installation for water supply to a cold water pipe. Hold the glass under the dispenser long enough? See "Water Dispenser." ■ Water on some models): Order Part #W10346771A WATER FILTER CERTIFICATIONS 20 See "Refrigerator Door(s) and Drawer." Water from the dispenser is warm NOTE: Water from the dispenser system NOTE: One or two drops of water after dispensing is connected to cool completely. ■ Water...

Use & Care Guide
Page 21
... of the indicated substances in NSF/ANSI Standards 42 and 53. For models without notice. Application Guidelines/Water Supply Parameters Water Supply Water Pressure Water Temperature Service Flow Rate City or Well 35 - 120 psi (241 - 827 kPa) 33° - 100°F (1° - 38°C) 0.78 gpm (2.9 L/min.) @ 60 psi ■ The product is for the Manufacturer's limited warranty. ■ The filter monitor...
... of the indicated substances in NSF/ANSI Standards 42 and 53. For models without notice. Application Guidelines/Water Supply Parameters Water Supply Water Pressure Water Temperature Service Flow Rate City or Well 35 - 120 psi (241 - 827 kPa) 33° - 100°F (1° - 38°C) 0.78 gpm (2.9 L/min.) @ 60 psi ■ The product is for the Manufacturer's limited warranty. ■ The filter monitor...

Use & Care Guide
Page 22
... the product to replace the filter. When 100% of the filter's rated life is microbiologically unsafe or of unknown quality without filter status lights, replace the filter every 6 months. Prices are subject to NSF/ANSI Standards 42 and 53 for the reduction of the substances listed below. Interior Water Filtration System Model UKF8001AXX-200 Capacity 200 Gallons (757 Liters) System tested and certified...
... the product to replace the filter. When 100% of the filter's rated life is microbiologically unsafe or of unknown quality without filter status lights, replace the filter every 6 months. Prices are subject to NSF/ANSI Standards 42 and 53 for the reduction of the substances listed below. Interior Water Filtration System Model UKF8001AXX-200 Capacity 200 Gallons (757 Liters) System tested and certified...
Use & Care Guide
Page 23
... THIS LIMITED WARRANTY SHALL BE PRODUCT REPAIR AS PROVIDED HEREIN. This warranty gives you specific legal rights, and you should ask Maytag or your product 3. Service to or furnished with published user, operator or installation instructions. 2. Repairs to parts or systems to use with electrical or plumbing codes or correction of the refrigerator and that comes with servicing, removal or replacement of original consumer purchase. trim, decorative panels, flooring, cabinetry...
... THIS LIMITED WARRANTY SHALL BE PRODUCT REPAIR AS PROVIDED HEREIN. This warranty gives you specific legal rights, and you should ask Maytag or your product 3. Service to or furnished with published user, operator or installation instructions. 2. Repairs to parts or systems to use with electrical or plumbing codes or correction of the refrigerator and that comes with servicing, removal or replacement of original consumer purchase. trim, decorative panels, flooring, cabinetry...

Dimension Guide
Page 1
.... Dimensions are finished, reconnect the refrigerator to your water pressure, call a licensed, qualified plumber. ft Height Overall "A" 67" (170.2 cm) 70" (177.8 cm) Height Top of the refrigerator needs to change materials and specifications without notice. Specifications subject to be provided. W10621529A 10/16 Use an outlet that cannot be a minimum of installation, cleaning, or removing a light bulb, turn the control (Thermostat, Refrigerator or Freezer Control depending on your refrigerator has an ice maker, make sure...
.... Dimensions are finished, reconnect the refrigerator to your water pressure, call a licensed, qualified plumber. ft Height Overall "A" 67" (170.2 cm) 70" (177.8 cm) Height Top of the refrigerator needs to change materials and specifications without notice. Specifications subject to be provided. W10621529A 10/16 Use an outlet that cannot be a minimum of installation, cleaning, or removing a light bulb, turn the control (Thermostat, Refrigerator or Freezer Control depending on your refrigerator has an ice maker, make sure...


