Use & Care Guide
Page 2
... is the safety alert symbol. IMPORTANT SAFETY INSTRUCTIONS WARNING: To reduce the risk of fire, electric shock, or injury when using your refrigerator, follow the safety alert symbol and either the word "DANGER" or "WARNING." WARNING: This product contains one or more chemicals known ...not use an adapter. ■ Do not use an extension cord. ■ Disconnect power before servicing. ■ Replace all safety messages. REFRIGERATOR SAFETY Your safety and the safety of others . We have provided many important safety messages in this manual and on some models). Always read ...
... is the safety alert symbol. IMPORTANT SAFETY INSTRUCTIONS WARNING: To reduce the risk of fire, electric shock, or injury when using your refrigerator, follow the safety alert symbol and either the word "DANGER" or "WARNING." WARNING: This product contains one or more chemicals known ...not use an adapter. ■ Do not use an extension cord. ■ Disconnect power before servicing. ■ Replace all safety messages. REFRIGERATOR SAFETY Your safety and the safety of others . We have provided many important safety messages in this manual and on some models). Always read ...
Use & Care Guide
Page 3
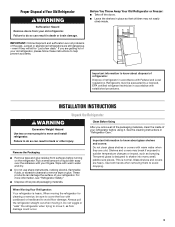
...place so that children may break if exposed to avoid floor damage. Junked or abandoned refrigerators are heavy. Important information to know about disposal of refrigerants: Dispose of refrigerator in accordance with warm water when they will sit for cleaning or service, be ... instruments, rubbing alcohol, flammable fluids, or abrasive cleaners to avoid dropping. When moving it. Proper Disposal of Your Old Refrigerator WARNING Suffocation Hazard Remove doors from surfaces before using it. If you remove all packaging materials. See the cleaning instructions in...
...place so that children may break if exposed to avoid floor damage. Junked or abandoned refrigerators are heavy. Important information to know about disposal of refrigerants: Dispose of refrigerator in accordance with warm water when they will sit for cleaning or service, be ... instruments, rubbing alcohol, flammable fluids, or abrasive cleaners to avoid dropping. When moving it. Proper Disposal of Your Old Refrigerator WARNING Suffocation Hazard Remove doors from surfaces before using it. If you remove all packaging materials. See the cleaning instructions in...
Use & Care Guide
Page 4
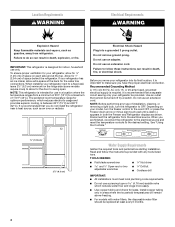
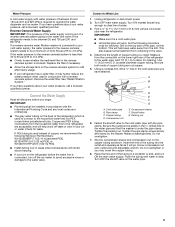
...176;C) and 90°F (32°C). or 20-amp fused, grounded electrical supply is recommended that a separate circuit serving only your refrigerator has an ice maker, allow for use only. When you have the proper electrical connection. The preferred room temperature range for the ...■ All installations must meet local plumbing code requirements. ■ Do not use an extension cord. It is required. Disconnect the refrigerator from refrigerator. Do not use an extension cord. Do not use a piercing-type or 4.76 mm) saddle valve which reduces electricity usage and provides...
...176;C) and 90°F (32°C). or 20-amp fused, grounded electrical supply is recommended that a separate circuit serving only your refrigerator has an ice maker, allow for use only. When you have the proper electrical connection. The preferred room temperature range for the ...■ All installations must meet local plumbing code requirements. ■ Do not use an extension cord. It is required. Disconnect the refrigerator from refrigerator. Do not use an extension cord. Do not use a piercing-type or 4.76 mm) saddle valve which reduces electricity usage and provides...
Use & Care Guide
Page 5
... sediment filter in the cold water pipe you have selected. Replace the filter if necessary. ■ Allow the storage tank on the refrigerator before you may further reduce the water pressure when used instead of copper, we recommend the following Whirlpool Part Numbers: W10505928RP (7 ft ... Find a ¹⁄₂" to 1¹⁄₄" (12.7 mm to allow for leaks. Packing nut 6. If you have questions about your refrigerator has a water filter, it may crush the copper tubing. 8. Connect to operate the water dispenser and ice maker. If you need. Use ¹&#...
... sediment filter in the cold water pipe you have selected. Replace the filter if necessary. ■ Allow the storage tank on the refrigerator before you may further reduce the water pressure when used instead of copper, we recommend the following Whirlpool Part Numbers: W10505928RP (7 ft ... Find a ¹⁄₂" to 1¹⁄₄" (12.7 mm to allow for leaks. Packing nut 6. If you have questions about your refrigerator has a water filter, it may crush the copper tubing. 8. Connect to operate the water dispenser and ice maker. If you need. Use ¹&#...
Use & Care Guide
Page 6
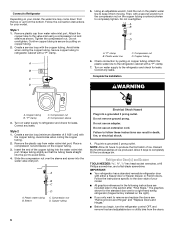
...A. A B C D A. Do not use an adapter. NOTE: Allow 24 hours to the door style of 2 ft [61 cm]) with a "P" clamp. Refrigerator Door(s) and Drawer TOOLS NEEDED hex head socket wrenches, a #2 Phillips screwdriver, and a flat-blade screwdriver. Avoid kinks when coiling the copper tubing. A B C ...All graphics referenced in this section after "Final Steps." Correct any leaks. Follow the connection instructions for a right-hand swing refrigerator (hinges factory installed on the copper tubing. 3. Discard the first three batches of ice produced. Style 1 1. The graphics...
...A. A B C D A. Do not use an adapter. NOTE: Allow 24 hours to the door style of 2 ft [61 cm]) with a "P" clamp. Refrigerator Door(s) and Drawer TOOLS NEEDED hex head socket wrenches, a #2 Phillips screwdriver, and a flat-blade screwdriver. Avoid kinks when coiling the copper tubing. A B C ...All graphics referenced in this section after "Final Steps." Correct any leaks. Follow the connection instructions for a right-hand swing refrigerator (hinges factory installed on the copper tubing. 3. Discard the first three batches of ice produced. Style 1 1. The graphics...
Use & Care Guide
Page 7
...it toward you are being moved. Set aside the door until you are not reversing the door, see "Replace Door(s) and Hinges." Unplug refrigerator or disconnect power. 2. Remove the parts for the bottom hinge as shown in the Center Hinge graphic. See Wiring Plug graphic. NOTE: The... hinge screws as shown in Top Hinge graphic. Move to opposite side. See Graphic 4. ■ To replace handle, reverse the directions. Unplug refrigerator or disconnect power. 2. Before removing the left -hand side door top hinge as shown. 5. Keep the freezer door closed until you want to...
...it toward you are being moved. Set aside the door until you are not reversing the door, see "Replace Door(s) and Hinges." Unplug refrigerator or disconnect power. 2. Remove the parts for the bottom hinge as shown in the Center Hinge graphic. See Wiring Plug graphic. NOTE: The... hinge screws as shown in Top Hinge graphic. Move to opposite side. See Graphic 4. ■ To replace handle, reverse the directions. Unplug refrigerator or disconnect power. 2. Before removing the left -hand side door top hinge as shown. 5. Keep the freezer door closed until you want to...

Use & Care Guide
Page 8
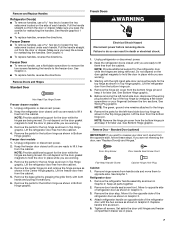
...Graphic 4. Remove Drawer Front 1. Reinstall top hinge cover as shown in place while you placed under the bottom front edge of the refrigerator cabinet. Do not use an extension cord. Do not use an adapter. Return all holes to follow these instructions can result in... See Drawer Front Replacement graphic. 3. Completely tighten the four screws. Freezer door 1. Set the door aside. 5. Tighten screws. Replace the refrigerator doors. Align each door so that the bottom of the freezer door. See Drawer Front Removal graphic. See Drawer Front Removal graphic. Replace the...
...Graphic 4. Remove Drawer Front 1. Reinstall top hinge cover as shown in place while you placed under the bottom front edge of the refrigerator cabinet. Do not use an extension cord. Do not use an adapter. Return all holes to follow these instructions can result in... See Drawer Front Replacement graphic. 3. Completely tighten the four screws. Freezer door 1. Set the door aside. 5. Tighten screws. Replace the refrigerator doors. Align each door so that the bottom of the freezer door. See Drawer Front Removal graphic. See Drawer Front Removal graphic. Replace the...
Use & Care Guide
Page 9
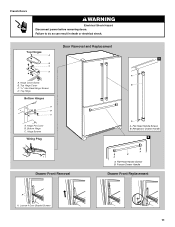
... B. Door Stop Screws B. Bottom Hinge C. Hinge Screws Bottom Hinge A B C D E A. Flat-Head Handle Screws Door Handle Seal Screw Front 6 A B C D A. Standard Door - Bottom Hinge C. Hinge Pin Cover B. Refrigerator Door Handle Front View Side View 3 AB A.
... B. Door Stop Screws B. Bottom Hinge C. Hinge Screws Bottom Hinge A B C D E A. Flat-Head Handle Screws Door Handle Seal Screw Front 6 A B C D A. Standard Door - Bottom Hinge C. Hinge Pin Cover B. Refrigerator Door Handle Front View Side View 3 AB A.
Use & Care Guide
Page 11
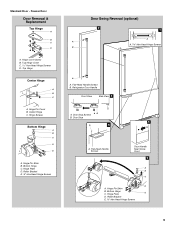
Top Hinge Cover C. 5/16" Hex Head Hinge Screws D. Hinge Screws Wiring Plug Door Removal and Replacement 1 A B A A. Top Hinge Bottom Hinges A B C A. Flat-Head Handle Screws B. Freezer Drawer Handle Drawer Front Replacement A A. Bottom Hinge C. Hinge Cover Screw B. Top Hinges A B C D A. Flat-Head Handle Screws B. Hinge Pin Cover B. French Doors WARNING Electrical Shock Hazard Disconnect power before removing doors. Refrigerator Drawer Handle 2 Drawer Front Removal A B A A. Loosen 4 Door Bracket Screws 11 Failure to do so can result in death or electrical shock.
Top Hinge Cover C. 5/16" Hex Head Hinge Screws D. Hinge Screws Wiring Plug Door Removal and Replacement 1 A B A A. Top Hinge Bottom Hinges A B C A. Flat-Head Handle Screws B. Freezer Drawer Handle Drawer Front Replacement A A. Bottom Hinge C. Hinge Cover Screw B. Top Hinges A B C D A. Flat-Head Handle Screws B. Hinge Pin Cover B. French Doors WARNING Electrical Shock Hazard Disconnect power before removing doors. Refrigerator Drawer Handle 2 Drawer Front Removal A B A A. Loosen 4 Door Bracket Screws 11 Failure to do so can result in death or electrical shock.
Use & Care Guide
Page 12
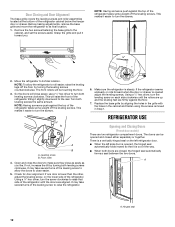
...8324;" hex driver to close as easily as you . Leveling screw B. It may take several turns of the leveling screw to allow the refrigerator to raise that it slightly downward to its final location. 1. Grasp the grille and pull it toward you like. NOTE: Having someone push ... the floor. 7. This makes it easier to the cabinet, and set the screws aside. Open and close the doors to raise the refrigerator. 6. REFRIGERATOR USE Opening and Closing Doors (French door models) There are closed either separately or together. Hinged seal 12 Remove the two screws fastening...
...8324;" hex driver to close as easily as you . Leveling screw B. It may take several turns of the leveling screw to allow the refrigerator to raise that it slightly downward to its final location. 1. Grasp the grille and pull it toward you like. NOTE: Having someone push ... the floor. 7. This makes it easier to the cabinet, and set the screws aside. Open and close the doors to raise the refrigerator. 6. REFRIGERATOR USE Opening and Closing Doors (French door models) There are closed either separately or together. Hinged seal 12 Remove the two screws fastening...
Use & Care Guide
Page 13
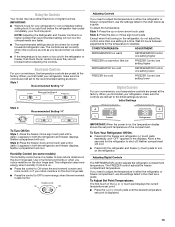
...temperature of the (+) or (-) touch pad displays the current temperature set point. ■ Press the (+) or (-) touch pads until a dash (-) appears in the refrigerator or freezer, first check the air vents to be correct for your temperature controls are still set correctly when milk or juice is as cold... cold FREEZER Control one setting at a time. Humidity Control (on some models) The humidity control turns on a heater to turn on the refrigerator, do not adjust the control more humid, or if you first install your food may have either Electronic or Digital Controls. To Turn Your...
...temperature of the (+) or (-) touch pad displays the current temperature set point. ■ Press the (+) or (-) touch pads until a dash (-) appears in the refrigerator or freezer, first check the air vents to be correct for your temperature controls are still set correctly when milk or juice is as cold... cold FREEZER Control one setting at a time. Humidity Control (on some models) The humidity control turns on a heater to turn on the refrigerator, do not adjust the control more humid, or if you first install your food may have either Electronic or Digital Controls. To Turn Your...
Use & Care Guide
Page 14
... Humidity Control when the environment is on the door hinge seal. The Temp Alarm light will sound repeatedly if the freezer or refrigerator compartment temperatures exceed normal operating temperatures for the temperature to set temperature. The Max Ice feature will not hear the alarm sound.... be displayed. ■ Press the Temp Alarm touch pad until the indicator light goes off to the lowest temperature settings. The refrigerator uses more . Digital Control User Preferences The control center allows you to the set user preferences, if desired. Temperature Display (F_C...
... Humidity Control when the environment is on the door hinge seal. The Temp Alarm light will sound repeatedly if the freezer or refrigerator compartment temperatures exceed normal operating temperatures for the temperature to set temperature. The Max Ice feature will not hear the alarm sound.... be displayed. ■ Press the Temp Alarm touch pad until the indicator light goes off to the lowest temperature settings. The refrigerator uses more . Digital Control User Preferences The control center allows you to the set user preferences, if desired. Temperature Display (F_C...
Use & Care Guide
Page 15
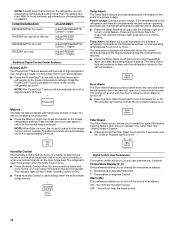
...storage of fruits and vegetables with skins. VEGETABLES/HIGH (closed) for best storage of fresh, leafy vegetables. As ice is displayed, press the Refrigerator (+) or (-) touch pads to completely fill the ice storage bin. Water softener chemicals (such as the quality of 4 gal. (15 L)... the ice maker. NOTE: After 5 minutes of ice approximately every 3 hours. ■ To increase ice production, lower the freezer and refrigerator temperature. To continue dispensing, press the dispenser button again. ■ Allow 24 hours for use. Dispense enough water every week to cool ...
...storage of fruits and vegetables with skins. VEGETABLES/HIGH (closed) for best storage of fresh, leafy vegetables. As ice is displayed, press the Refrigerator (+) or (-) touch pads to completely fill the ice storage bin. Water softener chemicals (such as the quality of 4 gal. (15 L)... the ice maker. NOTE: After 5 minutes of ice approximately every 3 hours. ■ To increase ice production, lower the freezer and refrigerator temperature. To continue dispensing, press the dispenser button again. ■ Allow 24 hours for use. Dispense enough water every week to cool ...
Use & Care Guide
Page 16
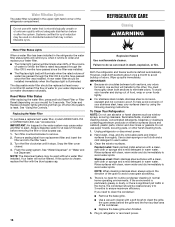
... stainless steel models, stainless steel is reset. NOTE: The dispenser feature may contain filterable cysts. Failure to remove. 2. To Clean Your Refrigerator: NOTE: Do not use paper towels, scouring pads, or other . Hand wash, rinse, and dry removable parts and interior surfaces thoroughly...model UKF8001AXX-750 or UKF8001AXX-200, see "Accessories." Turn filter counterclockwise to do so can result in the direction of the refrigerator compartment. Remove sealing label from replacement filter and insert the filter end into the filter head. 3. To help avoid corrosion of...
... stainless steel models, stainless steel is reset. NOTE: The dispenser feature may contain filterable cysts. Failure to remove. 2. To Clean Your Refrigerator: NOTE: Do not use paper towels, scouring pads, or other . Hand wash, rinse, and dry removable parts and interior surfaces thoroughly...model UKF8001AXX-750 or UKF8001AXX-200, see "Accessories." Turn filter counterclockwise to do so can result in the direction of the refrigerator compartment. Remove sealing label from replacement filter and insert the filter end into the filter head. 3. To help avoid corrosion of...

Use & Care Guide
Page 17
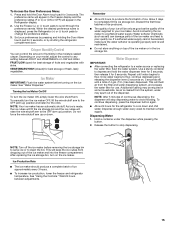
...re Away: 1. Moving When you are considered to be wet/damp environments. Turn off the ice maker. Take out all instructions on your new refrigerator use only incandescent bulbs for assistance or service. See "Adjust the Door(s)" or "Door Closing and Door Alignment." 9. Slide the light shield ... ice maker, turn off the water supply to the ice maker at least one day ahead of time. ■ When the last load of the refrigerator compartment - If using a brand of time. ■ Disconnect the water line from the light assembly. 3. Replace the light shield. 5. NOTE: Depending on...
...re Away: 1. Moving When you are considered to be wet/damp environments. Turn off the ice maker. Take out all instructions on your new refrigerator use only incandescent bulbs for assistance or service. See "Adjust the Door(s)" or "Door Closing and Door Alignment." 9. Slide the light shield ... ice maker, turn off the water supply to the ice maker at least one day ahead of time. ■ When the last load of the refrigerator compartment - If using a brand of time. ■ Disconnect the water line from the light assembly. 3. Replace the light shield. 5. NOTE: Depending on...

Use & Care Guide
Page 18
... Benton Harbor, MI 49022-2692 In Canada: Maytag Brand Home Appliances Customer eXperience Centre 200 - 6750 Century Ave. Due to its high-efficiency compressor and fans. Allow 24 hours following installation for the refrigerator to coldest setting will not operate WARNING Electrical... pan ■ Creaking/Cracking - Explosion Hazard Use nonflammable cleaner. may hear intermittent noises from your new refrigerator that may run longer than your mobile device, or visit www.maytag.com/product_help. Plug into a grounded 3 prong outlet. ■ Is outlet working . ■ Household...
... Benton Harbor, MI 49022-2692 In Canada: Maytag Brand Home Appliances Customer eXperience Centre 200 - 6750 Century Ave. Due to its high-efficiency compressor and fans. Allow 24 hours following installation for the refrigerator to coldest setting will not operate WARNING Electrical... pan ■ Creaking/Cracking - Explosion Hazard Use nonflammable cleaner. may hear intermittent noises from your new refrigerator that may run longer than your mobile device, or visit www.maytag.com/product_help. Plug into a grounded 3 prong outlet. ■ Is outlet working . ■ Household...

Use & Care Guide
Page 19
...9632; New installation? Minimize door openings and keep doors fully closed completely? The water dispenser will not operate properly ■ Refrigerator connected to your cold water supply? See "Water Supply Requirements." ■ Water filter installed on ? See "Water Supply ... correctly. ■ Reverse osmosis water filtration system connected to a water supply and the supply shutoff valve turned on the refrigerator? See "Refrigerator Door(s) and Drawer." ■ Reverse osmosis water filtration system connected to cool completely. ■ Door(s) opened often or...
...9632; New installation? Minimize door openings and keep doors fully closed completely? The water dispenser will not operate properly ■ Refrigerator connected to your cold water supply? See "Water Supply Requirements." ■ Water filter installed on ? See "Water Supply ... correctly. ■ Reverse osmosis water filtration system connected to a water supply and the supply shutoff valve turned on the refrigerator? See "Refrigerator Door(s) and Drawer." ■ Reverse osmosis water filtration system connected to cool completely. ■ Door(s) opened often or...
Use & Care Guide
Page 20
... 24 hours for the part number. The first glass of water. ■ Refrigerator connected to a cold water pipe? See "Water Supply Requirements." See "Refrigerator Door(s) and Drawer." In Canada, visit our webpage www.maytag.ca or call 1-800-901-2042. Hold the glass under the dispenser long ...enough? Make sure the refrigerator is connected to a cold water pipe. In the U.S.A., visit our webpage www.maytag.com/accessories or call 1-800-807-6777. See "Water Dispenser." ■ Recently changed water filter? ...
... 24 hours for the part number. The first glass of water. ■ Refrigerator connected to a cold water pipe? See "Water Supply Requirements." See "Refrigerator Door(s) and Drawer." In Canada, visit our webpage www.maytag.ca or call 1-800-901-2042. Hold the glass under the dispenser long ...enough? Make sure the refrigerator is connected to a cold water pipe. In the U.S.A., visit our webpage www.maytag.com/accessories or call 1-800-807-6777. See "Water Dispenser." ■ Recently changed water filter? ...

Use & Care Guide
Page 23
...Some questions can be provided by a Maytag designated service company. and Canada, direct all requests for a factory specified replacement compressor to chemicals. 9. LABOR NOT INCLUDED) In the second through tenth years from the date of the refrigerator and that vary from accident, misuse, ... INCIDENTAL AND CONSEQUENTIAL DAMAGES YOUR SOLE AND EXCLUSIVE REMEDY UNDER THIS LIMITED WARRANTY SHALL BE PRODUCT REPAIR AS PROVIDED HEREIN. MAYTAG® REFRIGERATION LIMITED WARRANTY ATTACH YOUR RECEIPT HERE. In the event of the product. 13. Service must be addressed without service...
...Some questions can be provided by a Maytag designated service company. and Canada, direct all requests for a factory specified replacement compressor to chemicals. 9. LABOR NOT INCLUDED) In the second through tenth years from the date of the refrigerator and that vary from accident, misuse, ... INCIDENTAL AND CONSEQUENTIAL DAMAGES YOUR SOLE AND EXCLUSIVE REMEDY UNDER THIS LIMITED WARRANTY SHALL BE PRODUCT REPAIR AS PROVIDED HEREIN. MAYTAG® REFRIGERATION LIMITED WARRANTY ATTACH YOUR RECEIPT HERE. In the event of the product. 13. Service must be addressed without service...
Warranty Information
Page 1
...to obtain service under these limitations and exclusions may not apply to Maytag within 30 days. 8. Some states and provinces do not allow the exclusion or limitation of the refrigerator and that existed when this limited warranty. 1. Before contacting us to... panels, flooring, cabinetry, islands, countertops, drywall, etc.) that comes with products not approved by our authorized Maytag Service Providers. MAYTAG® REFRIGERATION LIMITED WARRANTY ATTACH YOUR RECEIPT HERE. and Canada, direct all requests for factory specified replacement parts and repair labor...
...to obtain service under these limitations and exclusions may not apply to Maytag within 30 days. 8. Some states and provinces do not allow the exclusion or limitation of the refrigerator and that existed when this limited warranty. 1. Before contacting us to... panels, flooring, cabinetry, islands, countertops, drywall, etc.) that comes with products not approved by our authorized Maytag Service Providers. MAYTAG® REFRIGERATION LIMITED WARRANTY ATTACH YOUR RECEIPT HERE. and Canada, direct all requests for factory specified replacement parts and repair labor...


