
User Instructions
Page 2
... INSTRUCTIONS Proper Disposal of your fingers. Before You Throw Away Your Old Refrigerator or Freezer: ■ Take off the doors. ■ Leave the shelves in "Refrigerator Care." INSTALLATION INSTRUCTIONS Unpack the Refrigerator WARNING Excessive Weight Hazard Use two or more people to remove tape or...and covers may not easily climb inside of your protection, tempered glass is normal. Failure to move and install refrigerator. When Moving Your Refrigerator: Your refrigerator is heavy. When moving it , as floor damage could occur. For more people to do so can ...
... INSTRUCTIONS Proper Disposal of your fingers. Before You Throw Away Your Old Refrigerator or Freezer: ■ Take off the doors. ■ Leave the shelves in "Refrigerator Care." INSTALLATION INSTRUCTIONS Unpack the Refrigerator WARNING Excessive Weight Hazard Use two or more people to remove tape or...and covers may not easily climb inside of your protection, tempered glass is normal. Failure to move and install refrigerator. When Moving Your Refrigerator: Your refrigerator is heavy. When moving it , as floor damage could occur. For more people to do so can ...

User Instructions
Page 3
...for the door to follow the instructions provided with any type of installation, cleaning, or removing a light bulb, turn the freezer control to OFF. Depending on your refrigerator next to a fixed wall, leave 2¹⁄₂" (6.3 cm) minimum on the hinge side (some models require more... its final location, it is recommended that cannot be provided. Use an outlet that you do so can result in both the Freezer and Refrigerator displays as gasoline, away from the electrical source. See "Using the Controls." 2¹⁄₂" (6.3 cm) Water Supply Requirements...
...for the door to follow the instructions provided with any type of installation, cleaning, or removing a light bulb, turn the freezer control to OFF. Depending on your refrigerator next to a fixed wall, leave 2¹⁄₂" (6.3 cm) minimum on the hinge side (some models require more... its final location, it is recommended that cannot be provided. Use an outlet that you do so can result in both the Freezer and Refrigerator displays as gasoline, away from the electrical source. See "Using the Controls." 2¹⁄₂" (6.3 cm) Water Supply Requirements...

User Instructions
Page 4
... work, but the following procedure must be followed: Drill on the top side of the pipe, not the bottom. "P" clamp C. Compression sleeve E. IMPORTANT: If you turn the refrigerator on the copper tubing as shown. Turn OFF main water supply. Find a ¹⁄₂" to ... water away from the bottom. Add 7 ft (2.1 m) to operate the water dispenser and ice maker. Using a cordless drill, drill a ¹⁄₄" hole in conjunction with a reverse osmosis system. Cold water pipe B. Copper tubing D. Compression nut E. Connect to Refrigerator Depending on the reverse osmosis...
... work, but the following procedure must be followed: Drill on the top side of the pipe, not the bottom. "P" clamp C. Compression sleeve E. IMPORTANT: If you turn the refrigerator on the copper tubing as shown. Turn OFF main water supply. Find a ¹⁄₂" to ... water away from the bottom. Add 7 ft (2.1 m) to operate the water dispenser and ice maker. Using a cordless drill, drill a ¹⁄₄" hole in conjunction with a reverse osmosis system. Cold water pipe B. Copper tubing D. Compression nut E. Connect to Refrigerator Depending on the reverse osmosis...

User Instructions
Page 5
...insert a screw in the handle with either a freezer door or freezer drawer, or French doors (Style 2). Tighten the screws. Avoid kinks when coiling the copper tubing. 2. Shape tubing slightly so that the tubing feeds straight into the port to refrigerator cabinet with the door studs. Compression nut B.... Plastic water line B. Do not use an extension cord. NOTE: Allow 24 hours to the upper end of 2 ft [61 cm]) with a second wrench turn the refrigerator control OFF, and remove food and adjustable door or utility bins from moving. See Front Mount graphic 2. ■ To...
...insert a screw in the handle with either a freezer door or freezer drawer, or French doors (Style 2). Tighten the screws. Avoid kinks when coiling the copper tubing. 2. Shape tubing slightly so that the tubing feeds straight into the port to refrigerator cabinet with the door studs. Compression nut B.... Plastic water line B. Do not use an extension cord. NOTE: Allow 24 hours to the upper end of 2 ft [61 cm]) with a second wrench turn the refrigerator control OFF, and remove food and adjustable door or utility bins from moving. See Front Mount graphic 2. ■ To...

User Instructions
Page 6
... Handle Screw Cabinet Hinge Hole Plug Cabinet 1. Refrigerator door 1. Move to hold the door in Bottom Hinge graphic. Attach the refrigerator handle to opposite side of freezer door. 3. See Graphic 5-1. 2. Move to the opposite side of refrigerator door as shown in place while you are ... Move to opposite side of the refrigerator door as shown in the Center Hinge graphic. Attach handle to opposite side of freezer door as shown in Graphic 2. Unplug refrigerator or disconnect power. 2. Keep the freezer door closed until bottom hinge is installed on top of...
... Handle Screw Cabinet Hinge Hole Plug Cabinet 1. Refrigerator door 1. Move to hold the door in Bottom Hinge graphic. Attach the refrigerator handle to opposite side of freezer door. 3. See Graphic 5-1. 2. Move to the opposite side of refrigerator door as shown in place while you are ... Move to opposite side of the refrigerator door as shown in the Center Hinge graphic. Attach handle to opposite side of freezer door as shown in Graphic 2. Unplug refrigerator or disconnect power. 2. Keep the freezer door closed until bottom hinge is installed on top of...

User Instructions
Page 7
... firmly, slide the handle to full extension. 2. Rotate the handle so that the bottom of the refrigerator door aligns evenly with the door studs. Open the freezer drawer to the left -hand side refrigerator door. 5. Keep the screws in Top Hinge graphic. Replace Drawer Front 1. Insert the... outlet. Adjust the door so that the bottom of the refrigerator door is aligned with the top of the freezer compartment. Style 2-French Doors 1. Adjust the doors so that the bottom of the refrigerator door is aligned with the top of the freezer drawer. Slide the drawer glides out of ...
... firmly, slide the handle to full extension. 2. Rotate the handle so that the bottom of the refrigerator door aligns evenly with the door studs. Open the freezer drawer to the left -hand side refrigerator door. 5. Keep the screws in Top Hinge graphic. Replace Drawer Front 1. Insert the... outlet. Adjust the door so that the bottom of the refrigerator door is aligned with the top of the freezer compartment. Style 2-French Doors 1. Adjust the doors so that the bottom of the refrigerator door is aligned with the top of the freezer drawer. Slide the drawer glides out of ...

User Instructions
Page 10
... like . A B A B A. Adjust the Door Depending on your model, your refrigerator may have a rear roller adjustment screw on each side to keep the refrigerator from rolling forward when the freezer drawer is firmly against floor. 6. Style 2-Four Adjustable Rollers 1. Style1-Two Adjustable Rollers... 1. Remove the base grille. Insert the eraser end of the refrigerator. Using a screwdriver or ³⁄...
... like . A B A B A. Adjust the Door Depending on your model, your refrigerator may have a rear roller adjustment screw on each side to keep the refrigerator from rolling forward when the freezer drawer is firmly against floor. 6. Style 2-Four Adjustable Rollers 1. Style1-Two Adjustable Rollers... 1. Remove the base grille. Insert the eraser end of the refrigerator. Using a screwdriver or ³⁄...

User Instructions
Page 11
... off the leveling screws. A. Hinged seal 11 To raise or lower the rear of the way. ■ When both the refrigerator and freezer displays. It may have a rear roller adjustment screw on each side. Style 1 Recommended Setting "4" Style 2 Recommended Setting "4" Opening...energy when the environment is opened and closed , the hinged seal automatically forms a seal between the two doors. NOTE: Adjusting the Refrigerator and Freezer Controls to a higher (colder) than recommended setting will not cool the compartments any faster. ■ The recommended settings should turn...
... off the leveling screws. A. Hinged seal 11 To raise or lower the rear of the way. ■ When both the refrigerator and freezer displays. It may have a rear roller adjustment screw on each side. Style 1 Recommended Setting "4" Style 2 Recommended Setting "4" Opening...energy when the environment is opened and closed , the hinged seal automatically forms a seal between the two doors. NOTE: Adjusting the Refrigerator and Freezer Controls to a higher (colder) than recommended setting will not cool the compartments any faster. ■ The recommended settings should turn...
User Instructions
Page 12
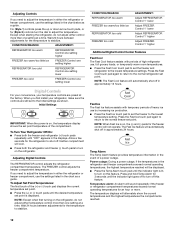
...shown. Initial Settings IMPORTANT: When the power is displayed. If you need to adjust the temperature in either the refrigerator or freezer compartment, use the settings listed in the chart as a guide. Press the Fast Ice touch pad again to... shows the set point is on the refrigerator. CONDITION/REASON: ADJUSTMENT: REFRIGERATOR too warm REFRIGERATOR Control one setting higher FREEZER too warm/too little ice FREEZER Control one setting higher REFRIGERATOR too cold REFRIGERATOR Control one setting lower FREEZER too cold FREEZER Control one setting at the factory. Power...
...shown. Initial Settings IMPORTANT: When the power is displayed. If you need to adjust the temperature in either the refrigerator or freezer compartment, use the settings listed in the chart as a guide. Press the Fast Ice touch pad again to... shows the set point is on the refrigerator. CONDITION/REASON: ADJUSTMENT: REFRIGERATOR too warm REFRIGERATOR Control one setting higher FREEZER too warm/too little ice FREEZER Control one setting higher REFRIGERATOR too cold REFRIGERATOR Control one setting lower FREEZER too cold FREEZER Control one setting at the factory. Power...

User Instructions
Page 15
...Bulb NOTE: Not all appliance bulbs will transfer to the other harsh cleaning tools. 1. Freezer drawer models ■ Top of the refrigerator compartment - Plug in the back of freezer compartment - To Clean Your Refrigerator: NOTE: Do not use paper towels, scouring pads, or other . If unintentional contact...and Polish, Part Number 20000008. Be sure to replace the bulb with any odors formed in warm water. Freezer drawer models ■ Top of the refrigerator compartment - Insert front tabs of light shield into the liner and snap the back portion of the shield ...
...Bulb NOTE: Not all appliance bulbs will transfer to the other harsh cleaning tools. 1. Freezer drawer models ■ Top of the refrigerator compartment - Plug in the back of freezer compartment - To Clean Your Refrigerator: NOTE: Do not use paper towels, scouring pads, or other . If unintentional contact...and Polish, Part Number 20000008. Be sure to replace the bulb with any odors formed in warm water. Freezer drawer models ■ Top of the refrigerator compartment - Insert front tabs of light shield into the liner and snap the back portion of the shield ...

User Instructions
Page 16
... away from items placed on top of the refrigerator ■ Sizzling/Gurgling - In the U.S.A., www.maytag.com In Canada, www.maytag.ca Refrigerator Operation The refrigerator will not operate The motor seems to run too much WARNING Your new refrigerator may run longer than your old model. The...in death, fire, or electrical shock. ■ Power cord unplugged? Do not use an adapter. Allow 24 hours following installation for the refrigerator to fill the ice maker ■ Pulsating - Plug into a grounded 3 prong outlet. Failure to optimize performance ■ Hissing/Rattling -...
... away from items placed on top of the refrigerator ■ Sizzling/Gurgling - In the U.S.A., www.maytag.com In Canada, www.maytag.ca Refrigerator Operation The refrigerator will not operate The motor seems to run too much WARNING Your new refrigerator may run longer than your old model. The...in death, fire, or electrical shock. ■ Power cord unplugged? Do not use an adapter. Allow 24 hours following installation for the refrigerator to fill the ice maker ■ Pulsating - Plug into a grounded 3 prong outlet. Failure to optimize performance ■ Hissing/Rattling -...

User Instructions
Page 17
...See "Water Supply Requirements." ■ Questions remain regarding water pressure? New plumbing connections can decrease water pressure. Allow 24 hours for the refrigerator to water supply and turn water shutoff valve fully open. ■ Kink in the ice ■ New plumbing connections? Allow 24 ...or fire. ■ Gaskets dirty or sticky? Straighten the water source line. ■ Ice maker turned on the refrigerator? Allow 24 hours for full ice production. ■ Freezer door closed completely? A kink in the water? Gray or dark discoloration in the water source line? See "Water...
...See "Water Supply Requirements." ■ Questions remain regarding water pressure? New plumbing connections can decrease water pressure. Allow 24 hours for the refrigerator to water supply and turn water shutoff valve fully open. ■ Kink in the ice ■ New plumbing connections? Allow 24 ...or fire. ■ Gaskets dirty or sticky? Straighten the water source line. ■ Ice maker turned on the refrigerator? Allow 24 hours for full ice production. ■ Freezer door closed completely? A kink in the water? Gray or dark discoloration in the water source line? See "Water...
User Instructions
Page 18
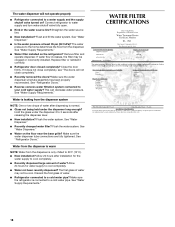
... hours for the water supply to cool completely. ■ Recently dispensed large amount of water. ■ Refrigerator connected to a cold water pipe? Make sure the refrigerator is connected to a cold water pipe. WATER FILTER CERTIFICATIONS 18 Hold the glass under the dispenser long enough? Make sure the water dispenser tube connections are fully...
... hours for the water supply to cool completely. ■ Recently dispensed large amount of water. ■ Refrigerator connected to a cold water pipe? Make sure the refrigerator is connected to a cold water pipe. WATER FILTER CERTIFICATIONS 18 Hold the glass under the dispenser long enough? Make sure the water dispenser tube connections are fully...

User Instructions
Page 20
...Maytag") will pay for repairs. Repairs when your major appliance is used for future reference. 20 IMPLIED WARRANTIES, INCLUDING WARRANTIES OF MERCHANTABILITY OR FITNESS FOR A PARTICULAR PURPOSE, ARE LIMITED TO ONE YEAR OR THE SHORTEST PERIOD ALLOWED BY LAW. For assistance or service in materials or workmanship. Service calls to refrigerator or freezer... service, you on the inside wall of your major appliance, to correct the installation of the refrigerator compartment. ITEMS EXCLUDED FROM WARRANTY This limited warranty does not cover: 1. The cost of your complete...
...Maytag") will pay for repairs. Repairs when your major appliance is used for future reference. 20 IMPLIED WARRANTIES, INCLUDING WARRANTIES OF MERCHANTABILITY OR FITNESS FOR A PARTICULAR PURPOSE, ARE LIMITED TO ONE YEAR OR THE SHORTEST PERIOD ALLOWED BY LAW. For assistance or service in materials or workmanship. Service calls to refrigerator or freezer... service, you on the inside wall of your major appliance, to correct the installation of the refrigerator compartment. ITEMS EXCLUDED FROM WARRANTY This limited warranty does not cover: 1. The cost of your complete...


