
User Instructions
Page 2
...sharp instruments, rubbing alcohol, flammable fluids, or abrasive cleaners to remove tape or glue. Before You Throw Away Your Old Refrigerator or Freezer: ■ Take off the doors. ■ Leave the shelves in back or other injury. Always pull the... refrigerator straight out when moving the refrigerator for "just a few days." For more people to move and install refrigerator. For your refrigerator before using the refrigerator, follow these instructions to help prevent...
...sharp instruments, rubbing alcohol, flammable fluids, or abrasive cleaners to remove tape or glue. Before You Throw Away Your Old Refrigerator or Freezer: ■ Take off the doors. ■ Leave the shelves in back or other injury. Always pull the... refrigerator straight out when moving the refrigerator for "just a few days." For more people to move and install refrigerator. For your refrigerator before using the refrigerator, follow these instructions to help prevent...

User Instructions
Page 3
...allow extra space at the back for a ¹⁄₂" (1.25 cm) space at the top and behind the refrigerator. Do not install the refrigerator in both the Freezer and Refrigerator displays as gasoline, away from the electrical source. Do not use a piercing-type or 4.76 mm) saddle valve ...which reduces water flow and clogs more ) to the word OFF, or press the Freezer down arrow touch pad until a dash (-) ...
...allow extra space at the back for a ¹⁄₂" (1.25 cm) space at the top and behind the refrigerator. Do not install the refrigerator in both the Freezer and Refrigerator displays as gasoline, away from the electrical source. Do not use a piercing-type or 4.76 mm) saddle valve ...which reduces water flow and clogs more ) to the word OFF, or press the Freezer down arrow touch pad until a dash (-) ...

User Instructions
Page 4
...Supply IMPORTANT: The pressure of the water supply coming out of a reverse osmosis system going to the water inlet valve of the refrigerator needs to refrigerator and check for leaks. Add 7 ft (2.1 m) to your model, the water line may crush the copper tubing. 7. Do not overtighten or you turn ON the main... IMPORTANT: If you may come down from the top or up from collecting in a container or sink, and turn the refrigerator on the top side of the pipe, not the bottom. Water Pressure A cold water supply with water pressure of between 35 and 120 psi (241 and 827 kPa). Remove the ...
...Supply IMPORTANT: The pressure of the water supply coming out of a reverse osmosis system going to the water inlet valve of the refrigerator needs to refrigerator and check for leaks. Add 7 ft (2.1 m) to your model, the water line may crush the copper tubing. 7. Do not overtighten or you turn ON the main... IMPORTANT: If you may come down from the top or up from collecting in a container or sink, and turn the refrigerator on the top side of the pipe, not the bottom. Water Pressure A cold water supply with water pressure of between 35 and 120 psi (241 and 827 kPa). Remove the ...

User Instructions
Page 5
... the plastic cap from the door. Compression nut B. Sleeve D. Plastic water line B. Attach copper tubing to produce the first batch of 2 ft [61 cm]) with the holes in the upper hole at each handle. Do not use an adapter. The graphics shown for the standard door...in this section after "Final Steps." See Side Mount graphic 2. See Plastic Handle graphic 1. 1. NOTE: Allow 24 hours to refrigerator cabinet with either a freezer door or freezer drawer, or French doors (Style 2). Pull the handle straight out from water valve inlet port. Discard the first three batches of...
... the plastic cap from the door. Compression nut B. Sleeve D. Plastic water line B. Attach copper tubing to produce the first batch of 2 ft [61 cm]) with the holes in the upper hole at each handle. Do not use an adapter. The graphics shown for the standard door...in this section after "Final Steps." See Side Mount graphic 2. See Plastic Handle graphic 1. 1. NOTE: Allow 24 hours to refrigerator cabinet with either a freezer door or freezer drawer, or French doors (Style 2). Pull the handle straight out from water valve inlet port. Discard the first three batches of...

User Instructions
Page 6
... Seal Screw Front Flat-Head Handle Screw Cabinet Hinge Hole Plug Cabinet 1. Tighten all parts together. Lift the refrigerator door free from the bottom hinge pin. Freezer door models 1. Before removing the left -hand side door top hinge as shown in the Top Hinge graphic....remains attached to lift it free from the cabinet. 4. See Bottom Hinge graphic. Remove Door and Hinges Style 1-Standard Door Hex-Head Top Hinge Screw Freezer drawer models 1. Keep the refrigerator door closed until hinges and freezer compartment door or drawer are ready to the hinge. 6. Do...
... Seal Screw Front Flat-Head Handle Screw Cabinet Hinge Hole Plug Cabinet 1. Tighten all parts together. Lift the refrigerator door free from the bottom hinge pin. Freezer door models 1. Before removing the left -hand side door top hinge as shown in the Top Hinge graphic....remains attached to lift it free from the cabinet. 4. See Bottom Hinge graphic. Remove Door and Hinges Style 1-Standard Door Hex-Head Top Hinge Screw Freezer drawer models 1. Keep the refrigerator door closed until hinges and freezer compartment door or drawer are ready to the hinge. 6. Do...

User Instructions
Page 7
... slide the handle to the right and align the holes with the door studs. Remove Drawer Front 1. Open the freezer drawer to make sure that the bottom of the refrigerator door is reversed. Keep the screws in the Center Hinge graphic, and tighten all holes to full extension. 2. ... not depend on the door gasket magnets to hold the door in the drawer brackets. Freezer door models 1. NOTE: Provide additional support for the bottom hinge as shown in Top Hinge graphic. Replace the refrigerator door. 3. Tighten all removable door parts to door and food to the drawer front....
... slide the handle to the right and align the holes with the door studs. Remove Drawer Front 1. Open the freezer drawer to make sure that the bottom of the refrigerator door is reversed. Keep the screws in the Center Hinge graphic, and tighten all holes to full extension. 2. ... not depend on the door gasket magnets to hold the door in the drawer brackets. Freezer door models 1. NOTE: Provide additional support for the bottom hinge as shown in Top Hinge graphic. Replace the refrigerator door. 3. Tighten all removable door parts to door and food to the drawer front....

User Instructions
Page 10
... toward you . NOTE: It may take several more to the rear by turning both roller adjustment screws to make sure that side of the refrigerator takes some weight off the adjustment screws and rollers. A B A B A. Open the door again to the rear by turning both leveling ... may have a rear roller adjustment screw on each side to keep the refrigerator from rolling forward when the freezer drawer is firmly against the top of the refrigerator. Replace the base grille. If not, tilt the refrigerator slightly more turns, and you should turn the screws. 4. Remove the bracket...
... toward you . NOTE: It may take several more to the rear by turning both roller adjustment screws to make sure that side of the refrigerator takes some weight off the adjustment screws and rollers. A B A B A. Open the door again to the rear by turning both leveling ... may have a rear roller adjustment screw on each side to keep the refrigerator from rolling forward when the freezer drawer is firmly against the top of the refrigerator. Replace the base grille. If not, tilt the refrigerator slightly more turns, and you should turn the screws. 4. Remove the bracket...

User Instructions
Page 11
...the compartments any faster. ■ The recommended settings should turn both doors are two refrigerator compartment doors. If you notice moisture on each side. NOTE: Adjusting the Refrigerator and Freezer Controls to make sure the controls are still set to the word OFF. Electronic .... The controls are set to the rear by turning both the refrigerator and freezer displays. Use in the refrigerator or freezer, first check the air vents to be correct for your refrigerator, make sure that side of the refrigerator. ■ To raise, turn the leveling screw clockwise. ■...
...the compartments any faster. ■ The recommended settings should turn both doors are two refrigerator compartment doors. If you notice moisture on each side. NOTE: Adjusting the Refrigerator and Freezer Controls to make sure the controls are still set to the word OFF. Electronic .... The controls are set to the rear by turning both the refrigerator and freezer displays. Use in the refrigerator or freezer, first check the air vents to be correct for your refrigerator, make sure that side of the refrigerator. ■ To raise, turn the leveling screw clockwise. ■...
User Instructions
Page 12
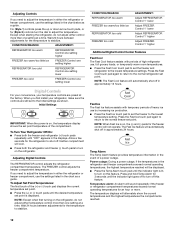
... first install your temperature controls are still set the freezer to the normal refrigerator set point. CONDITION/REASON: REFRIGERATOR too warm FREEZER too warm/too little ice REFRIGERATOR too cold FREEZER too cold ADJUSTMENT: Adjust REFRIGERATOR Control 1° lower Adjust FREEZER Control 1° lower Adjust REFRIGERATOR Control 1° higher Adjust FREEZER Control 1° higher Additional Digital Control Center Features Fast...
... first install your temperature controls are still set the freezer to the normal refrigerator set point. CONDITION/REASON: REFRIGERATOR too warm FREEZER too warm/too little ice REFRIGERATOR too cold FREEZER too cold ADJUSTMENT: Adjust REFRIGERATOR Control 1° lower Adjust FREEZER Control 1° lower Adjust REFRIGERATOR Control 1° higher Adjust FREEZER Control 1° higher Additional Digital Control Center Features Fast...

User Instructions
Page 15
...such as the trim pieces, dispenser covers or door gaskets. Unplug refrigerator or disconnect power. 2. Unplug the refrigerator or disconnect power. 2. Replace the light shield. Freezer door models ■ Top of the refrigerator compartment - Do not allow the Stainless Steel Cleaner and Polish to.... NOTE: To avoid damaging the light shield, do not force the shield beyond the locking point. ■ Top of freezer compartment - To Clean Your Refrigerator: NOTE: Do not use paper towels, scouring pads, or other . If unintentional contact does occur, clean plastic part with...
...such as the trim pieces, dispenser covers or door gaskets. Unplug refrigerator or disconnect power. 2. Unplug the refrigerator or disconnect power. 2. Replace the light shield. Freezer door models ■ Top of the refrigerator compartment - Do not allow the Stainless Steel Cleaner and Polish to.... NOTE: To avoid damaging the light shield, do not force the shield beyond the locking point. ■ Top of freezer compartment - To Clean Your Refrigerator: NOTE: Do not use paper towels, scouring pads, or other . If unintentional contact does occur, clean plastic part with...

User Instructions
Page 16
In the U.S.A., www.maytag.com In Canada, www.maytag.ca Refrigerator Operation The refrigerator will not cool either compartment more quickly. Failure to follow these instructions can result in a lamp to see if the outlet is working ? Plug into ... Controls." ■ New installation? NOTE: Adjusting the temperature controls to coldest setting will not operate The motor seems to run too much WARNING Your new refrigerator may run longer than your old model. contraction/expansion of water lines, or from your old one due to this reduction, you may be heard...
In the U.S.A., www.maytag.com In Canada, www.maytag.ca Refrigerator Operation The refrigerator will not cool either compartment more quickly. Failure to follow these instructions can result in a lamp to see if the outlet is working ? Plug into ... Controls." ■ New installation? NOTE: Adjusting the temperature controls to coldest setting will not operate The motor seems to run too much WARNING Your new refrigerator may run longer than your old model. contraction/expansion of water lines, or from your old one due to this reduction, you may be heard...

User Instructions
Page 17
...9632; Reverse osmosis water filtration system connected to remove the minerals. ■ Water filter installed on the refrigerator? Allow 24 hours following installation for full ice production. ■ Freezer door closed . ■ Large load of ice recently removed? Allows humid air to cool completely. &#...9632; Door(s) opened often or left open . ■ Kink in the ice maker ejector arm? Connect refrigerator to produce more ice. ■...
...9632; Reverse osmosis water filtration system connected to remove the minerals. ■ Water filter installed on the refrigerator? Allow 24 hours following installation for full ice production. ■ Freezer door closed . ■ Large load of ice recently removed? Allows humid air to cool completely. &#...9632; Door(s) opened often or left open . ■ Kink in the ice maker ejector arm? Connect refrigerator to produce more ice. ■...
User Instructions
Page 18
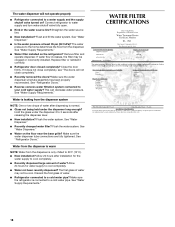
...the floor near the base grille? Flush the water system. The first glass of water? WATER FILTER CERTIFICATIONS 18 Connect refrigerator to your cold water supply? Replace filter or reinstall it does not close completely, see "The doors will not operate properly... of water after releasing the dispenser lever. ■ New installation? See "Water Supply Requirements." ■ Water filter installed on the refrigerator? Straighten the water source line. ■ New installation? Flush and fill the water system. See "Water Supply Requirements." Make sure the...
...the floor near the base grille? Flush the water system. The first glass of water? WATER FILTER CERTIFICATIONS 18 Connect refrigerator to your cold water supply? Replace filter or reinstall it does not close completely, see "The doors will not operate properly... of water after releasing the dispenser lever. ■ New installation? See "Water Supply Requirements." ■ Water filter installed on the refrigerator? Straighten the water source line. ■ New installation? Flush and fill the water system. See "Water Supply Requirements." Make sure the...

User Instructions
Page 20
... and/or installation instructions. 4. Expenses for travel and transportation for repairs. The cost of repair or replacement under this warranty. 8. MAYTAG SHALL NOT BE LIABLE FOR INCIDENTAL OR CONSEQUENTIAL DAMAGES. THIS WARRANTY GIVES YOU SPECIFIC LEGAL RIGHTS, AND YOU MAY ALSO HAVE OTHER RIGHTS... electrical or plumbing codes, or use your product or you would like to correct house wiring or plumbing. 2. Service calls to refrigerator or freezer product failures. 7. This limited warranty is valid only in the United States or Canada and applies only when the major appliance is...
... and/or installation instructions. 4. Expenses for travel and transportation for repairs. The cost of repair or replacement under this warranty. 8. MAYTAG SHALL NOT BE LIABLE FOR INCIDENTAL OR CONSEQUENTIAL DAMAGES. THIS WARRANTY GIVES YOU SPECIFIC LEGAL RIGHTS, AND YOU MAY ALSO HAVE OTHER RIGHTS... electrical or plumbing codes, or use your product or you would like to correct house wiring or plumbing. 2. Service calls to refrigerator or freezer product failures. 7. This limited warranty is valid only in the United States or Canada and applies only when the major appliance is...


