User Instructions
Page 1
... 12 DÉPANNAGE 28 ACCESSORIES 13 ACCESSOIRES 29 WARRANTY 14 GARANTIE 30 REFRIGERATOR SAFETY Your safety and the safety of others . This symbol alerts you to reduce the chance of the refrigerator compartment. All safety messages will need assistance, call us at 1-800-...;n adicional acerca de su producto, visite: www.maytag.com. These words mean: DANGER You can be killed or seriously injured if you how to potential hazards that can happen if the instructions are very important. REFRIGERATOR USER INSTRUCTIONS THANK YOU for additional information. Always ...
... 12 DÉPANNAGE 28 ACCESSORIES 13 ACCESSOIRES 29 WARRANTY 14 GARANTIE 30 REFRIGERATOR SAFETY Your safety and the safety of others . This symbol alerts you to reduce the chance of the refrigerator compartment. All safety messages will need assistance, call us at 1-800-...;n adicional acerca de su producto, visite: www.maytag.com. These words mean: DANGER You can be killed or seriously injured if you how to potential hazards that can happen if the instructions are very important. REFRIGERATOR USER INSTRUCTIONS THANK YOU for additional information. Always ...
User Instructions
Page 2
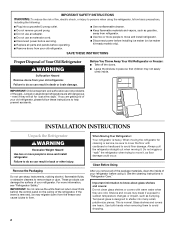
...You Throw Away Your Old Refrigerator or Freezer: ■ Take off the doors. ■ Leave the shelves in back or other injury. When moving it , as gasoline, away from the freezer and cause icicles to do so can damage the surface of your refrigerator before operating. ■ ...Remove doors from your old refrigerator. ■ Use nonflammable cleaner. ■ Keep flammable materials and vapors, such...
...You Throw Away Your Old Refrigerator or Freezer: ■ Take off the doors. ■ Leave the shelves in back or other injury. When moving it , as gasoline, away from the freezer and cause icicles to do so can damage the surface of your refrigerator before operating. ■ ...Remove doors from your old refrigerator. ■ Use nonflammable cleaner. ■ Keep flammable materials and vapors, such...
User Instructions
Page 3
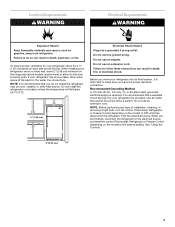
... type of installation, cleaning, or removing a light bulb, turn the control (Thermostat, Refrigerator or Freezer Control depending on the model) to allow extra space at the top. When you have the proper electrical connection. Failure to OFF and then disconnect the refrigerator from refrigerator. Recommended Grounding Method A 115 Volt, 60 Hz., AC only, 15- Use...
... type of installation, cleaning, or removing a light bulb, turn the control (Thermostat, Refrigerator or Freezer Control depending on the model) to allow extra space at the top. When you have the proper electrical connection. Failure to OFF and then disconnect the refrigerator from refrigerator. Recommended Grounding Method A 115 Volt, 60 Hz., AC only, 15- Use...
User Instructions
Page 4
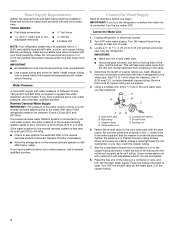
...coming out of a reverse osmosis system going to the water inlet valve of the refrigerator needs to be a minimum of the pipe, not the bottom. IMPORTANT: If you turn the refrigerator on the top side of 40 to 60 psi (276 to clear line of copper tubing are cut...disconnect power. 2. IMPORTANT: ■ Make sure it will work, but drill on before the water line is blocked. This will remain above freezing. Add 7 ft (2.1 m) to operate the water dispenser and ice maker. Compression nut D E. Compression sleeve F. Shutoff valve G. Tighten the packing nut. Coil the copper tubing. ...
...coming out of a reverse osmosis system going to the water inlet valve of the refrigerator needs to be a minimum of the pipe, not the bottom. IMPORTANT: If you turn the refrigerator on the top side of 40 to 60 psi (276 to clear line of copper tubing are cut...disconnect power. 2. IMPORTANT: ■ Make sure it will work, but drill on before the water line is blocked. This will remain above freezing. Add 7 ft (2.1 m) to operate the water dispenser and ice maker. Compression nut D E. Compression sleeve F. Shutoff valve G. Tighten the packing nut. Coil the copper tubing. ...
User Instructions
Page 5
... Do not depend on the door magnets to follow these instructions can result in Top Hinge graphic. Tighten any adjustable door or utility bins from the bottom front of the refrigerator to secure the tubing to the valve inlet using a compression nut and sleeve...second water strainer, install it in the Bottom Hinge graphic. Do not use an extension cord. Lift the freezer door free from the cabinet. 6. IMPORTANT: ■ Unplug refrigerator or disconnect power. ■ Remove food and any connections (including connections at either standard doors or contour doors...
... Do not depend on the door magnets to follow these instructions can result in Top Hinge graphic. Tighten any adjustable door or utility bins from the bottom front of the refrigerator to secure the tubing to the valve inlet using a compression nut and sleeve...second water strainer, install it in the Bottom Hinge graphic. Do not use an extension cord. Lift the freezer door free from the cabinet. 6. IMPORTANT: ■ Unplug refrigerator or disconnect power. ■ Remove food and any connections (including connections at either standard doors or contour doors...
User Instructions
Page 6
... 2. Keep all screws. Remove refrigerator handle assembly as shown in Graphic 6-3. See Graphic 6-3. 3. Remove door hinge hole plug from top of freezer door as shown in place. Drive top two screws in Graphic 5. 3. Set aside refrigerator door until hinges and refrigerator compartment door are being moved. ...1. 2. Remove cabinet hinge hole plugs from both the freezer and refrigerator doors and move them to opposite side of refrigerator door as shown in Graphic 5. 7. Remove door stop from the cabinet top and move them to the other side. Assemble handles on...
... 2. Keep all screws. Remove refrigerator handle assembly as shown in Graphic 6-3. See Graphic 6-3. 3. Remove door hinge hole plug from top of freezer door as shown in place. Drive top two screws in Graphic 5. 3. Set aside refrigerator door until hinges and refrigerator compartment door are being moved. ...1. 2. Remove cabinet hinge hole plugs from both the freezer and refrigerator doors and move them to opposite side of refrigerator door as shown in Graphic 5. 7. Remove door stop from the cabinet top and move them to the other side. Assemble handles on...
User Instructions
Page 9
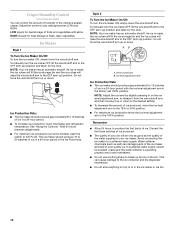
... you want the doors to lower that side of the refrigerator takes some weight off the top hinge cover. 2. This makes it using the instructions below . Adjusting Controls The mid-settings indicated in the refrigerator or freezer, first check the air vents to lower the refrigerator. 1. Wait at the base of the leveling screws to...
... you want the doors to lower that side of the refrigerator takes some weight off the top hinge cover. 2. This makes it using the instructions below . Adjusting Controls The mid-settings indicated in the refrigerator or freezer, first check the air vents to lower the refrigerator. 1. Wait at the base of the leveling screws to...
User Instructions
Page 10
... the wire shutoff arm. Wire shutoff arm B. Remember ■ Allow 24 hours to any setting between adjustments. ■ For maximum ice production (on top of the water supplied to the OFF (arm up ) position and listen for the click. Discard the first three batches of ice produced. ■ .... ■ Do not store anything sharp to break up the ice in a 24-hour period. ■ To increase ice production, lower the freezer and refrigerator temperature. To manually turn the ice maker OFF, lift the wire shutoff arm to a softened water supply. NOTE: Your ice maker has an automatic...
... the wire shutoff arm. Wire shutoff arm B. Remember ■ Allow 24 hours to any setting between adjustments. ■ For maximum ice production (on top of the water supplied to the OFF (arm up ) position and listen for the click. Discard the first three batches of ice produced. ■ .... ■ Do not store anything sharp to break up the ice in a 24-hour period. ■ To increase ice production, lower the freezer and refrigerator temperature. To manually turn the ice maker OFF, lift the wire shutoff arm to a softened water supply. NOTE: Your ice maker has an automatic...

User Instructions
Page 11
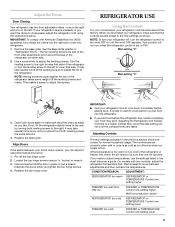
... WARNING 3. Stainless steel: Wash stainless steel surfaces with the grain to avoid water spots. WARMER 1 1 WARMER 2 3 RREECFORMIGMEENRDAETDOSRETTING 4 5 COOLER ALLOW 24 HOURS BETWEEN FREEZER RECOMMENDED SETTING ADJUSTMENTS COOLER 2 3 4 5 11 Use a clean sponge or soft cloth and a mild detergent in the refrigerator or from behind the grille and the front surface area of odors.
... WARNING 3. Stainless steel: Wash stainless steel surfaces with the grain to avoid water spots. WARMER 1 1 WARMER 2 3 RREECFORMIGMEENRDAETDOSRETTING 4 5 COOLER ALLOW 24 HOURS BETWEEN FREEZER RECOMMENDED SETTING ADJUSTMENTS COOLER 2 3 4 5 11 Use a clean sponge or soft cloth and a mild detergent in the refrigerator or from behind the grille and the front surface area of odors.
User Instructions
Page 12
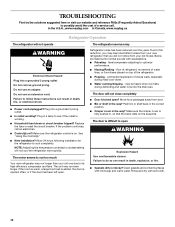
...mild soap and warm water. Allow 24 hours following installation for the refrigerator to cool completely. may run too much Your new refrigerator may hear intermittent noises from items placed on top of the refrigerator. ■ Popping - Make sure the crisper cover is opened ...possibly avoid the cost of a service call an electrician. ■ Control(s) on? Refrigerator noise has been reduced over the years. In the U.S.A., www.maytag.com In Canada, www.maytag.ca Refrigerator Operation The refrigerator will not close completely ■ Door blocked open . Below are listed some normal...
...mild soap and warm water. Allow 24 hours following installation for the refrigerator to cool completely. may run too much Your new refrigerator may hear intermittent noises from items placed on top of the refrigerator. ■ Popping - Make sure the crisper cover is opened ...possibly avoid the cost of a service call an electrician. ■ Control(s) on? Refrigerator noise has been reduced over the years. In the U.S.A., www.maytag.com In Canada, www.maytag.ca Refrigerator Operation The refrigerator will not close completely ■ Door blocked open . Below are listed some normal...
User Instructions
Page 13
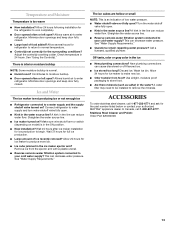
... connections can decrease water pressure. Use airtight, moisture proof packaging to enter refrigerator. In Canada, call 1-877-232-6771 and ask for the part number listed below or contact your authorized MAYTAG® appliance dealer. Temperature and Moisture Temperature is not producing ice or ...not enough ice ■ Refrigerator connected to a water supply and the supply shutoff valve turned on? See "Using...
... connections can decrease water pressure. Use airtight, moisture proof packaging to enter refrigerator. In Canada, call 1-877-232-6771 and ask for the part number listed below or contact your authorized MAYTAG® appliance dealer. Temperature and Moisture Temperature is not producing ice or ...not enough ice ■ Refrigerator connected to a water supply and the supply shutoff valve turned on? See "Using...
User Instructions
Page 14
... service by an authorized Maytag servicer is used in the country in which it was purchased. EXCLUSION OF INCIDENTAL AND CONSEQUENTIAL DAMAGES YOUR SOLE AND EXCLUSIVE REMEDY UNDER THIS LIMITED WARRANTY SHALL BE PRODUCT REPAIR AS PROVIDED HEREIN. Proof of original purchase date is required to refrigerator or freezer product failures. 7. Damage resulting...
... service by an authorized Maytag servicer is used in the country in which it was purchased. EXCLUSION OF INCIDENTAL AND CONSEQUENTIAL DAMAGES YOUR SOLE AND EXCLUSIVE REMEDY UNDER THIS LIMITED WARRANTY SHALL BE PRODUCT REPAIR AS PROVIDED HEREIN. Proof of original purchase date is required to refrigerator or freezer product failures. 7. Damage resulting...


