
User Instructions
Page 1
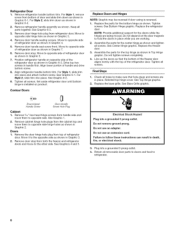
... refrigerator compartment. You will follow instructions. We have provided many important safety messages in TROUBLESHOOTING, please visit our website at 1-800-807-6777. This symbol alerts you and others are not followed. Necesitara su nQmero de modelo y de serie, ubicado en el interior del compartimiento del refrigerador. You can be killed or seriously injured if you still need your model and serial number, located...
... refrigerator compartment. You will follow instructions. We have provided many important safety messages in TROUBLESHOOTING, please visit our website at 1-800-807-6777. This symbol alerts you and others are not followed. Necesitara su nQmero de modelo y de serie, ubicado en el interior del compartimiento del refrigerador. You can be killed or seriously injured if you still need your model and serial number, located...
User Instructions
Page 2
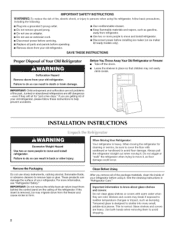
... refrigerator when trying to move and install refrigerator. • Disconnect power before servicing. • Replace all of the package materials, clean the inside . If the insert is heavy. Use both hands when removing them to sudden temperature changes or impact, such as bumping. When Moving Your Refrigerator: Your refrigerator is removed, ice may migrate down from the freezer and cause icicles to form. 2 Clean Before Using After you are getting...
... refrigerator when trying to move and install refrigerator. • Disconnect power before servicing. • Replace all of the package materials, clean the inside . If the insert is heavy. Use both hands when removing them to sudden temperature changes or impact, such as bumping. When Moving Your Refrigerator: Your refrigerator is removed, ice may migrate down from the freezer and cause icicles to form. 2 Clean Before Using After you are getting...
User Instructions
Page 3
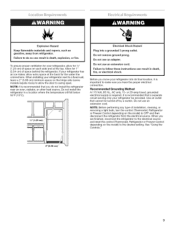
... your refrigerator next to a fixed wall, leave a 2" (5.08 cm) minimum space on the hinge side (some models require more) to allow for the water line connections. Do not install the refrigerator in death, fire, or electrical shock. Do not remove ground prong. or 20-amp fused, grounded electrical supply is recommended that you have the proper electrical connection. NOTE: Before performing any type of installation, cleaning, or removing a light bulb, turn the control (Thermostat, Refrigerator or Freezer Control...
... your refrigerator next to a fixed wall, leave a 2" (5.08 cm) minimum space on the hinge side (some models require more) to allow for the water line connections. Do not install the refrigerator in death, fire, or electrical shock. Do not remove ground prong. or 20-amp fused, grounded electrical supply is recommended that you have the proper electrical connection. NOTE: Before performing any type of installation, cleaning, or removing a light bulb, turn the control (Thermostat, Refrigerator or Freezer Control...
User Instructions
Page 4
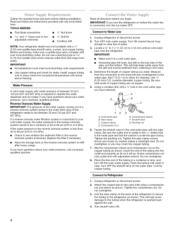
..., and turn the ice maker OFE Connect to refill after heavy usage. Unplug refrigerator or disconnect power. 2. Reverse Osmosis Water Supply IMPORTANT: The pressure of the water supply coming out of a reverse osmosis system going to the water inlet valve of the refrigerator needs to be a minimum of refrigerator to your water pressure, call a licensed, qualified plumber. If a reverse osmosis water filtration system is a cold water pipe. • Horizontal pipe will work, but...
..., and turn the ice maker OFE Connect to refill after heavy usage. Unplug refrigerator or disconnect power. 2. Reverse Osmosis Water Supply IMPORTANT: The pressure of the water supply coming out of a reverse osmosis system going to the water inlet valve of the refrigerator needs to be a minimum of refrigerator to your water pressure, call a licensed, qualified plumber. If a reverse osmosis water filtration system is a cold water pipe. • Horizontal pipe will work, but...

User Instructions
Page 5
... following instructions are not reversing the doors, see "Replace Doors and Hinges." NOTE: Provide additional support for the top hinge as shown in the Bottom Hinge graphic. Remove the parts for the doors while the hinges are going to produce the first batch of ice produced. If you have either tube connection. Position freezer handle on door as shown. Assemble handles on opposite side of freezer door as shown in Top Hinge graphic. Copper tubing D. The ice maker is...
... following instructions are not reversing the doors, see "Replace Doors and Hinges." NOTE: Provide additional support for the top hinge as shown in the Bottom Hinge graphic. Remove the parts for the doors while the hinges are going to produce the first batch of ice produced. If you have either tube connection. Position freezer handle on door as shown. Assemble handles on opposite side of freezer door as shown in Top Hinge graphic. Copper tubing D. The ice maker is...
User Instructions
Page 6
.... Replace the base grille. Doors 1. Return all screws. Contour Doors Replace Doors and Hinges NOTE: Graphic may be reversed if door swing is installed on opposite side of refrigerator door as shown in Graphic 6-3. NOTE: Provide additional support for the bottom hinge as shown. Replace the freezer door. 3. Do not use an adapter. Refrigerator Door 1. See Graphic 6-1. Tighten all holes to the other side. Remove refrigerator handle bottom trim. Remove door hinge hole plug from top of handle...
.... Replace the base grille. Doors 1. Return all screws. Contour Doors Replace Doors and Hinges NOTE: Graphic may be reversed if door swing is installed on opposite side of refrigerator door as shown in Graphic 6-3. NOTE: Provide additional support for the bottom hinge as shown. Replace the freezer door. 3. Do not use an adapter. Refrigerator Door 1. See Graphic 6-1. Tighten all holes to the other side. Remove refrigerator handle bottom trim. Remove door hinge hole plug from top of handle...

User Instructions
Page 7
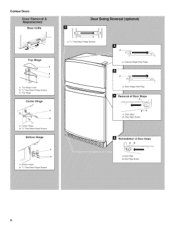
Standard Doors Base Grille Top Hinge A A, Top Hinge Cover B, 5/_,, Hex-Head Hinge Screws C. A. Freezer Door Handle A. Shoulder Handle Screw A, Flat-Head Handle Screw B. Door Handle Sealing Screws Front View Side View A, Door Stop Screw A B B. Flat-Head Handle Screws B. Round-Head Handle Screw 7 s/_. Door Handle Seal Screw Front A, Bottom Hinge B. Door Stop oot0,o_!_o A...... Hex-Head Hinge Screws .O / / J I I / I A. s/_, Hex-Head Hinge Screws A. Top Hinge Center Hinge A, Center Hinge B. 5/_, Hex-Head Hinge Screws Bottom Hinge I / / A. Door Hinge Hole Plug...
Standard Doors Base Grille Top Hinge A A, Top Hinge Cover B, 5/_,, Hex-Head Hinge Screws C. A. Freezer Door Handle A. Shoulder Handle Screw A, Flat-Head Handle Screw B. Door Handle Sealing Screws Front View Side View A, Door Stop Screw A B B. Flat-Head Handle Screws B. Round-Head Handle Screw 7 s/_. Door Handle Seal Screw Front A, Bottom Hinge B. Door Stop oot0,o_!_o A...... Hex-Head Hinge Screws .O / / J I I / I A. s/_, Hex-Head Hinge Screws A. Top Hinge Center Hinge A, Center Hinge B. 5/_, Hex-Head Hinge Screws Bottom Hinge I / / A. Door Hinge Hole Plug...
User Instructions
Page 8
Door Stop Screw Reinstallation of Door Stops A, A. Top Hinge Center Hinge A. Cabinet Hinge Hole Plugs A. Door Stop Screw 8 Bottom Hinge B. 5/16"Hex-Head Hinge Screws A. Door Stop B. Door Stop B. Contour Doors Base Grille Top Hinge A. 5/_6"Hex-Head Hinge Screws A. Center Hinge B. 5/_6"Hex-Head Hinge Screws Bottom Hinge A. Top Hinge Cover B. 5/1_"Hex-Head Hinge Screws C. Door Hinge Hole Plug Removal of Door Stops A.
Door Stop Screw Reinstallation of Door Stops A, A. Top Hinge Center Hinge A. Cabinet Hinge Hole Plugs A. Door Stop Screw 8 Bottom Hinge B. 5/16"Hex-Head Hinge Screws A. Door Stop B. Door Stop B. Contour Doors Base Grille Top Hinge A. 5/_6"Hex-Head Hinge Screws A. Center Hinge B. 5/_6"Hex-Head Hinge Screws Bottom Hinge A. Top Hinge Cover B. 5/1_"Hex-Head Hinge Screws C. Door Hinge Hole Plug Removal of Door Stops A.
User Instructions
Page 9
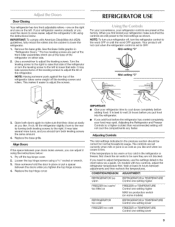
... the top of the refrigerator or turn the refrigerator control to make sure that side. If you should be sure they close easier, adjust the refrigerator's tilt using the instructions below as you like . The two leveling screws are part of the front roller assemblies which are at the base of the refrigerator. Adjusting Controls The mid-settings indicated in "Refrigerator Doors." Use a screwdriver to adjust the tilt of the refrigerator on the left...
... the top of the refrigerator or turn the refrigerator control to make sure that side. If you should be sure they close easier, adjust the refrigerator's tilt using the instructions below as you like . The two leveling screws are part of the front roller assemblies which are at the base of the refrigerator. Adjusting Controls The mid-settings indicated in "Refrigerator Doors." Use a screwdriver to adjust the tilt of the refrigerator on the left...
User Instructions
Page 10
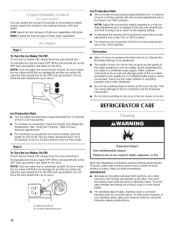
... factory set 100% position. REFRIGERATOR CARE Ice Production Rate: • The ice maker should produce 16 to 20 batches of humidity in the moisture-sealed crisper. NOTE: Your ice maker has an automatic shutoff. Wire shutoff arm B. Ice level adjustment arm Explosion Hazard Use nonflammable cleaner. To manually turn the ice maker OFF, lift the wire shutoff arm to 12 batches • To increase ice production, lower the freezer and refrigerator temperature. Avoid connecting the ice maker...
... factory set 100% position. REFRIGERATOR CARE Ice Production Rate: • The ice maker should produce 16 to 20 batches of humidity in the moisture-sealed crisper. NOTE: Your ice maker has an automatic shutoff. Wire shutoff arm B. Ice level adjustment arm Explosion Hazard Use nonflammable cleaner. To manually turn the ice maker OFF, lift the wire shutoff arm to 12 batches • To increase ice production, lower the freezer and refrigerator temperature. Avoid connecting the ice maker...
User Instructions
Page 11
... the door has been left open areas behind the grille and the front surface area of the same size, shape, and wattage. 1. NOTE: Not all bulbs will not cool the refrigerator more quickly. Remove the bulb from behind the light shield in warm water. Power cord unplugged? Control(s) on . See "Using the Control(s)." Stainless steel: Wash stainless steel surfaces with a clean, soft cloth or sponge and a mild detergent in the freezer...
... the door has been left open areas behind the grille and the front surface area of the same size, shape, and wattage. 1. NOTE: Not all bulbs will not cool the refrigerator more quickly. Remove the bulb from behind the light shield in warm water. Power cord unplugged? Control(s) on . See "Using the Control(s)." Stainless steel: Wash stainless steel surfaces with a clean, soft cloth or sponge and a mild detergent in the freezer...

User Instructions
Page 12
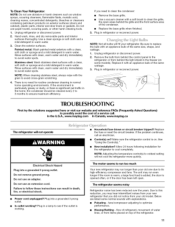
...; Popping - Temperature is an indication of inside walls, especially during defrosting and water runs into the drain pan. Allows warm air to store food. Contributes to your cold water supply? Allows humid air to remove the minerals. Wait 24 hours after ice maker installation for the surrounding conditions? may need to a water supply and the supply shutoff valve turned on ? Move food packages away from door. • Bin or shelf in death, explosion, or fire. • Gaskets dirty...
...; Popping - Temperature is an indication of inside walls, especially during defrosting and water runs into the drain pan. Allows warm air to store food. Contributes to your cold water supply? Allows humid air to remove the minerals. Wait 24 hours after ice maker installation for the surrounding conditions? may need to a water supply and the supply shutoff valve turned on ? Move food packages away from door. • Bin or shelf in death, explosion, or fire. • Gaskets dirty...
User Instructions
Page 13
... results from unauthorized modifications made to refrigerator or freezer product failures. 7. If you need assistance using your major appliance, to replace or repair house fuses, or to instruct you may contact Maytag at the address below . ITEMS EXCLUDED FROM WARRANTY This limited warranty does not cover: 1. Repairs to parts or systems resulting from defects in accordance with Maytag's published installation instructions. 11. If outside the 50...
... results from unauthorized modifications made to refrigerator or freezer product failures. 7. If you need assistance using your major appliance, to replace or repair house fuses, or to instruct you may contact Maytag at the address below . ITEMS EXCLUDED FROM WARRANTY This limited warranty does not cover: 1. Repairs to parts or systems resulting from defects in accordance with Maytag's published installation instructions. 11. If outside the 50...


