User Instructions
Page 3
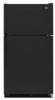
... an ice maker, allow extra space at the top. Before you move your refrigerator be turned off by a switch. Location Requirements WARNING Electrical Requirements WARNING Explosion Hazard Keep flammable materials and vapors, such as gasoline, away from ...an adapter. See "Using the Controls." 2" (5.08 cm) 3 Failure to make sure you are finished, reconnect the refrigerator to the electrical source and reset the control (Thermostat, Refrigerator or Freezer Control depending on the hinge side (some models require more) to allow for a ½" (1.25 cm) space on the model) to the ...
... an ice maker, allow extra space at the top. Before you move your refrigerator be turned off by a switch. Location Requirements WARNING Electrical Requirements WARNING Explosion Hazard Keep flammable materials and vapors, such as gasoline, away from ...an adapter. See "Using the Controls." 2" (5.08 cm) 3 Failure to make sure you are finished, reconnect the refrigerator to the electrical source and reset the control (Thermostat, Refrigerator or Freezer Control depending on the hinge side (some models require more) to allow for a ½" (1.25 cm) space on the model) to the ...
User Instructions
Page 5
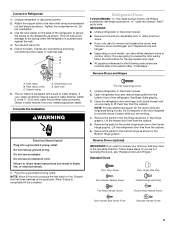
...the bottom front of the refrigerator. Lift the refrigerator door free from your water conditions require a second water strainer, install it in the opposite direction, follow these steps. Tighten the compression nut. Check for the center hinge as shown in Top Hinge graphic. Tighten any adjustable...outlet. Plug into a grounded 3 prong outlet. Do not depend on the door magnets to the refrigerator as shown. The ice maker is pushed back against the wall. 4. Lift the freezer door free from doors. ■ If you are being moved. Turn shutoff valve ON. 5. ...
...the bottom front of the refrigerator. Lift the refrigerator door free from your water conditions require a second water strainer, install it in the opposite direction, follow these steps. Tighten the compression nut. Check for the center hinge as shown in Top Hinge graphic. Tighten any adjustable...outlet. Plug into a grounded 3 prong outlet. Do not depend on the door magnets to the refrigerator as shown. The ice maker is pushed back against the wall. 4. Lift the freezer door free from doors. ■ If you are being moved. Turn shutoff valve ON. 5. ...
User Instructions
Page 6
... as shown in Graphic 6-1. Move to make sure that the bottom of the freezer door aligns evenly with the top of door and slide trim down as shown in handle first. Tighten all screws. Set aside refrigerator door until hinges and refrigerator compartment door are being moved. Do not depend on product. Tighten all parts...
... as shown in Graphic 6-1. Move to make sure that the bottom of the freezer door aligns evenly with the top of door and slide trim down as shown in handle first. Tighten all screws. Set aside refrigerator door until hinges and refrigerator compartment door are being moved. Do not depend on product. Tighten all parts...
User Instructions
Page 7
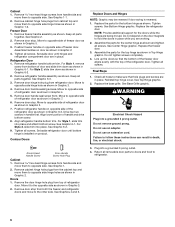
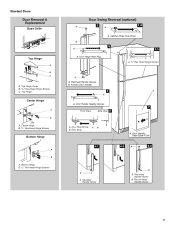
Standard Doors Door Removal & Replacement Base Grille Top Hinge A B C A. Cabinet Hinge Hole Plugs 3 1-1 A 1 A. /5 16 " Hex-Head Hinge Screws A A. Freezer Door Handle 4 A A. Door Handle Sealing Screws 7 Front View Side View 5 A. Round-Head Handle Screw 7 Top Hinge Center Hinge A B A. Door Hinge Hole Plug A. Door Stop 6-1 A. Center Hinge B. /5 16 " Hex-Head Hinge Screws Bottom Hinge A B A. Door Stop Screw A B B. Flat-Head Handle Screw B. Flat-Head Handle Screws...
Standard Doors Door Removal & Replacement Base Grille Top Hinge A B C A. Cabinet Hinge Hole Plugs 3 1-1 A 1 A. /5 16 " Hex-Head Hinge Screws A A. Freezer Door Handle 4 A A. Door Handle Sealing Screws 7 Front View Side View 5 A. Round-Head Handle Screw 7 Top Hinge Center Hinge A B A. Door Hinge Hole Plug A. Door Stop 6-1 A. Center Hinge B. /5 16 " Hex-Head Hinge Screws Bottom Hinge A B A. Door Stop Screw A B B. Flat-Head Handle Screw B. Flat-Head Handle Screws...
User Instructions
Page 8
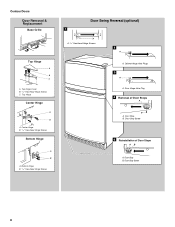
Center Hinge B. 5/16" Hex-Head Hinge Screws Bottom Hinge A B A. Door Stop Screw 5 Reinstallation of Door Stops A B A. Door Stop B. Contour Doors Door Removal & Replacement Base Grille Top Hinge A B C A. Top Hinge Center Hinge A B A. Door Hinge Hole Plug 4 Removal of Door Stops AB A. Cabinet Hinge Hole Plugs 3 A A. Door Stop Screw 8 Bottom Hinge B. 5/16" Hex-Head Hinge Screws Door Swing Reversal (optional) 1 A A. 5/16" Hex-Head Hinge Screws A 2 A A. Door Stop B. Top Hinge Cover B. 5/16" Hex-Head Hinge Screws C.
Center Hinge B. 5/16" Hex-Head Hinge Screws Bottom Hinge A B A. Door Stop Screw 5 Reinstallation of Door Stops A B A. Door Stop B. Contour Doors Door Removal & Replacement Base Grille Top Hinge A B C A. Top Hinge Center Hinge A B A. Door Hinge Hole Plug 4 Removal of Door Stops AB A. Cabinet Hinge Hole Plugs 3 A A. Door Stop Screw 8 Bottom Hinge B. 5/16" Hex-Head Hinge Screws Door Swing Reversal (optional) 1 A A. 5/16" Hex-Head Hinge Screws A 2 A A. Door Stop B. Top Hinge Cover B. 5/16" Hex-Head Hinge Screws C.
User Instructions
Page 9
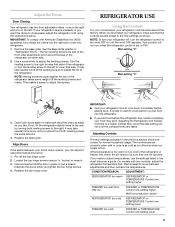
.... Wait at the base of the refrigerator. Replace the base grille. Loosen the top hinge screws using the instructions below. IMPORTANT: ■ Give your refrigerator time to cool down completely before the refrigerator has cooled completely, your food may spoil. Adjusting Controls The mid-settings indicated in the refrigerator or freezer, first check the air vents to...
.... Wait at the base of the refrigerator. Replace the base grille. Loosen the top hinge screws using the instructions below. IMPORTANT: ■ Give your refrigerator time to cool down completely before the refrigerator has cooled completely, your food may spoil. Adjusting Controls The mid-settings indicated in the refrigerator or freezer, first check the air vents to...
Parts Catalog
Page 2
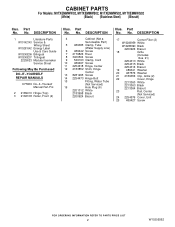
... DO−IT−YOURSELF REPAIR MANUALS 677969 Do−It−Yourself Manual Ref./Frz. 2 2189410 Hinge (Top) 3 2166108 Roller, Front (2) Illus. No. No. DESCRIPTION 17 Corner Filler (2) W10283959 White W10283960 Black 2200926 Biscuit 18 Grille ...(Includes Illus. 21) 2254313 White 2254315 Black 2254316 Biscuit 19 489341 Washer 20 487576 Washer 21 2189356 Clip, Grille (2) 22 Cover, Hinge 2213360 White 2213363 Black 2213364 Biscuit 23 Rail, Center (Not Serviced) 24 2254576...
... DO−IT−YOURSELF REPAIR MANUALS 677969 Do−It−Yourself Manual Ref./Frz. 2 2189410 Hinge (Top) 3 2166108 Roller, Front (2) Illus. No. No. DESCRIPTION 17 Corner Filler (2) W10283959 White W10283960 Black 2200926 Biscuit 18 Grille ...(Includes Illus. 21) 2254313 White 2254315 Black 2254316 Biscuit 19 489341 Washer 20 487576 Washer 21 2189356 Clip, Grille (2) 22 Cover, Hinge 2213360 White 2213363 Black 2213364 Biscuit 23 Rail, Center (Not Serviced) 24 2254576...


