User Guide
Page 2
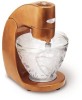
... the precision planetary mixing action to handle a wide range of innovative features designed for life - Your sleekly styled, gracefully curved Jenn-Air mixer - makes food preparation and presentation a joy. The Jenn-Air mixer is beautiful ... For the love of a Jenn-Air™ mixer. JENN-AIR™ MIXER C o n g r at u l at your fingertips.The Jenn-Air mixer's powerful high-efficiency 400-watt motor and drive system work in our expanding line of fine kitchen major appliances...
... the precision planetary mixing action to handle a wide range of innovative features designed for life - Your sleekly styled, gracefully curved Jenn-Air mixer - makes food preparation and presentation a joy. The Jenn-Air mixer is beautiful ... For the love of a Jenn-Air™ mixer. JENN-AIR™ MIXER C o n g r at u l at your fingertips.The Jenn-Air mixer's powerful high-efficiency 400-watt motor and drive system work in our expanding line of fine kitchen major appliances...
User Guide
Page 3
... records: Model Number Serial Number Date Purchased Store Name Table of the Product Safety Recall Act. Please complete the following for Service 12 Recipes 13-16 Warranty/Customer Service 17-18 Guide de L'utilisateur 20 Guía del Usuario 37 2 Please return the product registration card packaged with the provisions of Contents Safety Instructions 3-4 Parts and Features 5-6 Assembling Your Mixer 7-8 Operating Your Mixer 9 Speed Control Guide 10 Care and Cleaning...
... records: Model Number Serial Number Date Purchased Store Name Table of the Product Safety Recall Act. Please complete the following for Service 12 Recipes 13-16 Warranty/Customer Service 17-18 Guide de L'utilisateur 20 Guía del Usuario 37 2 Please return the product registration card packaged with the provisions of Contents Safety Instructions 3-4 Parts and Features 5-6 Assembling Your Mixer 7-8 Operating Your Mixer 9 Speed Control Guide 10 Care and Cleaning...

User Guide
Page 4
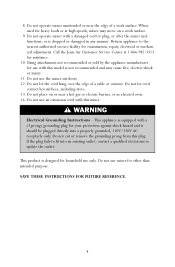
... problems or conditions you do not put the cord, plug or mixer in water or other attachments from mixer before cleaning. 5. Close supervision is necessary when any appliance is used by or near children. 4. What You Need to Know About Safety Instructions Warning and important safety instructions appearing in this manual are not meant to the mixer. 3 Important Safeguards WARNING When using electrical...
... problems or conditions you do not put the cord, plug or mixer in water or other attachments from mixer before cleaning. 5. Close supervision is necessary when any appliance is used by or near children. 4. What You Need to Know About Safety Instructions Warning and important safety instructions appearing in this manual are not meant to the mixer. 3 Important Safeguards WARNING When using electrical...
User Guide
Page 5
... for examination, repair, electrical or mechanical adjustment. RDUo CnoTtIcOuNt oSrFrOemRoFveUtThUe RgrEouRnEdFinEgRpErNonCgEf.rom this model is dropped or damaged in a heated oven. 14. Call the Jenn-Air Customer Service Center at high speeds, mixer may cause fire, electric shock or injury. 11. Do not let the cord hang over the edge of a work surface. 9. This appliance is designed for use with this mixer. This product...
... for examination, repair, electrical or mechanical adjustment. RDUo CnoTtIcOuNt oSrFrOemRoFveUtThUe RgrEouRnEdFinEgRpErNonCgEf.rom this model is dropped or damaged in a heated oven. 14. Call the Jenn-Air Customer Service Center at high speeds, mixer may cause fire, electric shock or injury. 11. Do not let the cord hang over the edge of a work surface. 9. This appliance is designed for use with this mixer. This product...
User Guide
Page 7
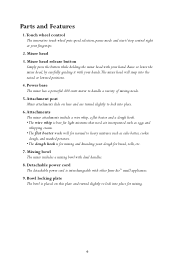
...whipping cream. • The flat beater works well for bread, rolls, etc. 7. Power base The mixer has a powerful 400-watt motor to lock into place. 6. Mixer head 3. Raise or lower the mixer head, by carefully guiding it with other Jenn-Air™ small appliances. 9. Attachment post Mixer attachments slide on this plate and turned slightly to handle a variety of mixing needs. 5. Attachments The mixer attachments include a wire whip, a flat beater and a dough hook. • The wire whip is for mixing and kneading yeast dough for normal to lock into place for mixing. 6 Mixing...
...whipping cream. • The flat beater works well for bread, rolls, etc. 7. Power base The mixer has a powerful 400-watt motor to lock into place. 6. Mixer head 3. Raise or lower the mixer head, by carefully guiding it with other Jenn-Air™ small appliances. 9. Attachment post Mixer attachments slide on this plate and turned slightly to handle a variety of mixing needs. 5. Attachments The mixer attachments include a wire whip, a flat beater and a dough hook. • The wire whip is for mixing and kneading yeast dough for normal to lock into place for mixing. 6 Mixing...
User Guide
Page 8
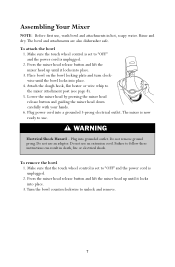
... Mixer NOTE: Before first use an extension cord. Make sure the touch wheel control is set to "OFF" and the power cord is unplugged. 2. Failure to the mixer attachment post (see page 8). 5. To remove the bowl 1. To attach the bowl 1. Press the mixer head release button and lift the mixer head up until it locks into a grounded 3-prong electrical outlet.The mixer is unplugged. 2. Plug into place. 4. Attach the dough hook, flat beater or wire whip to follow these instructions...
... Mixer NOTE: Before first use an extension cord. Make sure the touch wheel control is set to "OFF" and the power cord is unplugged. 2. Failure to the mixer attachment post (see page 8). 5. To remove the bowl 1. To attach the bowl 1. Press the mixer head release button and lift the mixer head up until it locks into a grounded 3-prong electrical outlet.The mixer is unplugged. 2. Plug into place. 4. Attach the dough hook, flat beater or wire whip to follow these instructions...
User Guide
Page 9
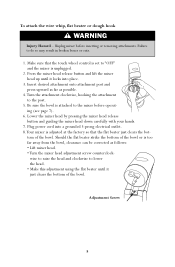
... possible. 4.Turn the attachment clockwise, hooking the attachment to "OFF" and the mixer is unplugged. 2. Lower the mixer head by pressing the mixer head release button and guiding the mixer head down carefully with your hands. 7. Plug power cord into place. 3. Insert desired attachment onto attachment post and press upward as far as follows: • Lift mixer head. • Turn the mixer head adjustment screw counterclock- Adjustment Screw 8 Make sure that the flat beater just clears the bot- Should the flat beater strike...
... possible. 4.Turn the attachment clockwise, hooking the attachment to "OFF" and the mixer is unplugged. 2. Lower the mixer head by pressing the mixer head release button and guiding the mixer head down carefully with your hands. 7. Plug power cord into place. 3. Insert desired attachment onto attachment post and press upward as far as follows: • Lift mixer head. • Turn the mixer head adjustment screw counterclock- Adjustment Screw 8 Make sure that the flat beater just clears the bot- Should the flat beater strike...
User Guide
Page 10
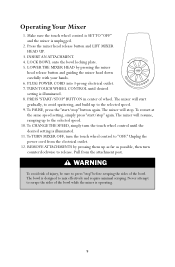
... sides of the bowl. INSERT AN ATTACHMENT. 4. LOCK BOWL onto the bowl locking plate. 5. Unplug the power cord from the attachment post. PLUG POWER CORD into 3-prong electrical outlet. 7.TURN TOUCH WHEEL CONTROL until the desired setting is illuminated. 11.To TURN MIXER OFF, turn the touch wheel control to mix effectively and require minimal scraping. Operating Your Mixer 1. REMOVE ATTACHMENTS by pressing the mixer head release button and guiding the mixer head down carefully with your hands. 6. LOWER THE MIXER HEAD by pressing...
... sides of the bowl. INSERT AN ATTACHMENT. 4. LOCK BOWL onto the bowl locking plate. 5. Unplug the power cord from the attachment post. PLUG POWER CORD into 3-prong electrical outlet. 7.TURN TOUCH WHEEL CONTROL until the desired setting is illuminated. 11.To TURN MIXER OFF, turn the touch wheel control to mix effectively and require minimal scraping. Operating Your Mixer 1. REMOVE ATTACHMENTS by pressing the mixer head release button and guiding the mixer head down carefully with your hands. 6. LOWER THE MIXER HEAD by pressing...
User Guide
Page 11
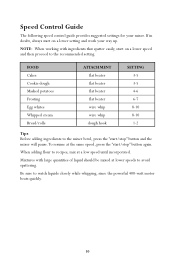
... proceed to avoid spattering. Be sure to recipes, mix at a low speed until incorporated. When adding flour to watch liquids closely while whipping, since the powerful 400-watt motor beats quickly. 10 FOOD Cakes Cookie dough Mashed potatoes Frosting Egg whites Whipped cream Bread/rolls ATTACHMENT flat beater flat beater flat beater flat beater wire whip wire whip dough hook SETTING 3-5 3-5 4-6 6-7 8-10 8-10 1-2 Tips Before adding ingredients to the mixer bowl, press the "start/stop " button again. If in doubt, always start...
... proceed to avoid spattering. Be sure to recipes, mix at a low speed until incorporated. When adding flour to watch liquids closely while whipping, since the powerful 400-watt motor beats quickly. 10 FOOD Cakes Cookie dough Mashed potatoes Frosting Egg whites Whipped cream Bread/rolls ATTACHMENT flat beater flat beater flat beater flat beater wire whip wire whip dough hook SETTING 3-5 3-5 4-6 6-7 8-10 8-10 1-2 Tips Before adding ingredients to the mixer bowl, press the "start/stop " button again. If in doubt, always start...
User Guide
Page 12
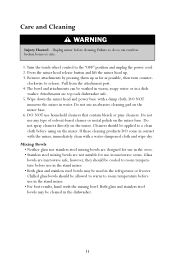
... attachments can result in microwave ovens. Mixing Bowls • Neither glass nor stainless steel mixing bowls are designed for use in broken bones or cuts. 1.Turn the touch wheel control to release. Care and Cleaning WARNING Injury Hazard - Unplug mixer before use household cleaners that contain bleach or pine cleaners. clockwise to the "OFF" position and unplug the power cord. 2. DO NOT use in the stand mixer. • Both glass...
... attachments can result in microwave ovens. Mixing Bowls • Neither glass nor stainless steel mixing bowls are designed for use in broken bones or cuts. 1.Turn the touch wheel control to release. Care and Cleaning WARNING Injury Hazard - Unplug mixer before use household cleaners that contain bleach or pine cleaners. clockwise to the "OFF" position and unplug the power cord. 2. DO NOT use in the stand mixer. • Both glass...
User Guide
Page 13
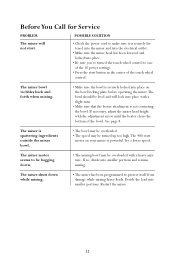
.... • Be sure you've turned the touch wheel control to make sure it is powerful.Try a lower speed. If necessary, adjust the mixer head height with the adjustment screw until the beater clears the bottom of the 10 power settings. • Press the start . • Check the power cord to one of the bowl. Before You Call for Service PROBLEM POSSIBLE SOLUTION The mixer will lock into place with a heavy mixture.
.... • Be sure you've turned the touch wheel control to make sure it is powerful.Try a lower speed. If necessary, adjust the mixer head height with the adjustment screw until the beater clears the bottom of the 10 power settings. • Press the start . • Check the power cord to one of the bowl. Before You Call for Service PROBLEM POSSIBLE SOLUTION The mixer will lock into place with a heavy mixture.
User Guide
Page 14
... with dough hook until dough is golden brown. Divide dough in half, place each on setting #1, mix dry ingredients into two 8" circles. Sprinkle with remaining 2 tablespoons of fresh herbs equals 1 teaspoon dried in the microwave). Cut into dough, creating indentations. Using dough hook attachment on greased cookie sheets and press into water and oil mixture. Optional toppings: 2 tablespoons of flour, yeast, sugar and...
... with dough hook until dough is golden brown. Divide dough in half, place each on setting #1, mix dry ingredients into two 8" circles. Sprinkle with remaining 2 tablespoons of fresh herbs equals 1 teaspoon dried in the microwave). Cut into dough, creating indentations. Using dough hook attachment on greased cookie sheets and press into water and oil mixture. Optional toppings: 2 tablespoons of flour, yeast, sugar and...
User Guide
Page 15
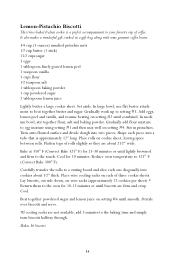
...Turn onto floured surface and divide dough into a tube that is a perfect accompaniment to your favorite cup of rolls slightly so they are about 1⁄2" thick. Lay biscotti, cut side down, on each of three cookie sheets. Makes 36 biscotti. 14 Reduce oven temperature to setting #5. Place wire cooling racks on wire... In large bowl, use flat beater attachment to a cutting board and slice each piece into two pieces. Gradually add flour mixture to egg mixture using setting #1 and then mix well on cookie sheet, leaving space between rolls. Place rolls on setting #4. Cool....
...Turn onto floured surface and divide dough into a tube that is a perfect accompaniment to your favorite cup of rolls slightly so they are about 1⁄2" thick. Lay biscotti, cut side down, on each of three cookie sheets. Makes 36 biscotti. 14 Reduce oven temperature to setting #5. Place wire cooling racks on wire... In large bowl, use flat beater attachment to a cutting board and slice each piece into two pieces. Gradually add flour mixture to egg mixture using setting #1 and then mix well on cookie sheet, leaving space between rolls. Place rolls on setting #4. Cool....
User Guide
Page 16
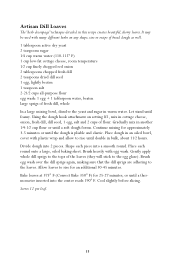
...a thermometer inserted into 2 pieces. Serves 12 per loaf. 15 Using the dough hook attachment on any shape, size or recipe of bread dough as well. 1 tablespoon active dry yeast 2 teaspoons sugar 1⁄4 cup warm water (110-115° F) 1 cup...mixing bowl, dissolve the yeast and sugar in bulk, about 11⁄2 hours. Shape each round onto a large, oiled baking sheet. It may be used with egg wash. Divide dough into the center reads 190° F. Let stand until double in warm water. Artisan Dill Loaves The "herb decoupage" technique detailed in an oiled bowl, cover with plastic...
...a thermometer inserted into 2 pieces. Serves 12 per loaf. 15 Using the dough hook attachment on any shape, size or recipe of bread dough as well. 1 tablespoon active dry yeast 2 teaspoons sugar 1⁄4 cup warm water (110-115° F) 1 cup...mixing bowl, dissolve the yeast and sugar in bulk, about 11⁄2 hours. Shape each round onto a large, oiled baking sheet. It may be used with egg wash. Divide dough into the center reads 190° F. Let stand until double in warm water. Artisan Dill Loaves The "herb decoupage" technique detailed in an oiled bowl, cover with plastic...
User Guide
Page 17
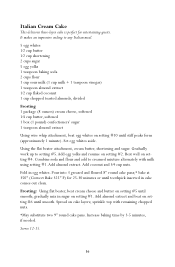
... almond extract and beat on setting #4. Set egg whites aside. Beat well on setting #6 until smooth. Fold in cake comes out clean. Serves 12-15. 16 Add almond extract. gradually mix in sugar on setting #2. Using the flat beater attachment, cream butter, shortening and sugar. Add egg yolks and resume on setting #1. Spread on setting #5 until smooth; Gradually work up to creamed mixture alternately with remaining chopped nuts...
... almond extract and beat on setting #4. Set egg whites aside. Beat well on setting #6 until smooth. Fold in cake comes out clean. Serves 12-15. 16 Add almond extract. gradually mix in sugar on setting #2. Using the flat beater attachment, cream butter, shortening and sugar. Add egg yolks and resume on setting #1. Spread on setting #5 until smooth; Gradually work up to creamed mixture alternately with remaining chopped nuts...
User Guide
Page 18
... control. 2.Warranty is proven defective, the mixer will also arrange delivery of an identical or comparable replacement to your door free of charge. Misuse, abuse, accidents, unreasonable use . 4. Consequential or incidental damages sustained by offering a one-year hassle-free replacement warranty. Products purchased for it to follow the Jenn-Air instructions. Warranty/Customer Service Jenn-Air® One-Year Hassle-Free Replacement Warranty Jenn-Air stands behind the high quality of charge. Jenn-Air will arrange for commercial...
... control. 2.Warranty is proven defective, the mixer will also arrange delivery of an identical or comparable replacement to your door free of charge. Misuse, abuse, accidents, unreasonable use . 4. Consequential or incidental damages sustained by offering a one-year hassle-free replacement warranty. Products purchased for it to follow the Jenn-Air instructions. Warranty/Customer Service Jenn-Air® One-Year Hassle-Free Replacement Warranty Jenn-Air stands behind the high quality of charge. Jenn-Air will arrange for commercial...
User Guide
Page 19
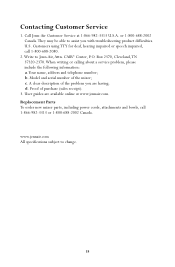
... you are available online at 1-866-982-3313 U.S.A. Model and serial number of the problem you with troubleshooting product difficulties. Box 2370, Cleveland,TN 37320-2370.When writing or calling about a service problem, please include the following information: a.Your name, address and telephone number; Call Jenn-Air Customer Service at www.jennair.com. User guides are having; Replacement Parts To order new mixer parts, including power cords, attachments and bowls, call 1-800-688...
... you are available online at 1-866-982-3313 U.S.A. Model and serial number of the problem you with troubleshooting product difficulties. Box 2370, Cleveland,TN 37320-2370.When writing or calling about a service problem, please include the following information: a.Your name, address and telephone number; Call Jenn-Air Customer Service at www.jennair.com. User guides are having; Replacement Parts To order new mixer parts, including power cords, attachments and bowls, call 1-800-688...

Parts List
Page 1
Part Number - SMALL APPLIANCES When requesting service or ordering parts, always provide the following information: - Repair Parts List MODEL NUMBER JSM900EAAU MISC. Part Description ©2005 Maytag Services Model Number - Product Type -
Part Number - SMALL APPLIANCES When requesting service or ordering parts, always provide the following information: - Repair Parts List MODEL NUMBER JSM900EAAU MISC. Part Description ©2005 Maytag Services Model Number - Product Type -
Parts List
Page 2
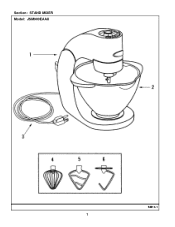
Section: STAND MIXER Model: JSM900EAAU SM10-1 1
Section: STAND MIXER Model: JSM900EAAU SM10-1 1
Parts List
Page 3
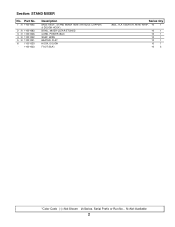
Section: STAND MIXER No. Part No. 1 N 11001055 2 N 11001063 3 N 11001026 4 N 11001022 5 N 11001021 6 11001020 - 11001023 Description BASE ASSY., STAND MIXER Note: (ANTIQUE COPPER) & DOUGH HOOK) BOWL, MIXER-CLEAR ETCHED CORD, POWER (BLK) WHIP, WIRE BEATER, FLAT HOOK, DOUGH FOOT (BLK) Series Qty (INCL. FLAT BEATER, WIRE WHIP, 10 1 10 1 10 1 10 1 10 1 10 1 10 3 *Color Code (-)=Not Shown #=Series, Serial Prefix or Run No., N=Not Available 2
Section: STAND MIXER No. Part No. 1 N 11001055 2 N 11001063 3 N 11001026 4 N 11001022 5 N 11001021 6 11001020 - 11001023 Description BASE ASSY., STAND MIXER Note: (ANTIQUE COPPER) & DOUGH HOOK) BOWL, MIXER-CLEAR ETCHED CORD, POWER (BLK) WHIP, WIRE BEATER, FLAT HOOK, DOUGH FOOT (BLK) Series Qty (INCL. FLAT BEATER, WIRE WHIP, 10 1 10 1 10 1 10 1 10 1 10 1 10 3 *Color Code (-)=Not Shown #=Series, Serial Prefix or Run No., N=Not Available 2

