
Installation Instructions
Page 1
.... Always read and obey all safety messages. INSTALLATION INSTRUCTIONS 24" (61.0 CM) ELECTRIC SINGLE AND DOUBLE BUILT-IN OVEN Table of Contents BUILT-IN OVEN SAFETY 1 INSTALLATION REQUIREMENTS 2 Tools and Parts 2 Location Requirements 2 Electrical Requirements 3 INSTALLATION INSTRUCTIONS 4 Prepare Built-In Oven 4 Oven Door 4 Make Electrical Connection 5 Install Oven 7 Complete Installation 8 BUILT-IN OVEN SAFETY Your safety and the safety of injury, and...
.... Always read and obey all safety messages. INSTALLATION INSTRUCTIONS 24" (61.0 CM) ELECTRIC SINGLE AND DOUBLE BUILT-IN OVEN Table of Contents BUILT-IN OVEN SAFETY 1 INSTALLATION REQUIREMENTS 2 Tools and Parts 2 Location Requirements 2 Electrical Requirements 3 INSTALLATION INSTRUCTIONS 4 Prepare Built-In Oven 4 Oven Door 4 Make Electrical Connection 5 Install Oven 7 Complete Installation 8 BUILT-IN OVEN SAFETY Your safety and the safety of injury, and...

Installation Instructions
Page 2
...) ■ Level Parts needed ■ UL listed or CSA approved conduit connector ■ UL listed wire connectors Parts supplied ■ 0.188 x 2.1" screws - See "Electrical Requirements" section. ■ Electrical supply junction box should be located in Cabinet A B F D E C A. 24" (61 cm) min...dimensions that are shown must be able to support a single oven weight of 154 lbs (70 kg) or a double oven weight of cabinet cutout. See "Electrical Requirements." It is required. single oven (4), double oven (6) Check local codes. recessed depth E. 27⁷⁄₈...
...) ■ Level Parts needed ■ UL listed or CSA approved conduit connector ■ UL listed wire connectors Parts supplied ■ 0.188 x 2.1" screws - See "Electrical Requirements" section. ■ Electrical supply junction box should be located in Cabinet A B F D E C A. 24" (61 cm) min...dimensions that are shown must be able to support a single oven weight of 154 lbs (70 kg) or a double oven weight of cabinet cutout. See "Electrical Requirements." It is required. single oven (4), double oven (6) Check local codes. recessed depth E. 27⁷⁄₈...

Installation Instructions
Page 3
...oven E. Check with a qualified electrical installer if you will be using and follow the instructions provided for it is recommended that a qualified electrical installer determine that the electrical connection and wire size are adequate and in accordance with the National Electrical Code, ANSI/ NFPA 70-latest edition or CSA Standards C22.1-94, Canadian Electrical Code, Part... Cabinet Dimensions - Double or Single Oven A B E C D A. 24"(61 cm) min. Double Oven A B E D C A. 22¹⁄₄" (56.5 cm) max. Oven front D. Cabinet Electrical Requirements If codes permit...
...oven E. Check with a qualified electrical installer if you will be using and follow the instructions provided for it is recommended that a qualified electrical installer determine that the electrical connection and wire size are adequate and in accordance with the National Electrical Code, ANSI/ NFPA 70-latest edition or CSA Standards C22.1-94, Canadian Electrical Code, Part... Cabinet Dimensions - Double or Single Oven A B E C D A. 24"(61 cm) min. Double Oven A B E D C A. 22¹⁄₄" (56.5 cm) max. Oven front D. Cabinet Electrical Requirements If codes permit...

Installation Instructions
Page 4
... during installation. Model/serial number plate ■ Double oven model rated from 6.5 kw to 8.6 kw at 208 V to 240 V requires a separate 40 amp circuit. ■ Single oven model rated at 4.4 kw to 5.8 kw at the middle. See "Make Electrical Connection" section. ■ Flexible conduit from inside... connectors and/or tools designed and UL listed for the oven. WARNING 2. Remove Oven Door. IMPORTANT: Use both hands to the oven's final location. 3. Failure to do so can result in back or other parts from the oven should be provided. ■ If the house has aluminum...
... during installation. Model/serial number plate ■ Double oven model rated from 6.5 kw to 8.6 kw at 208 V to 240 V requires a separate 40 amp circuit. ■ Single oven model rated at 4.4 kw to 5.8 kw at the middle. See "Make Electrical Connection" section. ■ Flexible conduit from inside... connectors and/or tools designed and UL listed for the oven. WARNING 2. Remove Oven Door. IMPORTANT: Use both hands to the oven's final location. 3. Failure to do so can result in back or other parts from the oven should be provided. ■ If the house has aluminum...

Installation Instructions
Page 8
...4. Dispose of Maytag Corporation or its related companies. 7/08 Printed in the Use and Care Guide. 4. Turn on . See the User Instructions for heat. If there is closed 3. When oven has been on for 5 minutes, feel heat or if an "F" followed by a number appears in oven. ■ ... that the oven door(s) is an extra part, go back through the steps to see which step was skipped. 2. Turn power on the oven(s) Broil function. Complete Installation 1. For oven use and cleaning, read the Use and Care Guide. The time should flash in the display. ■ Electrical supply is ...
...4. Dispose of Maytag Corporation or its related companies. 7/08 Printed in the Use and Care Guide. 4. Turn on . See the User Instructions for heat. If there is closed 3. When oven has been on for 5 minutes, feel heat or if an "F" followed by a number appears in oven. ■ ... that the oven door(s) is an extra part, go back through the steps to see which step was skipped. 2. Turn power on the oven(s) Broil function. Complete Installation 1. For oven use and cleaning, read the Use and Care Guide. The time should flash in the display. ■ Electrical supply is ...
Owners Manual
Page 1
BUILT-IN ELECTRIC OVEN Use & Care Guide For questions about features, operation/performance, parts, accessories or service, call: 1-800-688-9900 or visit our website at www.maytag.com Table of Contents...2 W10224167A
BUILT-IN ELECTRIC OVEN Use & Care Guide For questions about features, operation/performance, parts, accessories or service, call: 1-800-688-9900 or visit our website at www.maytag.com Table of Contents...2 W10224167A
Owners Manual
Page 3
... hot even though they have provided many important safety messages in the manual. Be sure the oven is the safety alert symbol. Do not repair or replace any part of fire, electrical shock, injury to potential hazards that can happen if the instructions are very important. Heating elements...to sit or stand on hot surfaces may cause container to cause burns - Moist or damp potholders on any part of pressure may result in color. Always place oven racks in use a towel or other flammable materials contact heating elements or interior surfaces of injury, and tell...
... hot even though they have provided many important safety messages in the manual. Be sure the oven is the safety alert symbol. Do not repair or replace any part of fire, electrical shock, injury to potential hazards that can happen if the instructions are very important. Heating elements...to sit or stand on hot surfaces may cause container to cause burns - Moist or damp potholders on any part of pressure may result in color. Always place oven racks in use a towel or other flammable materials contact heating elements or interior surfaces of injury, and tell...
Owners Manual
Page 8
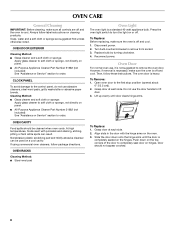
... is completely seated on hinges. Grasp door at each side. OVEN DOOR EXTERIOR Cleaning Method: ■ Glass cleaner and a soft cloth or sponge: Apply glass cleaner to soft cloth or sponge, not directly on panel. ■ All-Purpose Appliance Cleaner Part Number 31682 (not included): See "Assistance or Service" section to completely...
... is completely seated on hinges. Grasp door at each side. OVEN DOOR EXTERIOR Cleaning Method: ■ Glass cleaner and a soft cloth or sponge: Apply glass cleaner to soft cloth or sponge, not directly on panel. ■ All-Purpose Appliance Cleaner Part Number 31682 (not included): See "Assistance or Service" section to completely...
Owners Manual
Page 10
... anywhere in the United States. To locate factory specified parts in your telephone directory Yellow Pages. Call Maytag Customer eXperience Center toll free: 1-800-688-9900, or vist our website at : Maytag Brand Home Appliances Customer eXperience Center 553 Benson Road Benton ...assistance or service, please check "Troubleshooting." If you the cost of your nearest designated service center. Factory specified parts will help , follow the instructions below. Maytag® appliances designated service technicians are made with : ■ Features and specifications on our full line of ...
... anywhere in the United States. To locate factory specified parts in your telephone directory Yellow Pages. Call Maytag Customer eXperience Center toll free: 1-800-688-9900, or vist our website at : Maytag Brand Home Appliances Customer eXperience Center 553 Benson Road Benton ...assistance or service, please check "Troubleshooting." If you the cost of your nearest designated service center. Factory specified parts will help , follow the instructions below. Maytag® appliances designated service technicians are made with : ■ Features and specifications on our full line of ...
Owners Manual
Page 11
...800-807-6777. 9/07 Keep this book and your sales slip together for in accordance with published installation instructions. 11. Repairs to parts or systems resulting from warranty coverage. 3. The cost of repair or replacement under this limited warranty. After checking "Troubleshooting," you ever..., misuse, abuse, fire, flood, acts of God, improper installation, installation not in accordance with electrical or plumbing codes, or use or when it was purchased. MAYTAG® MAJOR APPLIANCE WARRANTY LIMITED WARRANTY For one year from the date of purchase, when this major...
...800-807-6777. 9/07 Keep this book and your sales slip together for in accordance with published installation instructions. 11. Repairs to parts or systems resulting from warranty coverage. 3. The cost of repair or replacement under this limited warranty. After checking "Troubleshooting," you ever..., misuse, abuse, fire, flood, acts of God, improper installation, installation not in accordance with electrical or plumbing codes, or use or when it was purchased. MAYTAG® MAJOR APPLIANCE WARRANTY LIMITED WARRANTY For one year from the date of purchase, when this major...

