User Manual
Page 1
Ft. 1.6 Cu. Over-the-Range Microwave Oven User's Manual Model MCO1610WF/MCO1610BF PLEASE READ THIS MANUAL CAREFULLY BEFORE USING YOUR MICROWAVE OVEN AND KEEP IT FOR FUTURE REFERENCE.
Ft. 1.6 Cu. Over-the-Range Microwave Oven User's Manual Model MCO1610WF/MCO1610BF PLEASE READ THIS MANUAL CAREFULLY BEFORE USING YOUR MICROWAVE OVEN AND KEEP IT FOR FUTURE REFERENCE.
User Manual
Page 3
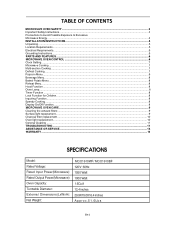
...Function ...8 Oven Lamp...8 Timer Function ...8 Lock Function for Children ...8 Inquiring Function ...8 Speedy Cooking ...8 Display On/Off Function...8 MICROWAVE OVEN CARE...9 Cleaning the exhaust filters ...9 Surface light replacement ...9 Charcoal filter replacement ...10 Oven light replacement...10 General Cleaning ...... SERVICE...12 WARRANTY ...13 SPECIFICATIONS Model: Rated Voltage: Rated Input Power(Microwave): Rated Output Power(Microwave): Oven Capacity: Turntable Diameter: External Dimensions(LxWxH): Net Weight: MCO1610WF/ MCO1610BF 120V~60Hz 1550 Watt 1000 Watt 1.6Cu.ft 12.4 inches ...
...Function ...8 Oven Lamp...8 Timer Function ...8 Lock Function for Children ...8 Inquiring Function ...8 Speedy Cooking ...8 Display On/Off Function...8 MICROWAVE OVEN CARE...9 Cleaning the exhaust filters ...9 Surface light replacement ...9 Charcoal filter replacement ...10 Oven light replacement...10 General Cleaning ...... SERVICE...12 WARRANTY ...13 SPECIFICATIONS Model: Rated Voltage: Rated Input Power(Microwave): Rated Output Power(Microwave): Oven Capacity: Turntable Diameter: External Dimensions(LxWxH): Net Weight: MCO1610WF/ MCO1610BF 120V~60Hz 1550 Watt 1000 Watt 1.6Cu.ft 12.4 inches ...
User Manual
Page 4
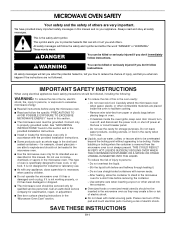
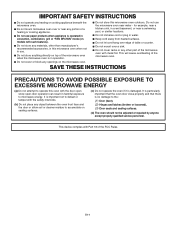
... the container is removed from paper or plastic bags before and halfway through heating it has been damaged or dropped. ■ The microwave oven should not be killed or seriously injured if you what can kill or hurt you don't immediately follow the specific "PRECAUTIONS TO...are placed inside the oven ignite, keep oven door closed glass jars - Do not overheat the liquid. - IMPORTANT SAFETY INSTRUCTIONS When using the microwave oven. ■ Read and follow instructions. SAVE THESE INSTRUCTIONS EN-3 These words mean: DANGER You can burn off power at the fuse or ...
... the container is removed from paper or plastic bags before and halfway through heating it has been damaged or dropped. ■ The microwave oven should not be killed or seriously injured if you what can kill or hurt you don't immediately follow the specific "PRECAUTIONS TO...are placed inside the oven ignite, keep oven door closed glass jars - Do not overheat the liquid. - IMPORTANT SAFETY INSTRUCTIONS When using the microwave oven. ■ Read and follow instructions. SAVE THESE INSTRUCTIONS EN-3 These words mean: DANGER You can burn off power at the fuse or ...
User Manual
Page 5
... the safety interlocks. (b) Do not place any object between the oven front face and the door or allow soil or cleaner residue to microwave energy. This device complies with the door open since open-door operation can result in harmful exposure to accumulate on sealing surfaces. (c) Do...sink. ■ Do not cover racks or any other than manufacturer's recommended accessories, in this microwave oven when not in use. ■ Do not store anything directly on the microwave oven. Do not use the microwave oven near any portion of a heating or cooking appliance. ■ Do not use paper ...
... the safety interlocks. (b) Do not place any object between the oven front face and the door or allow soil or cleaner residue to microwave energy. This device complies with the door open since open-door operation can result in harmful exposure to accumulate on sealing surfaces. (c) Do...sink. ■ Do not cover racks or any other than manufacturer's recommended accessories, in this microwave oven when not in use. ■ Do not store anything directly on the microwave oven. Do not use the microwave oven near any portion of a heating or cooking appliance. ■ Do not use paper ...
User Manual
Page 6
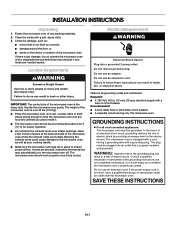
... is strong enough to follow these instructions can result in back or other injury. Do not use an extension cord. Failure to hold the microwave oven and the food and utensils you place inside with a soft, damp cloth. 3. Do not use an adapter. If there is the... or exterior of electric shock. Recommended: ■ A time-delay fuse or time-delay circuit breaker. ■ A separate circuit serving only this microwave oven. WARNING: Improper use an extension cord. Check for proper operation. ■ Do not block the exhaust vents or air intake openings. Location Requirements...
... is strong enough to follow these instructions can result in back or other injury. Do not use an extension cord. Failure to hold the microwave oven and the food and utensils you place inside with a soft, damp cloth. 3. Do not use an adapter. If there is the... or exterior of electric shock. Recommended: ■ A time-delay fuse or time-delay circuit breaker. ■ A separate circuit serving only this microwave oven. WARNING: Improper use an extension cord. Check for proper operation. ■ Do not block the exhaust vents or air intake openings. Location Requirements...
User Manual
Page 7
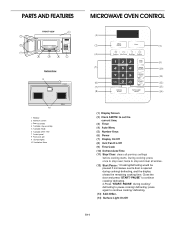
...) Defrost Auto/Time (11) Stop/Clear: clears all entries. (12) Start/Pause: 1.Cooking/defrosting would be paused if microwave oven's door is opened during cooking/ defrosting to continue cooking/ defrosting. 2.Press "START/ PAUSE" during cooking/ defrosting, and... Window 2 Interlock system 3 Door assembly 4 Turntable ring assembly 5 Turntable Shaft 6 Turntable glass tray 7 Control panel 8 Front vent grill 9 Surface lights 10 Ventilation filters MICROWAVE OVEN CONTROL (1) (2) (4) (5) (6) (7) (8) EXPRESS COOK 1-6 Display On/Off (3) (9) (10) (11) (12) (13) (14) (1) Display Screen (2) Clock...
...) Defrost Auto/Time (11) Stop/Clear: clears all entries. (12) Start/Pause: 1.Cooking/defrosting would be paused if microwave oven's door is opened during cooking/ defrosting to continue cooking/ defrosting. 2.Press "START/ PAUSE" during cooking/ defrosting, and... Window 2 Interlock system 3 Door assembly 4 Turntable ring assembly 5 Turntable Shaft 6 Turntable glass tray 7 Control panel 8 Front vent grill 9 Surface lights 10 Ventilation filters MICROWAVE OVEN CONTROL (1) (2) (4) (5) (6) (7) (8) EXPRESS COOK 1-6 Display On/Off (3) (9) (10) (11) (12) (13) (14) (1) Display Screen (2) Clock...
User Manual
Page 8
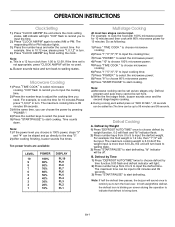
...appropriate, press "CLOCK AM/PM" will flash and "lb" indicator flash; 2) Press number keys from 0 to 9 to input the derfost time. Note: a.Microwave cooking can choose the power by pressing "POWER ". 4) Press the number keys to select the power level. 5) Press "START/PAUSE" to adjust the cooking... example: the food weight is 99 minutes and 99 seconds. 3) Press "START/PAUSE" to cook the food with 100% microwave power for 10 minutes and then cook with 80% microwave power for 10 minutes.Please press "1,0,0,0" in turn. 4). Defrost by Time 1) Press "DEFROST AUTO/TIME" twice to choose ...
...appropriate, press "CLOCK AM/PM" will flash and "lb" indicator flash; 2) Press number keys from 0 to 9 to input the derfost time. Note: a.Microwave cooking can choose the power by pressing "POWER ". 4) Press the number keys to select the power level. 5) Press "START/PAUSE" to adjust the cooking... example: the food weight is 99 minutes and 99 seconds. 3) Press "START/PAUSE" to cook the food with 100% microwave power for 10 minutes and then cook with 80% microwave power for 10 minutes.Please press "1,0,0,0" in turn. 4). Defrost by Time 1) Press "DEFROST AUTO/TIME" twice to choose ...
User Manual
Page 9
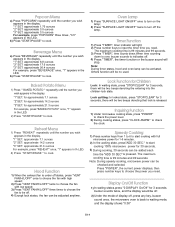
...,"3.5" appears in the LED. Reheat Menu 1) Press "REHEAT" repeatedly until the number you wish appears in the display. s Note: During speedy cooking, microwave power can be checked and selected. "1" SET: approximate 7.1 ounces "2" SET: approximate 14.2 ounces "3" SET: approximate 21.3 ounces For example, press... down.When time counting down is back to cook. Others function will light; 2) Press number keys to cook. Inquiring Function 1) Under microwave cooking state, press "POWER" to check the power level. 2) During cooking states, press "CLOCK AM/PM" to indicates off the lamp...
...,"3.5" appears in the LED. Reheat Menu 1) Press "REHEAT" repeatedly until the number you wish appears in the display. s Note: During speedy cooking, microwave power can be checked and selected. "1" SET: approximate 7.1 ounces "2" SET: approximate 14.2 ounces "3" SET: approximate 21.3 ounces For example, press... down.When time counting down is back to cook. Others function will light; 2) Press number keys to cook. Inquiring Function 1) Under microwave cooking state, press "POWER" to check the power level. 2) During cooking states, press "CLOCK AM/PM" to indicates off the lamp...
User Manual
Page 10
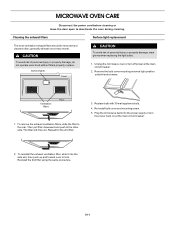
... or turn the power back on at light position under the microwave. MICROWAVE OVEN CARE Disconnect the power cord before cleaning or leave the door open to the other side. Then pull filter downward and push to deactivate ... personal injury or property damage, wear gloves when replacing the light bulbs. 1. Remove the bulb cover mounting screw at the main circuit breaker. 2. Plug the microwave back into the side slot, then push up and toward oven to the rear. To remove the exhaust ventilation filters, slide the filter to lock...
... or turn the power back on at light position under the microwave. MICROWAVE OVEN CARE Disconnect the power cord before cleaning or leave the door open to the other side. Then pull filter downward and push to deactivate ... personal injury or property damage, wear gloves when replacing the light bulbs. 1. Remove the bulb cover mounting screw at the main circuit breaker. 2. Plug the microwave back into the side slot, then push up and toward oven to the rear. To remove the exhaust ventilation filters, slide the filter to lock...
User Manual
Page 11
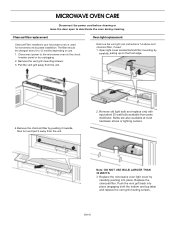
Remove the vent grill mounting screws. 3. Note: DO NOT USE BULB LARGER THAN 30 WATTS. 3. Replace the microwave oven light cover by carefully pulling up on use. 1. Push the vent grill back into place. Remove old light bulb and replace only ...the vent grill per instructions 1-4 above and charcoal filter, if used for nonvented, recirculated installation. EN-10 Charcoal filter replacement Charcoal Filter installed in your microwave oven, is used . 1. Open light cover located behind filter mounting by carefully pushing into place (engaging both the bottom and top tabs) and ...
Remove the vent grill mounting screws. 3. Note: DO NOT USE BULB LARGER THAN 30 WATTS. 3. Replace the microwave oven light cover by carefully pulling up on use. 1. Push the vent grill back into place. Remove old light bulb and replace only ...the vent grill per instructions 1-4 above and charcoal filter, if used for nonvented, recirculated installation. EN-10 Charcoal filter replacement Charcoal Filter installed in your microwave oven, is used . 1. Open light cover located behind filter mounting by carefully pushing into place (engaging both the bottom and top tabs) and ...
User Manual
Page 12
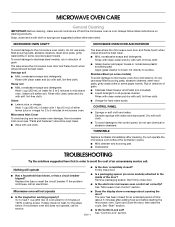
...-wool pads, gritty washcloths or some recycled paper towels. If water does not heat, try the steps below. See "Start" section. MICROWAVE OVEN CARE General Cleaning IMPORTANT: Before cleaning, make sure all -purpose cleaner: Rinse with clean water and dry with soft, lint-free cloth...should be kept clean. ■ Mild, nonabrasive soaps and detergents: Rinse with clean water and dry with wet cloth. Rub in microwave oven. See "Microwave Oven Control" section. Always follow label instructions on some models) attached to surface. Remove packaging spacer, then firmly close door. &#...
...-wool pads, gritty washcloths or some recycled paper towels. If water does not heat, try the steps below. See "Start" section. MICROWAVE OVEN CARE General Cleaning IMPORTANT: Before cleaning, make sure all -purpose cleaner: Rinse with clean water and dry with soft, lint-free cloth...should be kept clean. ■ Mild, nonabrasive soaps and detergents: Rinse with clean water and dry with wet cloth. Rub in microwave oven. See "Microwave Oven Control" section. Always follow label instructions on some models) attached to surface. Remove packaging spacer, then firmly close door. &#...
User Manual
Page 13
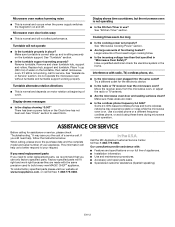
.... ■ Accessory and repair parts sales. ■ Specialized customer assistance (Spanish speaking). It may experience static or noise while the microwave oven is on and off. If you still need longer cooking times. ■ Is the incoming voltage less than that you need to..."Clock" section to build every new MAGIC CHEF® appliance. Cooking times seem too long ■ Is the cooking power set . Have a qualified electrician check the electrical system in use only factory specified parts. Display shows time countdown, but the microwave oven is not working properly. To...
.... ■ Accessory and repair parts sales. ■ Specialized customer assistance (Spanish speaking). It may experience static or noise while the microwave oven is on and off. If you still need longer cooking times. ■ Is the incoming voltage less than that you need to..."Clock" section to build every new MAGIC CHEF® appliance. Cooking times seem too long ■ Is the cooking power set . Have a qualified electrician check the electrical system in use only factory specified parts. Display shows time countdown, but the microwave oven is not working properly. To...
User Manual
Page 14
... of eight years. Some states prohibit the exclusion or limitation of MC Appliance Corporation. EN-13 Limited Warranty MC Appliance Corporation warrants each new Counvertop Microwave Oven to be free from defects in material and workmanship, and agrees to remedy any such defect or to furnish a new part(s), at www.mcappliance...
... of eight years. Some states prohibit the exclusion or limitation of MC Appliance Corporation. EN-13 Limited Warranty MC Appliance Corporation warrants each new Counvertop Microwave Oven to be free from defects in material and workmanship, and agrees to remedy any such defect or to furnish a new part(s), at www.mcappliance...


