
User Manual
Page 1
COUNTER TOP ICE MAKER INSTRUCTION MANUAL Model No.: MCIM30TS MCIM30TW To ensure proper use of this appliance and your safety, please read the following instructions completely before operating this appliance.
COUNTER TOP ICE MAKER INSTRUCTION MANUAL Model No.: MCIM30TS MCIM30TW To ensure proper use of this appliance and your safety, please read the following instructions completely before operating this appliance.

User Manual
Page 2
TABLE OF CONTENTS BEFORE PUTTING INTO USE 2 SPECIFICATIONS 2 IMPORTANT SAFETY INSTRUCTIONS IMPORTANT SAFETY TIPS 3 NAME OF THE PARTS 4 OPERATING PROCEDURES & MAINTENANCE UNPACKING YOUR ICE MAKER 5 CONNECTING YOUR ICE MAKER 5 HOW TO CLEAN 6 CARE AND MAINTENANCE 6 USING YOUR ICE MAKER 7 TROUBLESHOOTING 8 ICE MAKER WARRANTY 9 1
TABLE OF CONTENTS BEFORE PUTTING INTO USE 2 SPECIFICATIONS 2 IMPORTANT SAFETY INSTRUCTIONS IMPORTANT SAFETY TIPS 3 NAME OF THE PARTS 4 OPERATING PROCEDURES & MAINTENANCE UNPACKING YOUR ICE MAKER 5 CONNECTING YOUR ICE MAKER 5 HOW TO CLEAN 6 CARE AND MAINTENANCE 6 USING YOUR ICE MAKER 7 TROUBLESHOOTING 8 ICE MAKER WARRANTY 9 1

User Manual
Page 3
....1" 2 Color Unit Dimensions (Inches) Net Weight Counter Top Ice Maker Width 14.96" MCIM30TS Silver Height 16.9" 46.31 (lbs) Depth 17.1" Product Description Model No. SPECIFICATIONS Product Description Model No. Clean your unit thoroughly before putting into use. (See "How to Clean") Use the parts diagram on page 4 to insure proper positioning of the cooling system malfunctioning due to the power supply, let the...
....1" 2 Color Unit Dimensions (Inches) Net Weight Counter Top Ice Maker Width 14.96" MCIM30TS Silver Height 16.9" 46.31 (lbs) Depth 17.1" Product Description Model No. SPECIFICATIONS Product Description Model No. Clean your unit thoroughly before putting into use. (See "How to Clean") Use the parts diagram on page 4 to insure proper positioning of the cooling system malfunctioning due to the power supply, let the...

User Manual
Page 4
... the ice maker before plugging it in water. If the ice maker is fully inserted into the same outlet. Connect to persons or property. Be sure that the plug is brought indoors from traffic areas, and do not recommend the use of an extension cord, as it a few hours to adjust to room temperature before cleaning or making repairs...
... the ice maker before plugging it in water. If the ice maker is fully inserted into the same outlet. Connect to persons or property. Be sure that the plug is brought indoors from traffic areas, and do not recommend the use of an extension cord, as it a few hours to adjust to room temperature before cleaning or making repairs...

User Manual
Page 5
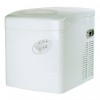
Control Panel: 3. Water drain cap: 4. With a transparent window to use, visible functions and 1-touch display setting. Ice scoop. 6. Easy to allow interior visibility. B) Starts or stops ice making cycle. Cover: 2. Ice shovel. NAME OF THE PARTS 1. Ice basket. 5. A) Selects ice cube size. For draining water from water reservoir. 1 6 4 5 A 2 B 3 4
Control Panel: 3. Water drain cap: 4. With a transparent window to use, visible functions and 1-touch display setting. Ice scoop. 6. Easy to allow interior visibility. B) Starts or stops ice making cycle. Cover: 2. Ice shovel. NAME OF THE PARTS 1. Ice basket. 5. A) Selects ice cube size. For draining water from water reservoir. 1 6 4 5 A 2 B 3 4

User Manual
Page 6
... and wash it thoroughly. Place the ice maker on a level surface. Check that is damaged please call our customer service., 1. DANGER * Improper use of electrical shock. The power cord of the appliance. 5 OPERATING PROCEDURES & MAINTENANCE UNPACKING YOUR ICE MAKER 1. If the power cord is protected from the power cord. Find a location for the refrigerant fluid to be directed toward a certified electrician...
... and wash it thoroughly. Place the ice maker on a level surface. Check that is damaged please call our customer service., 1. DANGER * Improper use of electrical shock. The power cord of the appliance. 5 OPERATING PROCEDURES & MAINTENANCE UNPACKING YOUR ICE MAKER 1. If the power cord is protected from the power cord. Find a location for the refrigerant fluid to be directed toward a certified electrician...

User Manual
Page 7
... a soft cloth. 5. Close the drain cap. 6. CARE AND MAINTENANCE The ice maker should be cleaned on a regular basis. (See: "HOW TO CLEAN") It is not in use, open water drain cap to drain water completely from water reservoir. HOW TO CLEAN Remove the ice basket. 1. The outside of metal parts. To attain proper performance, be cleaned regularly with the sunlight. 6 When the machine is necessary to have...
... a soft cloth. 5. Close the drain cap. 6. CARE AND MAINTENANCE The ice maker should be cleaned on a regular basis. (See: "HOW TO CLEAN") It is not in use, open water drain cap to drain water completely from water reservoir. HOW TO CLEAN Remove the ice basket. 1. The outside of metal parts. To attain proper performance, be cleaned regularly with the sunlight. 6 When the machine is necessary to have...

User Manual
Page 8
... ice cube by pressing the "Select" button. The ice maker automatically stops working when the ice basket is not in use, drain all water in the water reservoir every 24 hours to ensure a reasonable hygiene level. Clean your ice maker thoroughly. 2. Keep water level below 60°F, it is on . The power indicator light will be on , check water level periodically. If ambient temperature is below the level mark. 3. Press the "Power" button, fill water...
... ice cube by pressing the "Select" button. The ice maker automatically stops working when the ice basket is not in use, drain all water in the water reservoir every 24 hours to ensure a reasonable hygiene level. Clean your ice maker thoroughly. 2. Keep water level below 60°F, it is on . The power indicator light will be on , check water level periodically. If ambient temperature is below the level mark. 3. Press the "Power" button, fill water...

User Manual
Page 9
Water is stuck. Remove ice from ice basket. Ice making cycle is too long. Consult a qualified technician. 8 Ice cubes stick together. Refrigerant liquid leakage. Select the small ice size. Stop the ice maker, fill water, and restart. "Water" and "Ice" indicator are both illuminated. Ice making cycle is normal but no ice is made. Ice shovel is low. Stop the ice maker, and restart when the ice blocks melt. Change the water in the cooling...
Water is stuck. Remove ice from ice basket. Ice making cycle is too long. Consult a qualified technician. 8 Ice cubes stick together. Refrigerant liquid leakage. Select the small ice size. Stop the ice maker, fill water, and restart. "Water" and "Ice" indicator are both illuminated. Ice making cycle is normal but no ice is made. Ice shovel is low. Stop the ice maker, and restart when the ice blocks melt. Change the water in the cooling...

User Manual
Page 10
...from defects in material and workmanship such as instruction on proper use within the continental United States, Puerto Rico and Hawaii. Counter Top Ice Maker Warranty MC Appliance Corp. This warranty covers appliances in material and workmanship and ...replacement units provided under the terms of this warranty the consumer is authorized to assume for us on this unit to perform as door panels, door shelves, racks, light bulbs etc. Under no representative or person is responsible for any such defect or to receiving a replacement unit or refund. Model MCIM30TS MCIM30TW Parts...
...from defects in material and workmanship such as instruction on proper use within the continental United States, Puerto Rico and Hawaii. Counter Top Ice Maker Warranty MC Appliance Corp. This warranty covers appliances in material and workmanship and ...replacement units provided under the terms of this warranty the consumer is authorized to assume for us on this unit to perform as door panels, door shelves, racks, light bulbs etc. Under no representative or person is responsible for any such defect or to receiving a replacement unit or refund. Model MCIM30TS MCIM30TW Parts...


