User Manual
Page 1
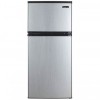
4.5 CU.FT. REFRIGERATOR INSTRUCTION MANUAL Model No.: MCDR450WEF MCDR450BEF MCDR450SEF To ensure proper use of this appliance and your safety, please read the following instructions completely before operating this appliance.
4.5 CU.FT. REFRIGERATOR INSTRUCTION MANUAL Model No.: MCDR450WEF MCDR450BEF MCDR450SEF To ensure proper use of this appliance and your safety, please read the following instructions completely before operating this appliance.
User Manual
Page 2
... could act as your proof of registering your product will allow for more efficient warranty service processing. 3. In the event that warranty service is to contact you regarding a safety notification or product update. 2. Once again thank you for purchasing a Magic Chef product. The first step in protecting your new product is required, registering your product include the following. 1.
... could act as your proof of registering your product will allow for more efficient warranty service processing. 3. In the event that warranty service is to contact you regarding a safety notification or product update. 2. Once again thank you for purchasing a Magic Chef product. The first step in protecting your new product is required, registering your product include the following. 1.
User Manual
Page 3
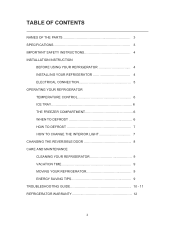
... . 6 .. 6 .. . 7 7 .. 8 9 . . 9 9 . . 9 . . 10 - 11 . 12 2 TABLE OF CONTENTS NAMES OF THE PARTS SPECIFICATIONS IMPORTANT SAFETY INSTRUCTIONS INSTALLATION INSTRUCTION BEFORE USING YOUR REFRIGERATOR INSTALLING YOUR REFRIGERATOR ELECTRICAL CONNECTION OPERATING YOUR REFRIGERATOR TEMPERATURE CONTROL ICE TRAY THE FREEZER COMPARTMENT WHEN TO DEFROST HOW TO DEFROST HOW TO CHANGE THE INTERIOR LIGHT ... CHANGING THE REVERSIBLE DOOR CARE AND MAINTENANCE CLEANING YOUR REFRIGERATOR VACATION TIME MOVING YOUR REFRIGERATOR ENERGY SAVING TIPS TROUBLESHOOTING GUIDE .
... . 6 .. 6 .. . 7 7 .. 8 9 . . 9 9 . . 9 . . 10 - 11 . 12 2 TABLE OF CONTENTS NAMES OF THE PARTS SPECIFICATIONS IMPORTANT SAFETY INSTRUCTIONS INSTALLATION INSTRUCTION BEFORE USING YOUR REFRIGERATOR INSTALLING YOUR REFRIGERATOR ELECTRICAL CONNECTION OPERATING YOUR REFRIGERATOR TEMPERATURE CONTROL ICE TRAY THE FREEZER COMPARTMENT WHEN TO DEFROST HOW TO DEFROST HOW TO CHANGE THE INTERIOR LIGHT ... CHANGING THE REVERSIBLE DOOR CARE AND MAINTENANCE CLEANING YOUR REFRIGERATOR VACATION TIME MOVING YOUR REFRIGERATOR ENERGY SAVING TIPS TROUBLESHOOTING GUIDE .
User Manual
Page 4
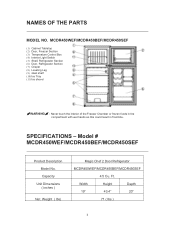
... ( lbs) Magic Chef 2 Door Refrigerator MCDR450WEF/MCDR450BEF/MCDR450SEF 4.5 Cu. MCDR450WEF/MCDR450BEF/MCDR450SEF (1) Cabinet Tabletop (2) Door, Freezer Section (3) Temperature Control Box (4) Interior Light Switch (5) Shelf, Refrigerator Section (6) Door, Refrigerator Section (7) Crisper (8) Leveling Leg (9) steel shelf (10) Ice Tray (11) Ice shovel WARNING : Never touch the interior of the Freezer Chamber or frozen foods in the compartment with wet hands as this could result in frost bite. Width Height Depth 19" 43.4" 20" 71 ( lbs ) 3 SPECIFICATIONS - Model # MCDR450WEF...
... ( lbs) Magic Chef 2 Door Refrigerator MCDR450WEF/MCDR450BEF/MCDR450SEF 4.5 Cu. MCDR450WEF/MCDR450BEF/MCDR450SEF (1) Cabinet Tabletop (2) Door, Freezer Section (3) Temperature Control Box (4) Interior Light Switch (5) Shelf, Refrigerator Section (6) Door, Refrigerator Section (7) Crisper (8) Leveling Leg (9) steel shelf (10) Ice Tray (11) Ice shovel WARNING : Never touch the interior of the Freezer Chamber or frozen foods in the compartment with wet hands as this could result in frost bite. Width Height Depth 19" 43.4" 20" 71 ( lbs ) 3 SPECIFICATIONS - Model # MCDR450WEF...
User Manual
Page 5
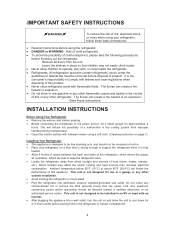
... service center. INSTALLATION INSTRUCTIONS Before Using Your Refrigerator • Remove the exterior and interior packing. • Before connecting the refrigerator to comply with federal and local regulations when disposing of this or any circumstances cut or remove the third (ground) prong from the unit. - It is strong enough to keep the refrigerator level. • Locate the refrigerator away from improper handling during transportation. • Clean the interior...
... service center. INSTALLATION INSTRUCTIONS Before Using Your Refrigerator • Remove the exterior and interior packing. • Before connecting the refrigerator to comply with federal and local regulations when disposing of this or any circumstances cut or remove the third (ground) prong from the unit. - It is strong enough to keep the refrigerator level. • Locate the refrigerator away from improper handling during transportation. • Clean the interior...
User Manual
Page 6
.... The power cord of this appliance. The cord should be secured behind the refrigerator and not left exposed or dangling to minimize the possibility of electrical shock. Use of an extension cord can result in the risk of electrical shock. Never unplug the refrigerator by an authorized service center. to request warranty service at www.mcappliance.com. 5 Electrical Connection WARNING Improper use an...
.... The power cord of this appliance. The cord should be secured behind the refrigerator and not left exposed or dangling to minimize the possibility of electrical shock. Use of an extension cord can result in the risk of electrical shock. Never unplug the refrigerator by an authorized service center. to request warranty service at www.mcappliance.com. 5 Electrical Connection WARNING Improper use an...
User Manual
Page 7
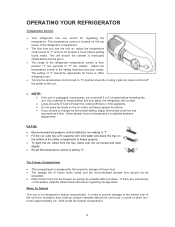
... the freezer as quickly as possible after purchase. Ice Tray • Recommended temperature control setting for ice making is designed for regulating the temperature. OPERATING YOUR REFRIGERATOR Temperature Control • Your refrigerator has one increment at least 2 hours before putting foods inside the freezer compartment. 6 The Freezer Compartment • This compartment is "7". • Fill the ice cube tray (2/3 capacity) with cold water and place the tray on the packet, carefully follow these instructions regarding...
... the freezer as quickly as possible after purchase. Ice Tray • Recommended temperature control setting for ice making is designed for regulating the temperature. OPERATING YOUR REFRIGERATOR Temperature Control • Your refrigerator has one increment at least 2 hours before putting foods inside the freezer compartment. 6 The Freezer Compartment • This compartment is "7". • Fill the ice cube tray (2/3 capacity) with cold water and place the tray on the packet, carefully follow these instructions regarding...
User Manual
Page 8
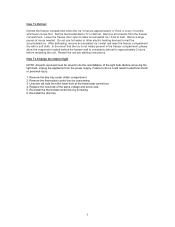
... the evaporator located behind the freezer wall to defrost. Remove the thermostat control box by screwing 6. Replace the new bulb of ice as needed. Remove large pieces of the same voltage and screw size. 5. After defrosting, remove accumulated ice / water and wipe the freezer compartment dry with a soft cloth. Failure to melt. Re-install the thermostat control box by unscrewing 3. Restart the unit per starting instructions. Unscrew old bulb from the power supply. Re-install the drip tray 7 Set the thermostat...
... the evaporator located behind the freezer wall to defrost. Remove the thermostat control box by screwing 6. Replace the new bulb of ice as needed. Remove large pieces of the same voltage and screw size. 5. After defrosting, remove accumulated ice / water and wipe the freezer compartment dry with a soft cloth. Failure to melt. Re-install the thermostat control box by unscrewing 3. Restart the unit per starting instructions. Unscrew old bulb from the power supply. Re-install the drip tray 7 Set the thermostat...
User Manual
Page 9
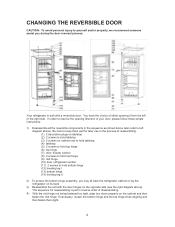
... simple instructions: 1) Disassemble all the reversible components in reverse order of either opening direction of reassembling. (1) 2 decorative plugs on tabletop (2) 2 screws to hold tabletop (3) 2 screws on cabinet rear to hold tabletop (4) tabletop (5) 2 screws to hold top hinge (6) top hinge (7) door, freezer section (8) 2 screws to hold mid hinge (9) mid hinge (10) door, refrigerator section (11) 2 screws to hold bottom hinge (12) leveling leg I (13) bottom hinge (14) leveling...
... simple instructions: 1) Disassemble all the reversible components in reverse order of either opening direction of reassembling. (1) 2 decorative plugs on tabletop (2) 2 screws to hold tabletop (3) 2 screws on cabinet rear to hold tabletop (4) tabletop (5) 2 screws to hold top hinge (6) top hinge (7) door, freezer section (8) 2 screws to hold mid hinge (9) mid hinge (10) door, refrigerator section (11) 2 screws to hold bottom hinge (12) leveling leg I (13) bottom hinge (14) leveling...
User Manual
Page 10
... compressor to keep the unit running efficiently. • The outside of the refrigerator should not be located in the coolest area of condensation, mold, or odor. • Use extreme caution in lukewarm water and baking soda solution. To prevent odor and mold growth, leave the door open slightly: blocking it be cleaned with mild detergent and warm water. • Dry the interior...
... compressor to keep the unit running efficiently. • The outside of the refrigerator should not be located in the coolest area of condensation, mold, or odor. • Use extreme caution in lukewarm water and baking soda solution. To prevent odor and mold growth, leave the door open slightly: blocking it be cleaned with mild detergent and warm water. • Dry the interior...
User Manual
Page 11
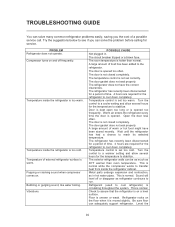
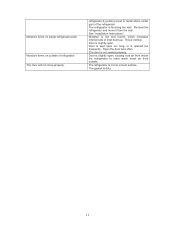
... can adequately support refrigerator. Warm air enters the refrigerator every time the door is uneven or weak. Floor is opened too frequently. Refrigerator rocks on and off or disappear as refrigerator continues to stabilize. Vibrations. The door gasket does not seal properly. Turn the control to a warmer setting and allow several hours for the temperature to run. Refrigerant (used to cool down completely. The door gasket does not seal properly. Temperature control is...
... can adequately support refrigerator. Warm air enters the refrigerator every time the door is uneven or weak. Floor is opened too frequently. Refrigerator rocks on and off or disappear as refrigerator continues to stabilize. Vibrations. The door gasket does not seal properly. Turn the control to a warmer setting and allow several hours for the temperature to run. Refrigerant (used to cool down completely. The door gasket does not seal properly. Temperature control is...
User Manual
Page 12
... under part of refrigerator. This is dirty. 11 Open the door less often. The gasket is normal. The refrigerator is hot and humid, which increases internal rate of frost build-up. Weather is not on inside the refrigerator to meet warm moist air from the wall. Door is opened too frequently. Door is kept open too long, or is slightly open , causing cold air from inside refrigerator walls. Re-level the refrigerator...
... under part of refrigerator. This is dirty. 11 Open the door less often. The gasket is normal. The refrigerator is hot and humid, which increases internal rate of frost build-up. Weather is not on inside the refrigerator to meet warm moist air from the wall. Door is opened too frequently. Door is kept open too long, or is slightly open , causing cold air from inside refrigerator walls. Re-level the refrigerator...
User Manual
Page 13
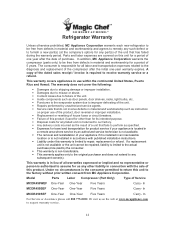
... are covered on this warranty is required to receive warranty service or a refund. Punctures to the evaporator system due to improper defrosting of Service MCDR450WEF One-Year One-Year Five Years Carry- Liability under this unit for other liability in connection with published installation instructions. This warranty is not available. In MCDR450SEF One-Year One-Year Five Years Carry- Model Parts Labor Compressor (Part Only) Type of...
... are covered on this warranty is required to receive warranty service or a refund. Punctures to the evaporator system due to improper defrosting of Service MCDR450WEF One-Year One-Year Five Years Carry- Liability under this unit for other liability in connection with published installation instructions. This warranty is not available. In MCDR450SEF One-Year One-Year Five Years Carry- Model Parts Labor Compressor (Part Only) Type of...


