
User Manual
Page 1
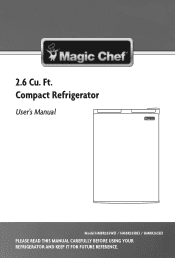
Compact Refrigerator User's Manual Model HMBR265WE1 / HMBR265BE1 / HMBR265SE1 PLEASE READ THIS MANUAL CAREFULLY BEFORE USING YOUR REFRIGERATOR AND KEEP IT FOR FUTURE REFERENCE. 2.6 Cu. Ft.
Compact Refrigerator User's Manual Model HMBR265WE1 / HMBR265BE1 / HMBR265SE1 PLEASE READ THIS MANUAL CAREFULLY BEFORE USING YOUR REFRIGERATOR AND KEEP IT FOR FUTURE REFERENCE. 2.6 Cu. Ft.
User Manual
Page 2
... regarding a safety notification or product update. 2. Registering your product could act as your proof of purchase in the event of registering your new product is required. 3. Registering your product will allow for more efficient warranty service processing when warranty service is to contact you for purchasing a Magic Chef® product. Registering your product will...
... regarding a safety notification or product update. 2. Registering your product could act as your proof of purchase in the event of registering your new product is required. 3. Registering your product will allow for more efficient warranty service processing when warranty service is to contact you for purchasing a Magic Chef® product. Registering your product will...
User Manual
Page 3
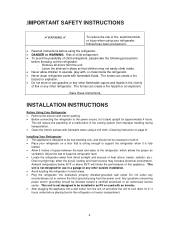
... the component part is too short, have been given supervision or instruction concerning use of the appliance in a safe way and understand the hazards involved. Cleaning and maintenance should not play with, operate, or crawl inside . 6) The appliance has to be unplugged before disposal. If the power cord is damaged, it must be removed before carrying out user maintenance...
... the component part is too short, have been given supervision or instruction concerning use of the appliance in a safe way and understand the hazards involved. Cleaning and maintenance should not play with, operate, or crawl inside . 6) The appliance has to be unplugged before disposal. If the power cord is damaged, it must be removed before carrying out user maintenance...
User Manual
Page 4
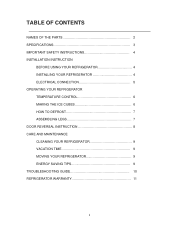
TABLE OF CONTENTS NAMES OF THE PARTS 2 SPECIFICATIONS 3 IMPORTANT SAFETY INSTRUCTIONS 4 INSTALLATION INSTRUCTION BEFORE USING YOUR REFRIGERATOR 4 INSTALLING YOUR REFRIGERATOR 4 ELECTRICAL CONNECTION 5 OPERATING YOUR REFRIGERATOR TEMPERATURE CONTROL 6 MAKING THE ICE CUBES 6 HOW TO DEFROST 7 ASSEMBLING LEGS 7 DOOR REVERSAL INSTRUCTION 8 CARE AND MAINTENANCE CLEANING YOUR REFRIGERATOR 9 VACATION TIME 9 MOVING YOUR REFRIGERATOR 9 ENERGY SAVING TIPS 9 TROUBLESHOOTING GUIDE 10 REFRIGERATOR WARRANTY 11 1
TABLE OF CONTENTS NAMES OF THE PARTS 2 SPECIFICATIONS 3 IMPORTANT SAFETY INSTRUCTIONS 4 INSTALLATION INSTRUCTION BEFORE USING YOUR REFRIGERATOR 4 INSTALLING YOUR REFRIGERATOR 4 ELECTRICAL CONNECTION 5 OPERATING YOUR REFRIGERATOR TEMPERATURE CONTROL 6 MAKING THE ICE CUBES 6 HOW TO DEFROST 7 ASSEMBLING LEGS 7 DOOR REVERSAL INSTRUCTION 8 CARE AND MAINTENANCE CLEANING YOUR REFRIGERATOR 9 VACATION TIME 9 MOVING YOUR REFRIGERATOR 9 ENERGY SAVING TIPS 9 TROUBLESHOOTING GUIDE 10 REFRIGERATOR WARRANTY 11 1

User Manual
Page 5
NAMES OF THE PARTS (1) Half-Width Freezer (2) Adjustable Temperature Control (3) "Dispense-A-Can"TM Storage (4) Accomodates 2 liter and tall bottles (5) Adjustable Front Leveling Legs (6) Removable Glass Shelves (7) Drip Tray (8) Ice Cube Tray WARNING : Never touch the interior of the Freezer Chamber or frozen foods in the compartment with wet hands as this could result in frost bite. 2
NAMES OF THE PARTS (1) Half-Width Freezer (2) Adjustable Temperature Control (3) "Dispense-A-Can"TM Storage (4) Accomodates 2 liter and tall bottles (5) Adjustable Front Leveling Legs (6) Removable Glass Shelves (7) Drip Tray (8) Ice Cube Tray WARNING : Never touch the interior of the Freezer Chamber or frozen foods in the compartment with wet hands as this could result in frost bite. 2

User Manual
Page 6
Capacity Unit Dimensions ( inches ) Net Weight ( lbs) Magic Chef 2.6 cu.ft. ENERGY STAR® Qualified Refrigerator HMBR265WE1.BE1.SE1 2.6 Cu. Ft. Width 17.5" Height 25" Depth 19.3" 41 ( lbs ) 3 SPECIFICATIONS - Model # HMBR265WE1.BE1.SE1 Product Description Model No.
Capacity Unit Dimensions ( inches ) Net Weight ( lbs) Magic Chef 2.6 cu.ft. ENERGY STAR® Qualified Refrigerator HMBR265WE1.BE1.SE1 2.6 Cu. Ft. Width 17.5" Height 25" Depth 19.3" 41 ( lbs ) 3 SPECIFICATIONS - Model # HMBR265WE1.BE1.SE1 Product Description Model No.
User Manual
Page 7
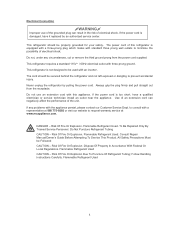
... cool down for approximately 4 hours. This unit is not designed for use gasoline or any other outside installation. • Avoid locating the refrigerator in moist areas. • Plug the refrigerator into a wall outlet, turn the unit on and allow children to operate, play with, or crawl inside the refrigerator. • Never clean refrigerator parts with lukewarm water using a soft cloth. (Cleaning instruction on a floor that children may increase electrical...
... cool down for approximately 4 hours. This unit is not designed for use gasoline or any other outside installation. • Avoid locating the refrigerator in moist areas. • Plug the refrigerator into a wall outlet, turn the unit on and allow children to operate, play with, or crawl inside the refrigerator. • Never clean refrigerator parts with lukewarm water using a soft cloth. (Cleaning instruction on a floor that children may increase electrical...
User Manual
Page 8
... Repair Manual/Owner's Guide Before Attempting To Service This Product. The power cord of this refrigerator is not designed to be secured behind the refrigerator and not left exposed or dangling to prevent accidental injury. This refrigerator is equipped with a three-prong plug which mates with this appliance. Use of an extension cord can result in the risk of electrical shock. DANGER - Flammable Refrigerant Used...
... Repair Manual/Owner's Guide Before Attempting To Service This Product. The power cord of this refrigerator is not designed to be secured behind the refrigerator and not left exposed or dangling to prevent accidental injury. This refrigerator is equipped with a three-prong plug which mates with this appliance. Use of an extension cord can result in the risk of electrical shock. DANGER - Flammable Refrigerant Used...
User Manual
Page 9
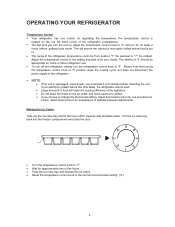
...; Twist the ice cube tray and release the ice cubes. • Reset the temperature control knob to the normal recommended setting. ("4") 6 3 4 7 0 1 2 Making the Ice Cubes Take out the ice cube tray and fill the tray to the refrigerator • NOTE • If the unit is unplugged, loses power; The temperature control is from position "1" the warmest to the setting that turning the temperature control knob to "0" position stops the cooling cycle, but...
...; Twist the ice cube tray and release the ice cubes. • Reset the temperature control knob to the normal recommended setting. ("4") 6 3 4 7 0 1 2 Making the Ice Cubes Take out the ice cube tray and fill the tray to the refrigerator • NOTE • If the unit is unplugged, loses power; The temperature control is from position "1" the warmest to the setting that turning the temperature control knob to "0" position stops the cooling cycle, but...
User Manual
Page 10
... remove frost as it may damage the cooling coils. (A punctured cooling coil will cause serious damage to the product and will close easier when the leveling legs are located in the front bottom corners of your refrigerator in the refrigerator. Make sure the drip tray is in warm water. 7 The refrigerator door will void the warranty). After defrosting, empty water from the freezer compartment. To defrost faster, keep the door open...
... remove frost as it may damage the cooling coils. (A punctured cooling coil will cause serious damage to the product and will close easier when the leveling legs are located in the front bottom corners of your refrigerator in the refrigerator. Make sure the drip tray is in warm water. 7 The refrigerator door will void the warranty). After defrosting, empty water from the freezer compartment. To defrost faster, keep the door open...
User Manual
Page 11
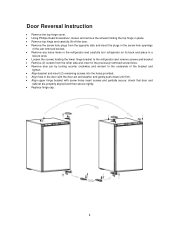
Door Reversal Instruction • Remove the top hinge cover. • Using Phillips Head Screwdriver, loosen and remove the screws holding the top hinge in place. • Remove top hinge and carefully lift off the door. • Remove the screw hole plugs from the opposite side and insert the plugs in the screw hole openings of the just removed screws. • Remove any loose items in the refrigerator and carefully turn refrigerator on its back...
Door Reversal Instruction • Remove the top hinge cover. • Using Phillips Head Screwdriver, loosen and remove the screws holding the top hinge in place. • Remove top hinge and carefully lift off the door. • Remove the screw hole plugs from the opposite side and insert the plugs in the screw hole openings of the just removed screws. • Remove any loose items in the refrigerator and carefully turn refrigerator on its back...
User Manual
Page 12
... the interior and exterior with a damp warm cloth soaked in lukewarm water and baking soda solution. Overloading the refrigerator forces the compressor to keep the door gasket (seal) clean to run longer. Energy Saving Tips • The refrigerator should not be accessible to child's play. • Short vacations: Leave the refrigerator operating during transportation. Foods that it open if necessary or have the door removed. Vacation...
... the interior and exterior with a damp warm cloth soaked in lukewarm water and baking soda solution. Overloading the refrigerator forces the compressor to keep the door gasket (seal) clean to run longer. Energy Saving Tips • The refrigerator should not be accessible to child's play. • Short vacations: Leave the refrigerator operating during transportation. Foods that it open if necessary or have the door removed. Vacation...
User Manual
Page 13
... close properly. Open the door less often. Door is opened too frequently. The gasket is set too cold. Bubbling or gurgling sound, like water boiling. The refrigerator does not have been stored recently. Turn the control to a cooler setting and allow several hours for the temperature to stabilize. Refrigerant (used to reach its selected temperature. See "Installation Instructions". Door is kept open , causing cold air from inside the refrigerator to meet warm moist air from outside...
... close properly. Open the door less often. Door is opened too frequently. The gasket is set too cold. Bubbling or gurgling sound, like water boiling. The refrigerator does not have been stored recently. Turn the control to a cooler setting and allow several hours for the temperature to stabilize. Refrigerant (used to reach its selected temperature. See "Installation Instructions". Door is kept open , causing cold air from inside the refrigerator to meet warm moist air from outside...
User Manual
Page 14
..., Hawaii and Puerto Rico. This warranty does not cover the following: • Damages due to shipping damage or improper installation. • Damages due to misuse or abuse. • Content losses due to failure of the unit. • Inside components such as door panels, door shelves, racks, light bulbs, etc. • Repairs performed by unauthorized service agents. • Service calls that do not involve...
..., Hawaii and Puerto Rico. This warranty does not cover the following: • Damages due to shipping damage or improper installation. • Damages due to misuse or abuse. • Content losses due to failure of the unit. • Inside components such as door panels, door shelves, racks, light bulbs, etc. • Repairs performed by unauthorized service agents. • Service calls that do not involve...

User Manual
Page 15
Magic Chef®logo is a registered trademark of CNA International, Inc. www.mcappliance.com Printed in China d/b/a MC Appliance Corporation. All rights reserved. CNA International, Inc.
Magic Chef®logo is a registered trademark of CNA International, Inc. www.mcappliance.com Printed in China d/b/a MC Appliance Corporation. All rights reserved. CNA International, Inc.


