

Owners Manual
Page 20
... 53-64 (optional - D8B Manual • Chapter 1 • page 14 CHANNEL TAP ALT RETURNS 2-TRACK DIGITAL BUS TAP/AUX TAP ANALOG STEREO INSERT/RETURN MIC/LINE 1 (through 12) MIC IN TRIM MIC/LINE 48V LINE IN A to D LINE 13 (through 24) TRIM LINE IN A to D PRE-DSP INSERT CHANNEL TAP BUS... to D TDIF/ADAT 8 channel format (optional) AES/EBU & S/PDIF STEREO INPUT TO CONTROL ROOM SELECT "Mackie Digital 8•Bus Block Diagram 2 / 28 / 2003" METER DIRECT ASSIGN TO TAPE OUT PFL SOLO MUTE PAN FADER PRE/ POST AUX 1-8 AUX LEVEL AUX PAN AUX LEVEL AUX LEVEL AUX PAN AUX LEVEL Figure...
... 53-64 (optional - D8B Manual • Chapter 1 • page 14 CHANNEL TAP ALT RETURNS 2-TRACK DIGITAL BUS TAP/AUX TAP ANALOG STEREO INSERT/RETURN MIC/LINE 1 (through 12) MIC IN TRIM MIC/LINE 48V LINE IN A to D LINE 13 (through 24) TRIM LINE IN A to D PRE-DSP INSERT CHANNEL TAP BUS... to D TDIF/ADAT 8 channel format (optional) AES/EBU & S/PDIF STEREO INPUT TO CONTROL ROOM SELECT "Mackie Digital 8•Bus Block Diagram 2 / 28 / 2003" METER DIRECT ASSIGN TO TAPE OUT PFL SOLO MUTE PAN FADER PRE/ POST AUX 1-8 AUX LEVEL AUX PAN AUX LEVEL AUX LEVEL AUX PAN AUX LEVEL Figure...

Owners Manual
Page 33
... any channel lets you hear only the soloed channel. • Mackie's exclusive Rude Solo Light flashes incessantly whenever any solo selections. D8B Manual • Chapter 2 • page 27 tween channel strips... • There are three different types of digital recorders. Channel Meters • Indicate post-EQ, pre-fader levels. • The audio level display is scaled in overhead of +22 dBu. lected (... below the channel V-Pots. • When the green LEDs are on, Fader Bank 1 is selected (MIC/LINE). • When the red LEDs are on, Fader Bank 2 is selected (TAPE IN). • When...
... any channel lets you hear only the soloed channel. • Mackie's exclusive Rude Solo Light flashes incessantly whenever any solo selections. D8B Manual • Chapter 2 • page 27 tween channel strips... • There are three different types of digital recorders. Channel Meters • Indicate post-EQ, pre-fader levels. • The audio level display is scaled in overhead of +22 dBu. lected (... below the channel V-Pots. • When the green LEDs are on, Fader Bank 1 is selected (MIC/LINE). • When the red LEDs are on, Fader Bank 2 is selected (TAPE IN). • When...

Owners Manual
Page 55
... an excellent patch point for individual channel effects, where it 's not like chorus or delay. Signal Path (INSERTS) Tape/Line/Mic Input A/D Converter Pre-Insert Channel Delay Digital Trim Phase Dynamics Input Meter Gate Compressor Dynamics Output Meter EQ Post-Insert Channel Metering...readout windows immediately above the INSERT icons. This is a great place to route another channel into an external effect, then back through this Pre-DSP insert point. D8B Manual • Chapter 3 • page 49 The POST insert is constant and unaffected by EQ, dynamics, or fader adjustments. •...
... an excellent patch point for individual channel effects, where it 's not like chorus or delay. Signal Path (INSERTS) Tape/Line/Mic Input A/D Converter Pre-Insert Channel Delay Digital Trim Phase Dynamics Input Meter Gate Compressor Dynamics Output Meter EQ Post-Insert Channel Metering...readout windows immediately above the INSERT icons. This is a great place to route another channel into an external effect, then back through this Pre-DSP insert point. D8B Manual • Chapter 3 • page 49 The POST insert is constant and unaffected by EQ, dynamics, or fader adjustments. •...

Owners Manual
Page 64
...the selected channel(s) after ungrouping. • Select "Dissolve" to retain only the channel's automation data (pre-group) after ungrouping. All parameters are copied from a previously established group. • Select some or all...+L on the same bank, or vertically to a channel directly above or below it (Mic/Line and Tape Return Banks only). Ungroup adjacent channel on the keyboard. For instance, in...8226; Horizontal linking allows two stereo channels to be linked horizontally to an D8B Manual • Chapter 3 • page 58 • Select the parameters that you to...
...the selected channel(s) after ungrouping. • Select "Dissolve" to retain only the channel's automation data (pre-group) after ungrouping. All parameters are copied from a previously established group. • Select some or all...+L on the same bank, or vertically to a channel directly above or below it (Mic/Line and Tape Return Banks only). Ungroup adjacent channel on the keyboard. For instance, in...8226; Horizontal linking allows two stereo channels to be linked horizontally to an D8B Manual • Chapter 3 • page 58 • Select the parameters that you to...

Owners Manual
Page 95
...Pan channel in most cases you can be activated when the console is often necessary to filter the dynamics key input. PRE-DSP INSERT • Click the PATCH button to select the key input source. KEY INPUT • Use another channel... cannot be used to use Dynamics EQ on the selected channels. This can select the EQ type for each channel (mics, tape, FX, and returns). Tip: These two buttons sound pretty similar in operation, so here is extremely useful ... The Panning Window (Ctrl+7) This window is the skinny on the Key signal. D8B Manual • Chapter 3 • page 89
...Pan channel in most cases you can be activated when the console is often necessary to filter the dynamics key input. PRE-DSP INSERT • Click the PATCH button to select the key input source. KEY INPUT • Use another channel... cannot be used to use Dynamics EQ on the selected channels. This can select the EQ type for each channel (mics, tape, FX, and returns). Tip: These two buttons sound pretty similar in operation, so here is extremely useful ... The Panning Window (Ctrl+7) This window is the skinny on the Key signal. D8B Manual • Chapter 3 • page 89

Owners Manual
Page 110
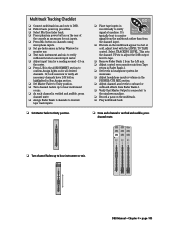
... path from the console to the multitrack, then from the beginning of the signal path to D8B. ❏ Follow basic power-up procedure. ❏ Select Mic/Line fader bank. TRIM LINE MIC 0 60 -20dB +40dB 1 ❏ Select L/R in the ASSIGNMENT section to visualize the...mics, and most electronic instruments don't need phantom power. When multitrack recording using microphone inputs. D8B Manual • Chapter 4 • page 104 For any multitrack setup, it 's helpful to confirm Assign lights on -screen to verify that all desired channels, or look on for desired Pre...
... path from the console to the multitrack, then from the beginning of the signal path to D8B. ❏ Follow basic power-up procedure. ❏ Select Mic/Line fader bank. TRIM LINE MIC 0 60 -20dB +40dB 1 ❏ Select L/R in the ASSIGNMENT section to visualize the...mics, and most electronic instruments don't need phantom power. When multitrack recording using microphone inputs. D8B Manual • Chapter 4 • page 104 For any multitrack setup, it 's helpful to confirm Assign lights on -screen to verify that all desired channels, or look on for desired Pre...
Owners Manual
Page 111
...LEVEL. MASTER L/R dB 10 5 U 5 10 20 30 40 50 60 ❏ Turn channel faders up to hear instrument or mic. This sets the channel V-Pots to adjust the D8B output level to tape. ❏ Remove Fader Bank 1 from the L/R mix. ❏ Adjust control room monitor mix from Tape ...Connect multitrack ins and outs to D8B. ❏ Follow basic power-up procedure. ❏ Select Mic/Line fader bank. ❏ Press phantom power button on the rear of the console as necessary for mic inputs. ❏ Press Mic button on channels using microphone inputs. ❏ Set pre-fader auxes in Setup Window ...
...LEVEL. MASTER L/R dB 10 5 U 5 10 20 30 40 50 60 ❏ Turn channel faders up to hear instrument or mic. This sets the channel V-Pots to adjust the D8B output level to tape. ❏ Remove Fader Bank 1 from the L/R mix. ❏ Adjust control room monitor mix from Tape ...Connect multitrack ins and outs to D8B. ❏ Follow basic power-up procedure. ❏ Select Mic/Line fader bank. ❏ Press phantom power button on the rear of the console as necessary for mic inputs. ❏ Press Mic button on channels using microphone inputs. ❏ Set pre-fader auxes in Setup Window ...
Owners Manual
Page 140
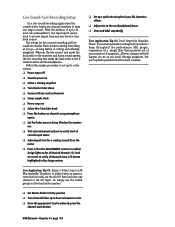
...effects ❏ Adjust mix to the cue (headphone) buses. ❏ Store and label snapshot(s) Live Application Tip #2: Don't forget the Snapshot filters. D8B Manual • Chapter 4 • page 134 All your changes will still happen on -screen to verify all desired channels. Or, look on cue... to Unity position ❏ Turn channel faders up a quick mix using microphone inputs ❏ Set Pre-Fader auxes in Bus Assign section ❏ Set up to hear instrument or mic. ❏ Once the appropriate level is achieved, press the channel mute button. Live Sound/Live Recording...
...effects ❏ Adjust mix to the cue (headphone) buses. ❏ Store and label snapshot(s) Live Application Tip #2: Don't forget the Snapshot filters. D8B Manual • Chapter 4 • page 134 All your changes will still happen on -screen to verify all desired channels. Or, look on cue... to Unity position ❏ Turn channel faders up a quick mix using microphone inputs ❏ Set Pre-Fader auxes in Bus Assign section ❏ Set up to hear instrument or mic. ❏ Once the appropriate level is achieved, press the channel mute button. Live Sound/Live Recording...

Owners Manual
Page 143
...Automation What Type of Data Can Be Automated Virtually all types of automation data. • Select Mic/Line bank, then Select All (Control+A). • Select Fader bank, then Select All (Control+A).... Save frequently, or set the D8B for automation. All D8B channel parameters can be automated except: • Analog Trims on channels 1-12 • Tape Output selection • Pre and Post insert selections •... to a MIDI sequencer, or by the Mackie designers makes the D8B painless and intuitive. The power, flexibility, and ease of the D8B automation system. If you've used other ...
...Automation What Type of Data Can Be Automated Virtually all types of automation data. • Select Mic/Line bank, then Select All (Control+A). • Select Fader bank, then Select All (Control+A).... Save frequently, or set the D8B for automation. All D8B channel parameters can be automated except: • Analog Trims on channels 1-12 • Tape Output selection • Pre and Post insert selections •... to a MIDI sequencer, or by the Mackie designers makes the D8B painless and intuitive. The power, flexibility, and ease of the D8B automation system. If you've used other ...

Owners Manual
Page 162
...pot or GUI Control Pot on the mixer input channel (MIC/LINE or TAPE IN). This can be accomplished from the aux control is independent of the channel fader position. Pre-Fader and Post-Fader Auxiliary Sends Normally, effect sends are selectable pre- D8B Manual • Appendices • page 156 Use the AUX... window, or individually on the PRE buttons below , we have chosen AUX 4 according to an aux send. In the channel strip, Alt-click the Aux Send level indicator to the Aux Bus 1. GUI Control Pot Assigned to AUX 4 Remember to a D8B mixer input channel (MIC/LINE or TAPE IN). 2. ...
...pot or GUI Control Pot on the mixer input channel (MIC/LINE or TAPE IN). This can be accomplished from the aux control is independent of the channel fader position. Pre-Fader and Post-Fader Auxiliary Sends Normally, effect sends are selectable pre- D8B Manual • Appendices • page 156 Use the AUX... window, or individually on the PRE buttons below , we have chosen AUX 4 according to an aux send. In the channel strip, Alt-click the Aux Send level indicator to the Aux Bus 1. GUI Control Pot Assigned to AUX 4 Remember to a D8B mixer input channel (MIC/LINE or TAPE IN). 2. ...

Owners Manual
Page 190
...Select LEDs 27 Fader Bank Selection 8 Fader Banks ...7, 26 EFFECTS ...29 HUI Layer ...29 MASTERS ...29 MIC/LINE (TRACK 28 TAPE IN (MONITOR 28 Fader Motors Off Button 37 Faders 27, 37, 42, 61...Mixdown Setup 12 Figure 1-5 Signal-Flow Diagram 13 Figure 1-6 D8B Block Diagram 14 Figure 1-7 D8B Gain Structure Diagram 16 Figure 2-1 Aux Sends 1-8 (Default-Mackie Stereo Ef 31 Figure 4-1 Power-up Procedure 96 Figure ... Example 109 Signal Path (INSERTS 49 TDIF Hookup to HDR24/96 (DIO•8 121 Using PRE-Insert for Bus Mastering 49 V-Pots ...43 File Menu ...51 Close Window (ESC 51 Desktop...
...Select LEDs 27 Fader Bank Selection 8 Fader Banks ...7, 26 EFFECTS ...29 HUI Layer ...29 MASTERS ...29 MIC/LINE (TRACK 28 TAPE IN (MONITOR 28 Fader Motors Off Button 37 Faders 27, 37, 42, 61...Mixdown Setup 12 Figure 1-5 Signal-Flow Diagram 13 Figure 1-6 D8B Block Diagram 14 Figure 1-7 D8B Gain Structure Diagram 16 Figure 2-1 Aux Sends 1-8 (Default-Mackie Stereo Ef 31 Figure 4-1 Power-up Procedure 96 Figure ... Example 109 Signal Path (INSERTS 49 TDIF Hookup to HDR24/96 (DIO•8 121 Using PRE-Insert for Bus Mastering 49 V-Pots ...43 File Menu ...51 Close Window (ESC 51 Desktop...
Owners Manual
Page 195
... Events 91 T T/DIF ...68, 99 Talkback ...24, 35 Talkback Level Button 34 Talkback Mic ...31 Talkback to Studio Button 34 Tape ...47 Tape Bank on Top ...90 Tape I/O ...40 STOP ...40 Transport Sub-menu 61 One Button Punch 62 Record Safe ...62 Use Pre-Roll ...62 Trim ...9, 55, 78 Trim Levels 26, 37, 61, 139 Troubleshooting Guide... 19 Upgrade UFX Cards 94 UPS ...6 Use Nine Pin Control 62 Use Pre-Roll ...62, 69 Use PreRoll ...78 Use Write Ready 69, 78 ...30 Master Meters ...31 Talkback Mic ...31 Vacuum Fluorescent Display 7 VFD ...7, 32 Video Monitor ...6 Video Port ...6 Virtual Group ......
... Events 91 T T/DIF ...68, 99 Talkback ...24, 35 Talkback Level Button 34 Talkback Mic ...31 Talkback to Studio Button 34 Tape ...47 Tape Bank on Top ...90 Tape I/O ...40 STOP ...40 Transport Sub-menu 61 One Button Punch 62 Record Safe ...62 Use Pre-Roll ...62 Trim ...9, 55, 78 Trim Levels 26, 37, 61, 139 Troubleshooting Guide... 19 Upgrade UFX Cards 94 UPS ...6 Use Nine Pin Control 62 Use Pre-Roll ...62, 69 Use PreRoll ...78 Use Write Ready 69, 78 ...30 Master Meters ...31 Talkback Mic ...31 Vacuum Fluorescent Display 7 VFD ...7, 32 Video Monitor ...6 Video Port ...6 Virtual Group ......