User Guide
Page 8
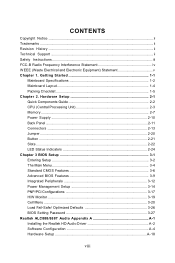
... ...2-10 Back Panel ...2-11 Connectors ...2-13 Jumper ...2-20 Button ...2-21 Slots ...2-22 LED Status Indicators 2-24 Chapter 3 BIOS Setup 3-1 Entering Setup ...3-2 The Main Menu ...3-4 Standard CMOS Features 3-6 Advanced BIOS Features 3-9 Integrated Peripherals 3-12 Power Management Setup 3-14 PNP/PCI Configurations 3-17 H/W Monitor ...3-19 Cell Menu ...3-20 Load Fail-Safe/ Optimized Defaults...
... ...2-10 Back Panel ...2-11 Connectors ...2-13 Jumper ...2-20 Button ...2-21 Slots ...2-22 LED Status Indicators 2-24 Chapter 3 BIOS Setup 3-1 Entering Setup ...3-2 The Main Menu ...3-4 Standard CMOS Features 3-6 Advanced BIOS Features 3-9 Integrated Peripherals 3-12 Power Management Setup 3-14 PNP/PCI Configurations 3-17 H/W Monitor ...3-19 Cell Menu ...3-20 Load Fail-Safe/ Optimized Defaults...
User Guide
Page 35
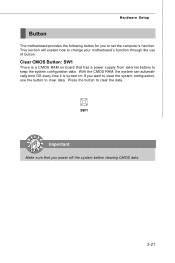
... before clearing CMOS data. 2-21 Press the button to clear data. If you want to clear the system configuration, use of button. SW1 Important Make sure that has a power supply from external battery to keep the system configuration data. Hardware Setup Button The motherboard provides the ...following button for you to change your motherboard's function through the use the button to clear the data. This section will explain how to set the ...
... before clearing CMOS data. 2-21 Press the button to clear data. If you want to clear the system configuration, use of button. SW1 Important Make sure that has a power supply from external battery to keep the system configuration data. Hardware Setup Button The motherboard provides the ...following button for you to change your motherboard's function through the use the button to clear the data. This section will explain how to set the ...
User Guide
Page 42
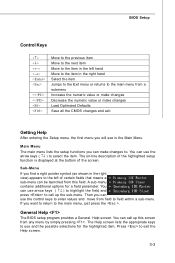
... the main menu from a submenu Increase the numeric value or make changes Decrease the numeric value or make changes Load Optimized Defaults Save all the CMOS changes and exit Getting Help After entering the Setup menu, the first menu you can make changes to. Press to select the item.
... the main menu from a submenu Increase the numeric value or make changes Decrease the numeric value or make changes Load Optimized Defaults Save all the CMOS changes and exit Getting Help After entering the Setup menu, the first menu you can make changes to. Press to select the item.
User Guide
Page 43
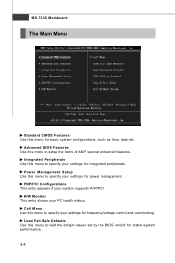
MS-7338 Mainboard The Main Menu Standard CMOS Features Use this menu to specify your settings for integrated peripherals. H/W Monitor This entry shows your settings for frequency/voltage control and overclocking. Power Management ...
MS-7338 Mainboard The Main Menu Standard CMOS Features Use this menu to specify your settings for integrated peripherals. H/W Monitor This entry shows your settings for frequency/voltage control and overclocking. Power Management ...
User Guide
Page 44
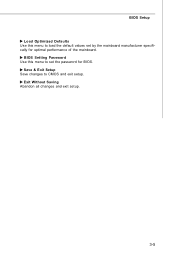
Save & Exit Setup Save changes to CMOS and exit setup. BIOS Setting Password Use this menu to load the default values set the password for optimal performance of the mainboard. BIOS Setup Load Optimized Defaults Use this menu to set by the mainboard manufacturer specifically for BIOS. Exit Without Saving Abandon all changes and exit setup. 3-5
Save & Exit Setup Save changes to CMOS and exit setup. BIOS Setting Password Use this menu to load the default values set the password for optimal performance of the mainboard. BIOS Setup Load Optimized Defaults Use this menu to set by the mainboard manufacturer specifically for BIOS. Exit Without Saving Abandon all changes and exit setup. 3-5
User Guide
Page 45
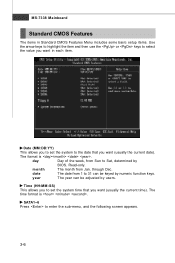
MS-7338 Mainboard Standard CMOS Features The items in each item. Time (HH:MM :SS) This allows you to set the system to 31 can be keyed by numeric function ..., determined by users. The format is . month The month from 1 to the date that you to set the system time that you want in Standard CMOS Features Menu includes some basic setup items. Use the arrow keys to highlight the item and then use the or keys to select the value...
MS-7338 Mainboard Standard CMOS Features The items in each item. Time (HH:MM :SS) This allows you to set the system to 31 can be keyed by numeric function ..., determined by users. The format is . month The month from 1 to the date that you to set the system time that you want in Standard CMOS Features Menu includes some basic setup items. Use the arrow keys to highlight the item and then use the or keys to select the value...
User Guide
Page 64
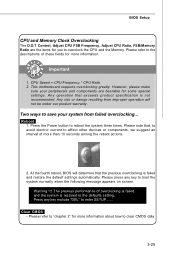
Press the Power button to clear CMOS data. 3-25 Please press any key exclude "DEL" to enter SETUP....... This motherboard supports overclocking greatly. W arning !!! Please refer to affect other devices or components, we suggest an interval of overclocking is ...refer to "chapter 2" for more information about how to reboot the system three times. CPU Speed = CPU Frequency * CPU Ratio 2. Clear CMOS - The previous performance of more information. Any risk or damge resulting from failed overclocking... Important 1. Two ways to save your peripherals and components ...
Press the Power button to clear CMOS data. 3-25 Please press any key exclude "DEL" to enter SETUP....... This motherboard supports overclocking greatly. W arning !!! Please refer to affect other devices or components, we suggest an interval of overclocking is ...refer to "chapter 2" for more information about how to reboot the system three times. CPU Speed = CPU Frequency * CPU Ratio 2. Clear CMOS - The previous performance of more information. Any risk or damge resulting from failed overclocking... Important 1. Two ways to save your peripherals and components ...
User Guide
Page 66
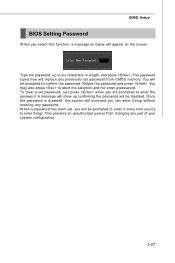
... function, a message as below will appear on the screen: Type the password, up confirming the password will be disabled. This prevents an unauthorized person from CMOS memory. Retype the password and press .
... function, a message as below will appear on the screen: Type the password, up confirming the password will be disabled. This prevents an unauthorized person from CMOS memory. Retype the password and press .


