User Manual
Page 2
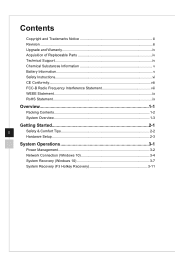
... Notice iii Revision iii Upgrade and Warranty iv Acquisition of Replaceable Parts iv Technical Support iv Chemical Substances Information v Battery Information v Safety Instructions vi CE Conformity viii FCC-B Radio Frequency Interference Statement viii WEEE Statement ix RoHS Statement ix Overview 1-1 Packing Contents 1-2 System Overview 1-3 Getting Started 2-1 ii Safety & Comfort Tips 2-2 Hardware Setup 2-3 System Operations 3-1 Power Management 3-2 Network Connection (Windows 10 3-4 System Recovery (Windows 10 3-7 System Recovery (F3 Hotkey Recovery 3-11
... Notice iii Revision iii Upgrade and Warranty iv Acquisition of Replaceable Parts iv Technical Support iv Chemical Substances Information v Battery Information v Safety Instructions vi CE Conformity viii FCC-B Radio Frequency Interference Statement viii WEEE Statement ix RoHS Statement ix Overview 1-1 Packing Contents 1-2 System Overview 1-3 Getting Started 2-1 ii Safety & Comfort Tips 2-2 Hardware Setup 2-3 System Operations 3-1 Power Management 3-2 Network Connection (Windows 10 3-4 System Recovery (Windows 10 3-7 System Recovery (F3 Hotkey Recovery 3-11
User Manual
Page 4
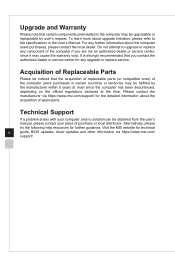
... the authorized dealer or service center for any component of purchase or local distributor. Visit the MSI website for technical iv guide, BIOS updates, driver updates and other information via https://www.msi.com/support/ for further guidance. Do not attempt to the specifications in the computer may cause the warranty void. Acquisition of Replaceable Parts Please be upgradable or replaceable by user's request. For any further...
... the authorized dealer or service center for any component of purchase or local distributor. Visit the MSI website for technical iv guide, BIOS updates, driver updates and other information via https://www.msi.com/support/ for further guidance. Do not attempt to the specifications in the computer may cause the warranty void. Acquisition of Replaceable Parts Please be upgradable or replaceable by user's request. For any further...
User Manual
Page 6
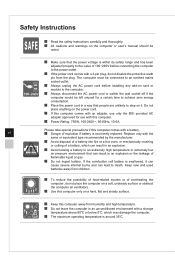
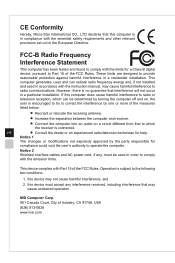
... or user's manual should be left unused for use with the same or equivalent type recommended by the manufacturer. ◙◙ Avoid disposal of a battery into fire or a hot oven, or mechanically crushing or cutting of a battery, which may damage the computer. ◙◙ The maximum operating temperature is incorrectly replaced. Replace only with this computer comes with an adapter, use...
... or user's manual should be left unused for use with the same or equivalent type recommended by the manufacturer. ◙◙ Avoid disposal of a battery into fire or a hot oven, or mechanically crushing or cutting of a battery, which may damage the computer. ◙◙ The maximum operating temperature is incorrectly replaced. Replace only with this computer comes with an adapter, use...
User Manual
Page 7
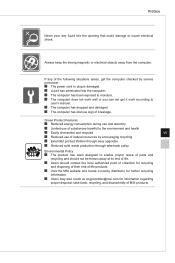
... and recycled vii ◙◙ Reduced use of natural resources by service personnel: ◙◙ The power cord or plug is damaged. ◙◙ Liquid has penetrated into the opening that could damage or cause electrical shock. Preface Never pour any of the following situations arises, get it work according to user's manual. ◙◙ The computer has...
... and recycled vii ◙◙ Reduced use of natural resources by service personnel: ◙◙ The power cord or plug is damaged. ◙◙ Liquid has penetrated into the opening that could damage or cause electrical shock. Preface Never pour any of the following situations arises, get it work according to user's manual. ◙◙ The computer has...
User Manual
Page 8
... with the instruction manual, may cause harmful interference to Part 15 of the measures listed below: ■■ Reorient or relocate the receiving antenna. ■■ Increase the separation between the computer and receiver. ■■ Connect the computer into an outlet on , the user is subject to operate the computer. CE Conformity Hereby, Micro-Star International CO...
... with the instruction manual, may cause harmful interference to Part 15 of the measures listed below: ■■ Reorient or relocate the receiving antenna. ■■ Increase the separation between the computer and receiver. ■■ Connect the computer into an outlet on , the user is subject to operate the computer. CE Conformity Hereby, Micro-Star International CO...

User Manual
Page 14
SS-Out Side surround sound line out in 7.1 channel mode. 4 Line-Out This connector is provided for headphones or speakers. 5 Mic-In This connector is used for air convection and to your system. 3 Line-In Used for microphones. Do not cover the ventilator. 2 Power Jack Power supplied through this jack supplies power to prevent the equipment from overheating. hh Rear View 1 1-4 345 6 9 10 2 1 15 8 7 12 11 13 14 16 1 Ventilator The ventilator on the enclosure is provided for connecting external audio outputting devices.
SS-Out Side surround sound line out in 7.1 channel mode. 4 Line-Out This connector is provided for headphones or speakers. 5 Mic-In This connector is used for air convection and to your system. 3 Line-In Used for microphones. Do not cover the ventilator. 2 Power Jack Power supplied through this jack supplies power to prevent the equipment from overheating. hh Rear View 1 1-4 345 6 9 10 2 1 15 8 7 12 11 13 14 16 1 Ventilator The ventilator on the enclosure is provided for connecting external audio outputting devices.

User Manual
Page 15
... Out in 5.1/ 7.1 channel mode. 7 RS-Out Rear-Surround Out in 4/ 5.1/ 7.1 channel mode. 8 S/PDIF-Out This S/PDIF (Sony & Philips Digital Interconnect Format) connector is provided for digital audio transmission to external speakers through an optical fiber cable. 9 RJ-45 LAN Jack (2.5G) The standard RJ-45 LAN jack is provided for connection to the Local Area Network (LAN). Yellow Green/ Orange LED Color Left Yellow Right...
... Out in 5.1/ 7.1 channel mode. 7 RS-Out Rear-Surround Out in 4/ 5.1/ 7.1 channel mode. 8 S/PDIF-Out This S/PDIF (Sony & Philips Digital Interconnect Format) connector is provided for digital audio transmission to external speakers through an optical fiber cable. 9 RJ-45 LAN Jack (2.5G) The standard RJ-45 LAN jack is provided for connection to the Local Area Network (LAN). Yellow Green/ Orange LED Color Left Yellow Right...

User Manual
Page 16
... cable. 15 PS/2® Keyboard/ Mouse Combo Port The PS/2 keyboard/ mouse DIN connector for PS/2 keyboard/ mouse. 16 USB 2.0 Port (Type-A) The USB (Universal Serial Bus) port is for fast charging. Important If this computer features an Intel® CPU without integrated graphics, the Thunderbolt™ 3 port will turn off if PC enters shutdown or sleep mode. The slim and sleek USB Type-C connector features reversible plug orientation and up to 5V/3A power supply for external devices. 13...
... cable. 15 PS/2® Keyboard/ Mouse Combo Port The PS/2 keyboard/ mouse DIN connector for PS/2 keyboard/ mouse. 16 USB 2.0 Port (Type-A) The USB (Universal Serial Bus) port is for fast charging. Important If this computer features an Intel® CPU without integrated graphics, the Thunderbolt™ 3 port will turn off if PC enters shutdown or sleep mode. The slim and sleek USB Type-C connector features reversible plug orientation and up to 5V/3A power supply for external devices. 13...

User Manual
Page 17
... equipment is turned off. 2 Drive Activity Indicator LED blinks when the system is turned on and off. hh Top View Overview 1 23 4 56 3 1-7 1 Power Button/ LED Press the power button to turn the system on . LED glows when the equipment power is accessing the internal storage drives. 3 USB 3.2 Gen 1 Port (Type-A) USB 3.2 Gen 1, the SuperSpeed USB, delivers up to 5V/3A power supply for various devices, such as storage devices, hard drives, video cameras, etc. 4 USB 3.2 Gen 2 Port (Type-C) USB 3.2 Gen 2, the...
... equipment is turned off. 2 Drive Activity Indicator LED blinks when the system is turned on and off. hh Top View Overview 1 23 4 56 3 1-7 1 Power Button/ LED Press the power button to turn the system on . LED glows when the equipment power is accessing the internal storage drives. 3 USB 3.2 Gen 1 Port (Type-A) USB 3.2 Gen 1, the SuperSpeed USB, delivers up to 5V/3A power supply for various devices, such as storage devices, hard drives, video cameras, etc. 4 USB 3.2 Gen 2 Port (Type-C) USB 3.2 Gen 2, the...

User Manual
Page 19
2 Getting Started This chapter provides you with the information on hardware setup procedures. While connecting peripheral devices, be careful in holding the devices and use a grounded wrist strap to avoid static electricity.
2 Getting Started This chapter provides you with the information on hardware setup procedures. While connecting peripheral devices, be careful in holding the devices and use a grounded wrist strap to avoid static electricity.

User Manual
Page 21
Your system may vary in appearance. • Please make sure the system has been grounded to earth through the AC power cord and the electrical outlet before powering on the system. Getting Started Hardware Setup Important • The illustrations are for reference only. hh Connecting Peripherials Connect the cables of keyboard, mouse, LAN, monitor, etc. 2-3
Your system may vary in appearance. • Please make sure the system has been grounded to earth through the AC power cord and the electrical outlet before powering on the system. Getting Started Hardware Setup Important • The illustrations are for reference only. hh Connecting Peripherials Connect the cables of keyboard, mouse, LAN, monitor, etc. 2-3
User Manual
Page 24
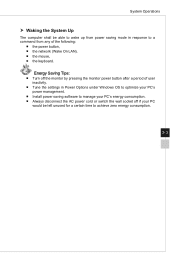
...; Turn off your display or set your system power. Right-click [Start] [Control Panel] from the list and then click [System and Security]. , select Select [Power Options] and choose a power plan that suits your display, hard drive, and battery. To take advantage of these potential energy savings, the power management feature has been preset to sleep mode after a period of user inactivity. You may also fine-tune the settings by clicking [Change...
...; Turn off your display or set your system power. Right-click [Start] [Control Panel] from the list and then click [System and Security]. , select Select [Power Options] and choose a power plan that suits your display, hard drive, and battery. To take advantage of these potential energy savings, the power management feature has been preset to sleep mode after a period of user inactivity. You may also fine-tune the settings by clicking [Change...
User Manual
Page 25
... the settings in Power Options under Windows OS to optimize your PC's power management. ■■ Install power saving software to manage your PC's energy consumption. ■■ Always disconnect the AC power cord or switch the wall socket off the monitor by pressing the monitor power button after a period of the following: ■■ the power button, ■■ the network (Wake On LAN), ■■ the mouse, ■■ the keyboard.
... the settings in Power Options under Windows OS to optimize your PC's power management. ■■ Install power saving software to manage your PC's energy consumption. ■■ Always disconnect the AC power cord or switch the wall socket off the monitor by pressing the monitor power button after a period of the following: ■■ the power button, ■■ the network (Wake On LAN), ■■ the mouse, ■■ the keyboard.
User Manual
Page 26
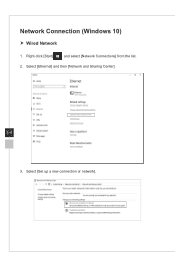
Right-click [Start] and select [Network Connections] from the list. 2. Select [Set up a new connection or network]. Select [Ethernet] and then [Network and Sharing Center]. 3-4 3. Network Connection (Windows 10) hh Wired Network 1.
Right-click [Start] and select [Network Connections] from the list. 2. Select [Set up a new connection or network]. Select [Ethernet] and then [Network and Sharing Center]. 3-4 3. Network Connection (Windows 10) hh Wired Network 1.
User Manual
Page 27
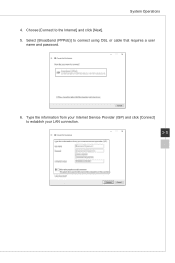
Choose [Connect to connect using DSL or cable that requires a user name and password. 6. Select [Broadband (PPPoE)] to the Internet] and click [Next]. 5. Type the information from your Internet Service Provider (ISP) and click [Connect] to establish your LAN connection. 3-5 System Operations 4.
Choose [Connect to connect using DSL or cable that requires a user name and password. 6. Select [Broadband (PPPoE)] to the Internet] and click [Next]. 5. Type the information from your Internet Service Provider (ISP) and click [Connect] to establish your LAN connection. 3-5 System Operations 4.
User Manual
Page 28
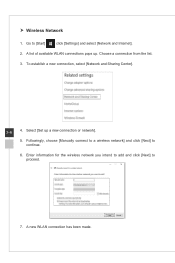
A list of available WLAN connections pops up a new connection or network]. 5. Select [Set up . Enter information for the wireless network you intend to add and click [Next] to continue. 6. A new WLAN connection has been made. Followingly, choose [Manually connect to a wireless network] and click [Next] to proceed. 7. Choose a connection from the list. 3. Go to [Start] , click [Settings] and select [Network and Internet]. 2. To establish a new connection, select [Network and Sharing Center]. 3-6 4. hh Wireless Network 1.
A list of available WLAN connections pops up a new connection or network]. 5. Select [Set up . Enter information for the wireless network you intend to add and click [Next] to continue. 6. A new WLAN connection has been made. Followingly, choose [Manually connect to a wireless network] and click [Next] to proceed. 7. Choose a connection from the list. 3. Go to [Start] , click [Settings] and select [Network and Internet]. 2. To establish a new connection, select [Network and Sharing Center]. 3-6 4. hh Wireless Network 1.
User Manual
Page 29
... service center for further assistance. 3-7 If the following solution fails to recover your system drive to install the OS with other storage devices. Before using the System Recovery Function may include: ■■ Restore the system back to the initial status of original manufacturer's default settings. ■■ When some errors have occurred to the operating system in use. ■■ When the operating...
... service center for further assistance. 3-7 If the following solution fails to recover your system drive to install the OS with other storage devices. Before using the System Recovery Function may include: ■■ Restore the system back to the initial status of original manufacturer's default settings. ■■ When some errors have occurred to the operating system in use. ■■ When the operating...

User Manual
Page 30
Go to start the system recovery. 3-8 3. Choose between [Keep my files] and [Remove everything All drives Just remove my files Remove files and clean the drive Just remove my files Remove files and clean the drive Keep my files Only the drive where Reset this PC 1. The [Choose an option] screen pops up. Reset this PC Windows is installed Remove everything ]. Select [Recovery] and click [Get started] under [Reset this PC] to [Start] , click [Settings] and select [Update and security]. 2.
Go to start the system recovery. 3-8 3. Choose between [Keep my files] and [Remove everything All drives Just remove my files Remove files and clean the drive Just remove my files Remove files and clean the drive Keep my files Only the drive where Reset this PC 1. The [Choose an option] screen pops up. Reset this PC Windows is installed Remove everything ]. Select [Recovery] and click [Get started] under [Reset this PC] to [Start] , click [Settings] and select [Update and security]. 2.

User Manual
Page 32
Select [Remove everything 1. Click [Reset] to be made during the process. hh Remove everything ]. 2. Then select between [Only the drive where Windows is installed] and [All drives]. 3. If you to choose between [Just remove my files] and [Remove files and clean the drive]. 3-10 4. The next screen will pop up, asking you have multiple hard drives, a screen will show the changes to start the system reset.
Select [Remove everything 1. Click [Reset] to be made during the process. hh Remove everything ]. 2. Then select between [Only the drive where Windows is installed] and [All drives]. 3. If you to choose between [Just remove my files] and [Remove files and clean the drive]. 3-10 4. The next screen will pop up, asking you have multiple hard drives, a screen will show the changes to start the system reset.
User Manual
Page 33
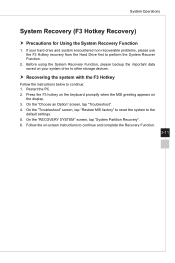
... Follow the instructions below to the default settings. 5. On the "Troubleshoot" screen, tap "Restore MSI factory" to reset the system to continue: 1. Restart the PC. 2. Before using the System Recovery Function, please backup the important data saved on the display. 3. On the "Choose an Option" screen, tap "Troubleshoot". 4. System Operations System Recovery (F3 Hotkey Recovery) hh Precautions for Using the System Recovery Function 1. On the "RECOVERY SYSTEM" screen, tap "System Partition Recovery". 6. If your...
... Follow the instructions below to the default settings. 5. On the "Troubleshoot" screen, tap "Restore MSI factory" to reset the system to continue: 1. Restart the PC. 2. Before using the System Recovery Function, please backup the important data saved on the display. 3. On the "Choose an Option" screen, tap "Troubleshoot". 4. System Operations System Recovery (F3 Hotkey Recovery) hh Precautions for Using the System Recovery Function 1. On the "RECOVERY SYSTEM" screen, tap "System Partition Recovery". 6. If your...


