
User Guide
Page 11
... 1-3 Motherboard Specifications 1-4 Connectors Quick Guide 1-6 Back Panel Quick Guide 1-8 CPU (Central Processing Unit 1-11 Introduction to the LGA 1150 CPU 1-11 CPU & Heatsink Installation 1-12 Memory 1-15 Dual-Channel mode Population Rule 1-15 Mounting Screw Holes 1-16 Power Supply 1-17 JPWR1~2: ATX Power Connectors 1-17 Expansion Slot 1-18 PCI_E1: PCIe 2.0 Expansion...
... 1-3 Motherboard Specifications 1-4 Connectors Quick Guide 1-6 Back Panel Quick Guide 1-8 CPU (Central Processing Unit 1-11 Introduction to the LGA 1150 CPU 1-11 CPU & Heatsink Installation 1-12 Memory 1-15 Dual-Channel mode Population Rule 1-15 Mounting Screw Holes 1-16 Power Supply 1-17 JPWR1~2: ATX Power Connectors 1-17 Expansion Slot 1-18 PCI_E1: PCIe 2.0 Expansion...
User Guide
Page 12
... 1-24 JTPM1: TPM Module Connector 1-25 Jumper 1-25 JBAT1: Clear CMOS Jumper 1-25 Drivers and Utilities 1-26 Total Installer 1-26 Chapter 2 Quick Installation 2-1 CPU Installation 2-2 Memory Installation 2-4 Motherboard Installation 2-5 Power Connectors Installation 2-7 SATA HDD Installation 2-9 mSATA SSD Installation 2-10 Front Panel Connector Installation 2-11 JFP1 Connector Installation 2-11 Front Panel Audio...
... 1-24 JTPM1: TPM Module Connector 1-25 Jumper 1-25 JBAT1: Clear CMOS Jumper 1-25 Drivers and Utilities 1-26 Total Installer 1-26 Chapter 2 Quick Installation 2-1 CPU Installation 2-2 Memory Installation 2-4 Motherboard Installation 2-5 Power Connectors Installation 2-7 SATA HDD Installation 2-9 mSATA SSD Installation 2-10 Front Panel Connector Installation 2-11 JFP1 Connector Installation 2-11 Front Panel Audio...

User Guide
Page 18
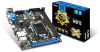
... only. ■ RENESAS UPD720202 chip - 2x USB 3.0 ports (2 ports on the back panel)* * For H81I only. ■ Realtek® ALC887 Codec - 7.1-Channel High Definition Audio - Chapter 1 Motherboard Specifications CPU Support Chipset Memory Support Expansion Slot Onboard Graphics Storage USB Audio LAN Back Panel Connectors ■ 4th Generation Intel® Core™ i7...
... only. ■ RENESAS UPD720202 chip - 2x USB 3.0 ports (2 ports on the back panel)* * For H81I only. ■ Realtek® ALC887 Codec - 7.1-Channel High Definition Audio - Chapter 1 Motherboard Specifications CPU Support Chipset Memory Support Expansion Slot Onboard Graphics Storage USB Audio LAN Back Panel Connectors ■ 4th Generation Intel® Core™ i7...

User Guide
Page 21
...,SYSFAN1 DIMM1~2 JAUD1 JBAT1 JCI1 JCOM1 JFP1, JFP2 JPWR1~2 JTPM1 JUSB1/ JUSB2 JUSB3 PCI_E1 SATA1~4 Port Type I/O ports LGA1150 CPU Socket Fan Power Connectors DDR3 Memory Slots Front Panel Audio Connector Clear CMOS Jumper Chassis Intrusion Connector Serial Port Connector System Panel Connectors ATX Power Connectors TPM Module Connector USB 2.0 Expansion...
...,SYSFAN1 DIMM1~2 JAUD1 JBAT1 JCI1 JCOM1 JFP1, JFP2 JPWR1~2 JTPM1 JUSB1/ JUSB2 JUSB3 PCI_E1 SATA1~4 Port Type I/O ports LGA1150 CPU Socket Fan Power Connectors DDR3 Memory Slots Front Panel Audio Connector Clear CMOS Jumper Chassis Intrusion Connector Serial Port Connector System Panel Connectors ATX Power Connectors TPM Module Connector USB 2.0 Expansion...

User Guide
Page 29
... mode Population Rule In Dual-Channel mode, the memory modules can enhance system performance. The following illustrations explain the population rules for installing memory modules. For more information on compatible components, please visit http://www.msi.com/service/test-report/ Chapter 1 DIMM1 DIMM2 Video... Demonstration Watch the video to learn how to 15+ GB of memory (not full 16 GB) when ...
... mode Population Rule In Dual-Channel mode, the memory modules can enhance system performance. The following illustrations explain the population rules for installing memory modules. For more information on compatible components, please visit http://www.msi.com/service/test-report/ Chapter 1 DIMM1 DIMM2 Video... Demonstration Watch the video to learn how to 15+ GB of memory (not full 16 GB) when ...

User Guide
Page 44
Memory Installation http://youtu.be/76yLtJaKlCQ 1 Chapter 2 2 3 Quick Installation 2-4
Memory Installation http://youtu.be/76yLtJaKlCQ 1 Chapter 2 2 3 Quick Installation 2-4

User Guide
Page 59
... from a submenu Click the right button Increase the numeric value or make changes Decrease the numeric value or make changes General Help CPU Specifications Enter Memory-Z Load optimized defaults OC Profile Load From USB OC Profile Save to USB Save Change and Reset Save a screenshot to a FAT/FAT32 USB drive Chapter...
... from a submenu Click the right button Increase the numeric value or make changes Decrease the numeric value or make changes General Help CPU Specifications Enter Memory-Z Load optimized defaults OC Profile Load From USB OC Profile Save to USB Save Change and Reset Save a screenshot to a FAT/FAT32 USB drive Chapter...

User Guide
Page 60
... is . ▶ SATA Port Shows the information of the device and motherboard. ▶ System Information Shows detailed system information, including CPU type, BIOS version, and Memory (read only). SETTINGS Chapter 3 System Status ▶ System Date Sets the system date. Use tab key to switch between time elements. Important If the connected...
... is . ▶ SATA Port Shows the information of the device and motherboard. ▶ System Information Shows detailed system information, including CPU type, BIOS version, and Memory (read only). SETTINGS Chapter 3 System Status ▶ System Date Sets the system date. Use tab key to switch between time elements. Important If the connected...

User Guide
Page 62
...applications, such as the primary boot device. [IGD] Integrated Graphics Display. [PEG] PCI-Express Graphics Device. ▶ Integrated Graphics Share Memory [default] Selects a fixed amount of SATA storage device, such as Native Command Queuing (NCQ) and hot-plugging. ▶ SATA1~4 Hot..., 256MB, Maximum] Chapter 3 BIOS Setup 3-8 This item defines the exact memory size shared to the onboard graphics. [Options: 32M, 64M, 128M, 256M] ▶ DVMT Memory [256MB] DVMT memory can dynamically allocate system memory for optimum system. ▶ Ipv6 PXE Support [Enabled] When "Enabled", ...
...applications, such as the primary boot device. [IGD] Integrated Graphics Display. [PEG] PCI-Express Graphics Device. ▶ Integrated Graphics Share Memory [default] Selects a fixed amount of SATA storage device, such as Native Command Queuing (NCQ) and hot-plugging. ▶ SATA1~4 Hot..., 256MB, Maximum] Chapter 3 BIOS Setup 3-8 This item defines the exact memory size shared to the onboard graphics. [Options: 32M, 64M, 128M, 256M] ▶ DVMT Memory [256MB] DVMT memory can dynamically allocate system memory for optimum system. ▶ Ipv6 PXE Support [Enabled] When "Enabled", ...

User Guide
Page 67
... you can access the system. A message will appear on this menu, you can select one of them be prompted to prevent other people from CMOS memory. This it is used to abandon all changes and exit BIOS setup. ▶ Save Changes and Reboot This item is used to save all changes...
... you can access the system. A message will appear on this menu, you can select one of them be prompted to prevent other people from CMOS memory. This it is used to abandon all changes and exit BIOS setup. ▶ Save Changes and Reboot This item is used to save all changes...

User Guide
Page 68
...; Overclocking your PC manually is only recommended for easy overclocking. ▶ Current CPU/ DRAM/ Ring Frequency These items show the current frequencies of installed CPU, Memory and Ring. This item can void your warranty or severely damage your hardware. • If you are unfamiliar with overclocking, we advise you to use...
...; Overclocking your PC manually is only recommended for easy overclocking. ▶ Current CPU/ DRAM/ Ring Frequency These items show the current frequencies of installed CPU, Memory and Ring. This item can void your warranty or severely damage your hardware. • If you are unfamiliar with overclocking, we advise you to use...

User Guide
Page 69
... CMOS jumper/ button section to clear the CMOS data, and enter the BIOS to enter the sub-menu. After that, the memory will be activated after changing memory timing. Read-only. ▶ DRAM Frequency [Auto] Sets the DRAM frequency. The valid value range depends on the installed CPU.... ▶ Adjusted Ring Frequency Shows the adjusted Ring frequency. Read-only. ▶ DRAM Timing Mode [Auto] Selects the memory timing mode. [Auto] DRAM timings will be determined based on SPD (Serial Presence Detect) of first initiation and first training. Chapter 3 3-15 ...
... CMOS jumper/ button section to clear the CMOS data, and enter the BIOS to enter the sub-menu. After that, the memory will be activated after changing memory timing. Read-only. ▶ DRAM Frequency [Auto] Sets the DRAM frequency. The valid value range depends on the installed CPU.... ▶ Adjusted Ring Frequency Shows the adjusted Ring frequency. Read-only. ▶ DRAM Timing Mode [Auto] Selects the memory timing mode. [Auto] DRAM timings will be determined based on SPD (Serial Presence Detect) of first initiation and first training. Chapter 3 3-15 ...

User Guide
Page 70
... Bit [Enabled] Intel's Execute Disable Bit functionality can also access this information menu at any time by pressing [F5]. ▶ DIMM1~2 Memory SPD Press to damage the system. It is highly improved. [Enable] Enables Intel Hyper-Threading technology. [Disabled] Disables this function. ▶... classes of malicious "buffer overflow" attacks where worms attempt to execute code to enter the sub-menu. Read only. ▶ MEMORY-Z Press to increase transaction rates and reduces end-user response times. You can execute instructions simultaneously. In this way, the system...
... Bit [Enabled] Intel's Execute Disable Bit functionality can also access this information menu at any time by pressing [F5]. ▶ DIMM1~2 Memory SPD Press to damage the system. It is highly improved. [Enable] Enables Intel Hyper-Threading technology. [Disabled] Disables this function. ▶... classes of malicious "buffer overflow" attacks where worms attempt to execute code to enter the sub-menu. Read only. ▶ MEMORY-Z Press to increase transaction rates and reduces end-user response times. You can execute instructions simultaneously. In this way, the system...

User Guide
Page 71
... partitions. ▶ Intel Virtualization Tech [Enabled] Enables or disables Intel Virtualization technology. [Enabled] Enables Intel Virtualization technology and allows a platform to protect the CPU from memory for tuning the CPU performance. [Disabled] Disables the hardware prefetcher. ▶ Adjacent Cache Line Prefetch [Enabled] Enables or disables the CPU hardware prefetcher (MLC Spatial...
... partitions. ▶ Intel Virtualization Tech [Enabled] Enables or disables Intel Virtualization technology. [Enabled] Enables Intel Virtualization technology and allows a platform to protect the CPU from memory for tuning the CPU performance. [Disabled] Disables the hardware prefetcher. ▶ Adjacent Cache Line Prefetch [Enabled] Enables or disables the CPU hardware prefetcher (MLC Spatial...

User Guide
Page 76
... default values. ■ c - Slides the Min and Max tabs to set the temperatures and fan speeds. Important • The minimum values of CPU, system and memory. Checks this item to the previous values. Selects a fan you save the changes and reboot the system. ▶ Voltage display Shows the current voltages of...
... default values. ■ c - Slides the Min and Max tabs to set the temperatures and fan speeds. Important • The minimum values of CPU, system and memory. Checks this item to the previous values. Selects a fan you save the changes and reboot the system. ▶ Voltage display Shows the current voltages of...


