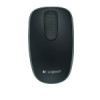
Getting Started Guide
Page 5
Logitech Zone Touch Mouse T400 Your Zone Touch Mouse T400 Power switch Battery status light Battery compartment and receiver storage Unifying receiver English 5
Getting Started Guide
Page 6
Check the battery status light. Red means its time to the On position. Plug in the On position USB 6 English Power switch in the receiver Plug the Unifying receiver into a USB port. 2. Power on the mouse Move the power switch to change the battery. Logitech Zone Touch Mouse T400 Set up your mouse 1.
Getting Started Guide
Page 7
... Product Page While you're online, check out the Zone Touch Mouse T400 Product Page, your destination for using your Touch Mouse experience with additional gestures, smoother performance, and personalized settings. No prompt? Logitech Zone Touch Mouse T400 3. www.logitech.com/support/t400 In addition to live forums that enhances your new Touch Mouse. The Product Page is also home to...
Getting Started Guide
Page 8
Click the left, right, or middle area of the mouse surface. 8 English Click the top 2/3 of the touch strip to go to the Windows Start screen. Clicking The Touch Mouse provides full 3-button operation. Logitech Zone Touch Mouse T400 Using the mouse One finger scrolling Swipe up, down, or sideways on the touch strip.
Getting Started Guide
Page 9
To learn more, visit: www.logitech.com/ support/unifying Receiver storage English 9 Replace batteries Remove the battery cover and insert new batteries into the compartment. Logitech Zone Touch Mouse T400 Unifying Logitech® Unifying technology connects up to six compatible Logitech mice and keyboards to the same receiver, using only one USB port for multiple devices.
Getting Started Guide
Page 10
Logitech Zone Touch Mouse T400 Troubleshooting Touch Mouse not working? • Restart the mouse by turning it off and then back on. • Check if your Unifying receiver is properly connected to a USB Port. • Move the Unifying receiver to another USB port on your computer. (Try connecting directly to your computer instead of using a USB hub.) • Remove any metallic objects near the mouse. • If the status light blinks red, replace the battery. 10 English