3800 Manual
Page 2
... collar to the motor unit 6 Attach mounting bracket to the motor unit 6 Installation 7-16 Installation safety instructions 7 Position the opener 7 Attach the emergency release rope and handle 8 Install the power door lock 8 Attach the cable tension monitor (Required 9 Install the control console 10 Install remote light 11 Electrical requirements 12 Mount the battery backup unit (BBU...
... collar to the motor unit 6 Attach mounting bracket to the motor unit 6 Installation 7-16 Installation safety instructions 7 Position the opener 7 Attach the emergency release rope and handle 8 Install the power door lock 8 Attach the cable tension monitor (Required 9 Install the control console 10 Install remote light 11 Electrical requirements 12 Mount the battery backup unit (BBU...
3800 Manual
Page 4
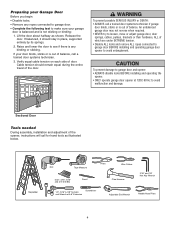
... or is out of balance. Verify equal cable tension on each side of the opener, instructions will call a trained door systems technician. 3. Sectional Door Tools needed During assembly, installation and adjustment of door. If balanced, it should remain equal during the entire travel of which... are under EXTREME tension. • Disable ALL locks and remove ALL ropes connected to garage door BEFORE installing and operating garage door WARNING opener to avoid entanglement. Cable tension should stay in place, supported entirely by its springs. 2. ...
... or is out of balance. Verify equal cable tension on each side of the opener, instructions will call a trained door systems technician. 3. Sectional Door Tools needed During assembly, installation and adjustment of door. If balanced, it should remain equal during the entire travel of which... are under EXTREME tension. • Disable ALL locks and remove ALL ropes connected to garage door BEFORE installing and operating garage door WARNING opener to avoid entanglement. Cable tension should stay in place, supported entirely by its springs. 2. ...
3800 Manual
Page 6
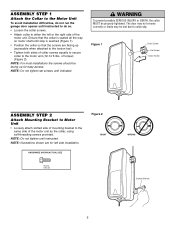
...2). Ensure that the screws are for easy access. of the motor unit as the collar, using self-threading screws provided. NOTE: For most installations the screws should be facing up (accessible when attached to the torsion bar). • Tighten both sides of the motor unit. The door ...on motor shaft until indicated. ASSEMBLY STEP 1 Attach the Collar to the Motor Unit To avoid installation difficulties, do so. • Loosen the collar screws. • Attach collar to either the left side installation. NOTE: Do not tighten until instructed to do not run the garage door opener until...
...2). Ensure that the screws are for easy access. of the motor unit as the collar, using self-threading screws provided. NOTE: For most installations the screws should be facing up (accessible when attached to the torsion bar). • Tighten both sides of the motor unit. The door ...on motor shaft until indicated. ASSEMBLY STEP 1 Attach the Collar to the Motor Unit To avoid installation difficulties, do so. • Loosen the collar screws. • Attach collar to either the left side installation. NOTE: Do not tighten until instructed to do not run the garage door opener until...
3800 Manual
Page 7
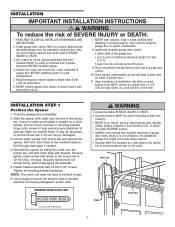
...by sliding the collar over the end of the door. 9. Motor unit Staple Torsion Bar 7 WARNING INSTALLATION IMPORTANT INSTALLATION INSTRUCTIONS WARNING To reduce the risk of garage door. 11. Install wall-mounted garage door control: • within sight of the garage door. • out of... a 1-1/2" (3.8 cm) high object (or a 2x4 laid flat) on inside of SEVERE INJURY or DEATH: 1. READ AND FOLLOW ALL INSTALLATION WARNINGS AND INSTRUCTIONS. 2. Close the garage door completely. 2. Drill through steel plate if needed. 4. Securely tighten collar screws that attach to the torsion bar...
...by sliding the collar over the end of the door. 9. Motor unit Staple Torsion Bar 7 WARNING INSTALLATION IMPORTANT INSTALLATION INSTRUCTIONS WARNING To reduce the risk of garage door. 11. Install wall-mounted garage door control: • within sight of the garage door. • out of... a 1-1/2" (3.8 cm) high object (or a 2x4 laid flat) on inside of SEVERE INJURY or DEATH: 1. READ AND FOLLOW ALL INSTALLATION WARNINGS AND INSTRUCTIONS. 2. Close the garage door completely. 2. Drill through steel plate if needed. 4. Securely tighten collar screws that attach to the torsion bar...
3800 Manual
Page 10
... back of insulation from a closing garage door. The door will not return to motor unit. See Protector System Instructions beginning on the motor unit: white to white and white/red to a single gang box (Figure 1). If installing into gang box) as in several places. Adjust screw for snug fit. • Drill and...
... back of insulation from a closing garage door. The door will not return to motor unit. See Protector System Instructions beginning on the motor unit: white to white and white/red to a single gang box (Figure 1). If installing into gang box) as in several places. Adjust screw for snug fit. • Drill and...
3800 Manual
Page 11
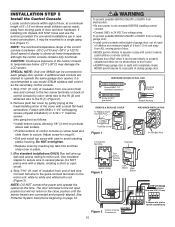
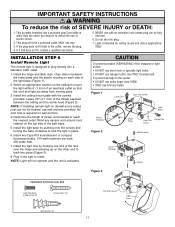
... mount and indoor applications ONLY. Select an appropriate location on the other ) as a feature to reach the nearest outlet. Install the ceiling mount plate with an extension cord unless plug can not be fully inserted. 6. Install two Type A19 incandescent or compact fluorescent bulbs. 100 watt maximum per bulb, 200 watts total... between the ceiling and the screw head (Figure 2). Use ONLY incandescent. To prevent damage to the opener: • DO NOT use halogen bulbs. IMPORTANT SAFETY INSTRUCTIONS WARNING To reduce the risk of electric shock. 2.
... mount and indoor applications ONLY. Select an appropriate location on the other ) as a feature to reach the nearest outlet. Install the ceiling mount plate with an extension cord unless plug can not be fully inserted. 6. Install two Type A19 incandescent or compact fluorescent bulbs. 100 watt maximum per bulb, 200 watts total... between the ceiling and the screw head (Figure 2). Use ONLY incandescent. To prevent damage to the opener: • DO NOT use halogen bulbs. IMPORTANT SAFETY INSTRUCTIONS WARNING To reduce the risk of electric shock. 2.

3800 Manual
Page 13
... 8 Mount the Battery Backup Unit (BBU) (not provided) If the optional 475LM battery backup unit is part of this installation it should be installed at this time. • The BBU can be mounted to either the ceiling or a wall within 3' (.9 m) of the motor unit. • Position the BBU as ... 1-1/2" lag screws (2) provided with the BBU unit. • Connect the BBU cord into the connector on the bottom of the motor unit. • Follow all instructions included with the 475LM unit to test for proper operation and testing of the BBU.
... 8 Mount the Battery Backup Unit (BBU) (not provided) If the optional 475LM battery backup unit is part of this installation it should be installed at this time. • The BBU can be mounted to either the ceiling or a wall within 3' (.9 m) of the motor unit. • Position the BBU as ... 1-1/2" lag screws (2) provided with the BBU unit. • Connect the BBU cord into the connector on the bottom of the motor unit. • Follow all instructions included with the 475LM unit to test for proper operation and testing of the BBU.
3800 Manual
Page 21
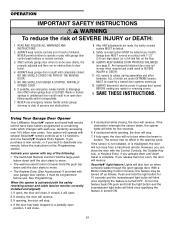
...remote controls up to move. • The Keyless Entry (See Accessories): If provided with the safety reversing sensor and cable tension monitor correctly installed and aligned): 1. NO ONE SHOULD CROSS THE PATH OF THE MOVING DOOR. 5. If possible, use emergency release handle to a matching code ... power to move. • The wall-mounted Control Console: Hold the push bar down travel . 4. SAVE THESE INSTRUCTIONS. Using Your Garage Door Opener Your LiftMaster Security✚® opener and hand-held Remote Control: Hold the large push button down until the door starts to garage...
...remote controls up to move. • The Keyless Entry (See Accessories): If provided with the safety reversing sensor and cable tension monitor correctly installed and aligned): 1. NO ONE SHOULD CROSS THE PATH OF THE MOVING DOOR. 5. If possible, use emergency release handle to a matching code ... power to move. • The wall-mounted Control Console: Hold the push bar down travel . 4. SAVE THESE INSTRUCTIONS. Using Your Garage Door Opener Your LiftMaster Security✚® opener and hand-held Remote Control: Hold the large push button down until the door starts to garage...
3800 Manual
Page 23
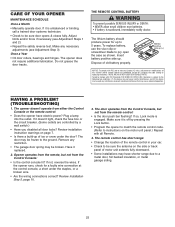
...to match the remote control code. (Refer to a metal door, foil backed insulation, or metal garage siding. 23 HAVING A PROBLEM? (TROUBLESHOOTING) 1. Review installation instruction warnings on page 7. • Is there a build-up (+) NOTICE: To comply with FCC and or Industry Canada (IC) rules, adjustment or modifications of.... The opener doesn't operate from either the Control Console or the remote control: • Does the opener have shorter range due to instructions on the side or back panel of ice or snow under the staples, or a broken wire. • Are the wiring connections correct...
...to match the remote control code. (Refer to a metal door, foil backed insulation, or metal garage siding. 23 HAVING A PROBLEM? (TROUBLESHOOTING) 1. Review installation instruction warnings on page 7. • Is there a build-up (+) NOTICE: To comply with FCC and or Industry Canada (IC) rules, adjustment or modifications of.... The opener doesn't operate from either the Control Console or the remote control: • Does the opener have shorter range due to instructions on the side or back panel of ice or snow under the staples, or a broken wire. • Are the wiring connections correct...
3800 Manual
Page 26
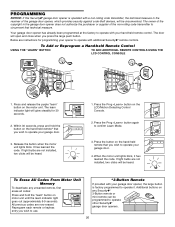
... the "learn indicator light will open and close when you wish to operate your garage door. 4. LOCK LOCK LIGHTLIGHT 1. If light bulbs are instructions for 30 seconds. 2. Additional buttons on the hand-held remote* that you wish to use. *3-Button Remote If provided with your hand-held...door opener, which provides security against code-theft devices, will be heard. To Add or Reprogram a Hand-held remote control. Below are not installed, two clicks will be heard. Release the button when the motor unit lights blink. When the motor unit lights blink, it . PROGRAMMING NOTICE:...
... the "learn indicator light will open and close when you wish to operate your garage door. 4. LOCK LOCK LIGHTLIGHT 1. If light bulbs are instructions for 30 seconds. 2. Additional buttons on the hand-held remote* that you wish to use. *3-Button Remote If provided with your hand-held...door opener, which provides security against code-theft devices, will be heard. To Add or Reprogram a Hand-held remote control. Below are not installed, two clicks will be heard. Release the button when the motor unit lights blink. When the motor unit lights blink, it . PROGRAMMING NOTICE:...
3800 Manual
Page 32
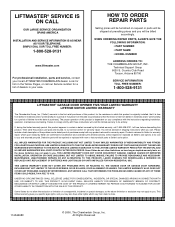
...this limited warranty, will be repaired or replaced (at Seller's sole option) at no cost to comply strictly with the instructions regarding installation, operation, maintenance and testing. THIS LIMITED WARRANTY ALSO DOES NOT COVER ANY PROBLEMS CAUSED BY INTERFERENCE. NO PERSON IS ...TO ORDER REPAIR PARTS Selling prices will be furnished on your compliance with those instructions will be billed accordingly. LIFTMASTER® SERVICE IS ON CALL OUR LARGE SERVICE ORGANIZATION SPANS AMERICA INSTALLATION AND SERVICE INFORMATION IS AS NEAR AS YOUR TELEPHONE. Products returned to Seller ...
...this limited warranty, will be repaired or replaced (at Seller's sole option) at no cost to comply strictly with the instructions regarding installation, operation, maintenance and testing. THIS LIMITED WARRANTY ALSO DOES NOT COVER ANY PROBLEMS CAUSED BY INTERFERENCE. NO PERSON IS ...TO ORDER REPAIR PARTS Selling prices will be furnished on your compliance with those instructions will be billed accordingly. LIFTMASTER® SERVICE IS ON CALL OUR LARGE SERVICE ORGANIZATION SPANS AMERICA INSTALLATION AND SERVICE INFORMATION IS AS NEAR AS YOUR TELEPHONE. Products returned to Seller ...


