
Embedded Web Server Administrator's Guide
Page 14
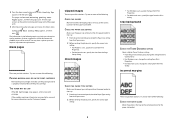
... HH:MM format, and then choose from communicating with a trusted clock-typically the same one NTLM configuration on the user's password. Using NTLM authentication NTLM (Windows NT LAN Manager) is being used as needed. 5 To sync to an NTP server rather than manage date and time settings manually, click the Enable...
... HH:MM format, and then choose from communicating with a trusted clock-typically the same one NTLM configuration on the user's password. Using NTLM authentication NTLM (Windows NT LAN Manager) is being used as needed. 5 To sync to an NTP server rather than manage date and time settings manually, click the Enable...

Embedded Web Server Administrator's Guide
Page 15
... Name (the server name of "back door" measures such as a backup password. Consult your device with the URL beginning "https://"), rather than an unsecured browsing window. Note: If you do not connect to the Embedded Web Server using HTTPS, you will not be helpful if other security measures become unavailable, for...
... Name (the server name of "back door" measures such as a backup password. Consult your device with the URL beginning "https://"), rather than an unsecured browsing window. Note: If you do not connect to the Embedded Web Server using HTTPS, you will not be helpful if other security measures become unavailable, for...
Embedded Web Server Administrator's Guide
Page 21
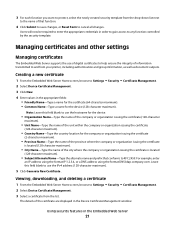
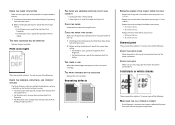
... by the security template. The details of the certificate are displayed in the Embedded Web Server 21 Using security features in the Device Certificate Management window. 3 For each function you want to protect, select the newly created security template from the drop-down list next to the name of that conforms...
... by the security template. The details of the certificate are displayed in the Embedded Web Server 21 Using security features in the Device Certificate Management window. 3 For each function you want to protect, select the newly created security template from the drop-down list next to the name of that conforms...
Clearing Jams Guide
Page 1
Have excessive curl or twist - Have windows, holes, perforations, cutouts, or embossing - Have an interlocking design - Open doors and covers and remove trays to load them. • Do not load too much ... cartridge. To resolve any way Understanding jam numbers and locations When a jam occurs, a message indicating the jam location appears on the underside of the printer. Lexmark™ T65x Clearing Jams Guide Clearing jams Avoiding jams The following hints can stain garments and skin. Make sure the stack height does not exceed...
Have excessive curl or twist - Have windows, holes, perforations, cutouts, or embossing - Have an interlocking design - Open doors and covers and remove trays to load them. • Do not load too much ... cartridge. To resolve any way Understanding jam numbers and locations When a jam occurs, a message indicating the jam location appears on the underside of the printer. Lexmark™ T65x Clearing Jams Guide Clearing jams Avoiding jams The following hints can stain garments and skin. Make sure the stack height does not exceed...
Troubleshooting Guide
Page 2
... IN HEX TRACE MODE If Ready Hex appears on the display, then you must set Collate to print, specify the correct type setting: • For Windows users, specify the type from Print Properties. • For Macintosh users, specify the type from the wrong tray or on to print These are possible...
... IN HEX TRACE MODE If Ready Hex appears on the display, then you must set Collate to print, specify the correct type setting: • For Windows users, specify the type from Print Properties. • For Macintosh users, specify the type from the wrong tray or on to print These are possible...
Troubleshooting Guide
Page 3
... are possible solutions. Try one or more information, see the hardware setup documentation that came with the duplex unit, or go to www.lexmark.com/publications to the 2000-sheet tray. • Make sure the printer is listed on . Reinstall the duplex unit. For more information...MAKE SURE THE OPTION IS INSTALLED CORRECTLY Print a menu settings page and check to print, specify the correct settings from the computer: • For Windows users, specify the settings from Print Properties. • For Macintosh users, specify the settings from the Paper menu. 2 Before sending the job ...
... are possible solutions. Try one or more information, see the hardware setup documentation that came with the duplex unit, or go to www.lexmark.com/publications to the 2000-sheet tray. • Make sure the printer is listed on . Reinstall the duplex unit. For more information...MAKE SURE THE OPTION IS INSTALLED CORRECTLY Print a menu settings page and check to print, specify the correct settings from the computer: • For Windows users, specify the settings from Print Properties. • For Macintosh users, specify the settings from the Paper menu. 2 Before sending the job ...
Troubleshooting Guide
Page 5
...DARKNESS SETTING Select a lighter Toner Darkness setting: • From the printer control panel, change the setting from the Quality menu. • For Windows users, change the setting from Print Properties. • For Macintosh users, change the setting from the Page Setup dialog. The information in the ...SETTING Make sure the paper size setting matches the paper loaded in the tray to print, specify the correct size setting: • For Windows users, specify the size from Print Properties. • For Macintosh users, specify the size from the Print dialog. Clipped images These are...
...DARKNESS SETTING Select a lighter Toner Darkness setting: • From the printer control panel, change the setting from the Quality menu. • For Windows users, change the setting from Print Properties. • For Macintosh users, change the setting from the Page Setup dialog. The information in the ...SETTING Make sure the paper size setting matches the paper loaded in the tray to print, specify the correct size setting: • For Windows users, specify the size from Print Properties. • For Macintosh users, specify the size from the Print dialog. Clipped images These are...
Troubleshooting Guide
Page 6
...control panel, check the Paper Type setting from the Paper menu. 2 Before sending the job to print, specify the correct type setting: • For Windows users, specify the type from Print Properties. • For Macintosh users, specify the type from a fresh package. • Store paper in its ...control panel, check the Paper Type setting from the Paper menu. 2 Before sending the job to print, specify the correct type setting: • For Windows users, specify the type from Print Properties. • For Macintosh users, specify the type from a fresh package. • Store paper in its ...
...control panel, check the Paper Type setting from the Paper menu. 2 Before sending the job to print, specify the correct type setting: • For Windows users, specify the type from Print Properties. • For Macintosh users, specify the type from a fresh package. • Store paper in its ...control panel, check the Paper Type setting from the Paper menu. 2 Before sending the job to print, specify the correct type setting: • For Windows users, specify the type from Print Properties. • For Macintosh users, specify the type from a fresh package. • Store paper in its ...
Troubleshooting Guide
Page 7
...control panel, check the Paper Type setting from the Paper menu. 2 Before sending the job to print, specify the correct type setting: • For Windows users, specify the type from Print Properties. • For Macintosh users, specify the type from a fresh package. • Store paper in its ...panel, check the Paper Type setting from the Paper menu. 2 Before sending the job to print, specify the correct type setting: • For Windows users, specify the type from Print Properties. • For Macintosh users, specify the type from your software program or application. THE PRINT CARTRIDGE ...
...control panel, check the Paper Type setting from the Paper menu. 2 Before sending the job to print, specify the correct type setting: • For Windows users, specify the type from Print Properties. • For Macintosh users, specify the type from a fresh package. • Store paper in its ...panel, check the Paper Type setting from the Paper menu. 2 Before sending the job to print, specify the correct type setting: • For Windows users, specify the type from Print Properties. • For Macintosh users, specify the type from your software program or application. THE PRINT CARTRIDGE ...
Troubleshooting Guide
Page 8
...side to feed the paper for the job: • From the printer control panel, select the Default Source from the Paper Menu. • For Windows users, select the paper source from Print Properties. • For Macintosh users, select the paper source from the Print dialog and pop-up menus. Streaked...or feeder to feed paper for the job: • From the printer control panel, select the Default Source from the Paper Menu. • For Windows users, select the paper source from Print Properties. • For Macintosh users, select the paper source from the Print dialog and pop-up menus. ...
...side to feed the paper for the job: • From the printer control panel, select the Default Source from the Paper Menu. • For Windows users, select the paper source from Print Properties. • For Macintosh users, select the paper source from the Print dialog and pop-up menus. Streaked...or feeder to feed paper for the job: • From the printer control panel, select the Default Source from the Paper Menu. • For Windows users, select the paper source from Print Properties. • For Macintosh users, select the paper source from the Print dialog and pop-up menus. ...
Troubleshooting Guide
Page 9
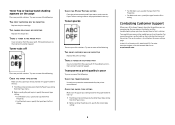
...check the Paper Type setting from the Paper menu. 2 Before sending the job to print, specify the correct type setting: • For Windows users, specify the type from Print Properties. • For Macintosh users, specify the type from the paper path. For more of the following... problem persists, then contact Customer Support. If the problem persists, then contact Customer Support. For other countries/regions, visit the Lexmark Web site at www.lexmark.com. 9 Toner rubs off These are possible solutions. You need to find a solution. Contacting Customer Support When you have ...
...check the Paper Type setting from the Paper menu. 2 Before sending the job to print, specify the correct type setting: • For Windows users, specify the type from Print Properties. • For Macintosh users, specify the type from the paper path. For more of the following... problem persists, then contact Customer Support. If the problem persists, then contact Customer Support. For other countries/regions, visit the Lexmark Web site at www.lexmark.com. 9 Toner rubs off These are possible solutions. You need to find a solution. Contacting Customer Support When you have ...
User's Guide
Page 2
... a printer hard disk ...30 Installing hardware options...34 Order of installation ...34 Installing paper drawers...34 Installing an optional duplex unit (T650 only) ...35 Attaching cables...36 Verifying printer setup...37 Printing a menu settings page...38 Printing a network setup page ...38 Setting ... printing...40 Information you will need to set up the printer on a wireless network 40 Installing the printer on a wireless network (Windows 41 Installing the printer on a wireless network (Macintosh 42 Installing the printer on a wired network...45 Changing port settings after installing ...
... a printer hard disk ...30 Installing hardware options...34 Order of installation ...34 Installing paper drawers...34 Installing an optional duplex unit (T650 only) ...35 Attaching cables...36 Verifying printer setup...37 Printing a menu settings page...38 Printing a network setup page ...38 Setting ... printing...40 Information you will need to set up the printer on a wireless network 40 Installing the printer on a wireless network (Windows 41 Installing the printer on a wireless network (Macintosh 42 Installing the printer on a wired network...45 Changing port settings after installing ...
User's Guide
Page 38
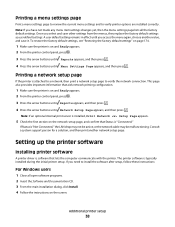
.... Printing a menu settings page Print a menu settings page to review the current menu settings and to install the software after setup, follow these instructions: For Windows users 1 Close all the factory default settings. Note: If you select and save it. Once you have not made any menu item settings changes yet...
.... Printing a menu settings page Print a menu settings page to review the current menu settings and to install the software after setup, follow these instructions: For Windows users 1 Close all the factory default settings. Note: If you select and save it. Once you have not made any menu item settings changes yet...
User's Guide
Page 39
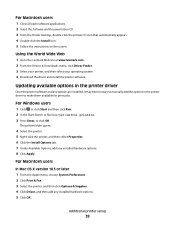
Updating available options in the printer driver to the Lexmark Web site at www.lexmark.com. 2 From the Drivers & Downloads menu, click Driver Finder. 3 Select your printer, and then select your operating system. 4 Download the driver and install the printer ... System Preferences. 2 Click Print & Fax. 3 Select the printer, and then click Options & Supplies. 4 Click Driver, and then add any installed hardware options. 5 Click OK. For Windows users 1 Click , or click Start and then click Run. 2 In the Start Search or Run box, type control printers. 3 Press Enter, or click OK. Additional...
Updating available options in the printer driver to the Lexmark Web site at www.lexmark.com. 2 From the Drivers & Downloads menu, click Driver Finder. 3 Select your printer, and then select your operating system. 4 Download the driver and install the printer ... System Preferences. 2 Click Print & Fax. 3 Select the printer, and then click Options & Supplies. 4 Click Driver, and then add any installed hardware options. 5 Click OK. For Windows users 1 Click , or click Start and then click Run. 2 In the Start Search or Run box, type control printers. 3 Press Enter, or click OK. Additional...

User's Guide
Page 41
... USB cable until instructed to set up the printer. 1 Connect the power cable, and then turn the printer on. Installing the printer on a wireless network (Windows) Before you install the printer on a wireless network, make sure that: • An optional wireless card is installed in your printer. • Your wireless network...
... USB cable until instructed to set up the printer. 1 Connect the power cable, and then turn the printer on. Installing the printer on a wireless network (Windows) Before you install the printer on a wireless network, make sure that: • An optional wireless card is installed in your printer. • Your wireless network...
User's Guide
Page 45
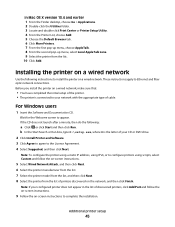
... Agreement. 4 Select Suggested, and then click Next. Installing the printer on a wired network Use the following : a Click , or click Start and then click Run. For Windows users 1 Insert the Software and Documentation CD. Wait for the Welcome screen to install the printer on a wired network, make sure that: • You have...
... Agreement. 4 Select Suggested, and then click Next. Installing the printer on a wired network Use the following : a Click , or click Start and then click Run. For Windows users 1 Insert the Software and Documentation CD. Wait for the Welcome screen to install the printer on a wired network, make sure that: • You have...
User's Guide
Page 47
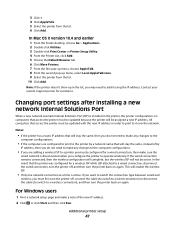
Changing port settings after installing a new network Internal Solutions Port When a new network Lexmark Internal Solutions Port (ISP) is installed in the printer, the printer configurations on computers that access the printer must be updated because the printer will ... switch to a wired connection) or disconnect the cable (to switch to make a note of by a network name that the printer was configured for assistance. For Windows users 1 Print a network setup page and make any changes to the computer configurations. • If the computers are configured to print to the printer by...
Changing port settings after installing a new network Internal Solutions Port When a new network Lexmark Internal Solutions Port (ISP) is installed in the printer, the printer configurations on computers that access the printer must be updated because the printer will ... switch to a wired connection) or disconnect the cable (to switch to make a note of by a network name that the printer was configured for assistance. For Windows users 1 Print a network setup page and make any changes to the computer configurations. • If the computers are configured to print to the printer by...

User's Guide
Page 50
... for the printer settings under the serial heading on the Menu Settings page you set in the printer. f Click OK, and then close all the windows. Additional printer setup 50 f Make sure Local is not available, select the port under the Select Port menu, and then click Add Port. j Make sure... Settings tab, set the serial parameters in the COM port must set the serial parameters to the same serial parameters in the Add a New Port window.
... for the printer settings under the serial heading on the Menu Settings page you set in the printer. f Click OK, and then close all the windows. Additional printer setup 50 f Make sure Local is not available, select the port under the Select Port menu, and then click Add Port. j Make sure... Settings tab, set the serial parameters in the COM port must set the serial parameters to the same serial parameters in the Add a New Port window.
User's Guide
Page 61
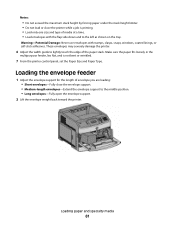
...: Never use envelopes with the flap side down and to lightly touch the edge of media at a time. • Load envelopes with stamps, clasps, snaps, windows, coated linings, or self-stick adhesives.
...: Never use envelopes with the flap side down and to lightly touch the edge of media at a time. • Load envelopes with stamps, clasps, snaps, windows, coated linings, or self-stick adhesives.
User's Guide
Page 62
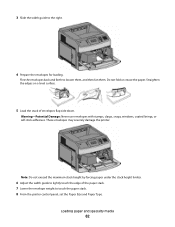
Flex the envelopes back and forth to the right. 4 Prepare the envelopes for loading. Warning-Potential Damage: Never use envelopes with stamps, clasps, snaps, windows, coated linings, or self-stick adhesives. Note: Do not exceed the maximum stack height by forcing paper under the stack height limiter. 6 Adjust the width ...
Flex the envelopes back and forth to the right. 4 Prepare the envelopes for loading. Warning-Potential Damage: Never use envelopes with stamps, clasps, snaps, windows, coated linings, or self-stick adhesives. Note: Do not exceed the maximum stack height by forcing paper under the stack height limiter. 6 Adjust the width ...


