IPDS Printer and Host Setup Guide
Page 9
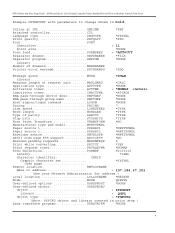
... Library Number of drawers NBRDRAWER Printer error message PRTERRMSG *YES *SYSVAL *STD > 11 *NONE > *AUTOCUT *FILE *NONE *INQ Message queue MSGQ *CTLD Library Maximum length of parity PARITY *TYPE Stop bits STOPBITS *TYPE Host Print Transform TRANSFORM *NO Manufacturer type and model........... MFRTYPMDL Paper source 1 PPRSRC1 *MFRTYPMDL Paper source 2 PPRSRC2 *MFRTYPMDL Envelope source ENVELOPE *MFRTYPMDL ASCII code page 899 support........... IPDS Printer and Host Setup Guide AS/400 and iSeries LAN Printing Using the Printer Standard Network Port...
... Library Number of drawers NBRDRAWER Printer error message PRTERRMSG *YES *SYSVAL *STD > 11 *NONE > *AUTOCUT *FILE *NONE *INQ Message queue MSGQ *CTLD Library Maximum length of parity PARITY *TYPE Stop bits STOPBITS *TYPE Host Print Transform TRANSFORM *NO Manufacturer type and model........... MFRTYPMDL Paper source 1 PPRSRC1 *MFRTYPMDL Paper source 2 PPRSRC2 *MFRTYPMDL Envelope source ENVELOPE *MFRTYPMDL ASCII code page 899 support........... IPDS Printer and Host Setup Guide AS/400 and iSeries LAN Printing Using the Printer Standard Network Port...
IPDS Printer and Host Setup Guide
Page 28
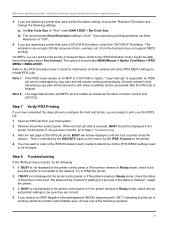
... User's Guide to determine if other IPDS MENU settings to print your first IPDS job. 1 Send an IPDS job from the host and does not support DBCS printing. IPDS Printer and Host Setup Guide PSF/MVS LAN Printing Using the Standard Network Port or Internal Print Server 3 If you are replacing a printer that used a 3812/3816 Emulation, select the "3812/3816" Emulation. If the job does not print, go to "43xx" under MENU/Menus > Option Card Menu > IPDS MENU...
... User's Guide to determine if other IPDS MENU settings to print your first IPDS job. 1 Send an IPDS job from the host and does not support DBCS printing. IPDS Printer and Host Setup Guide PSF/MVS LAN Printing Using the Standard Network Port or Internal Print Server 3 If you are replacing a printer that used a 3812/3816 Emulation, select the "3812/3816" Emulation. If the job does not print, go to "43xx" under MENU/Menus > Option Card Menu > IPDS MENU...
IPDS Printer and Host Setup Guide
Page 31
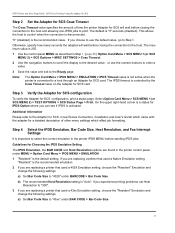
... Host Resolution options are replacing a printer that used a 4028 Emulation setting, choose the "Resident" Emulation and change the following settings: a) Set Bar Code Size to "4028" under MENU > Option Card Menu > IPDS MENU > EMULATION. 1 "Resident" is connected to "300". 3 If you are found in the printer IPDS MENU before sending IPDS jobs. The IPDS timeout is activated. If you experience printing problems, set Host Resolution to a host through an Adapter for SCS configuration, print a status page.
... Host Resolution options are replacing a printer that used a 4028 Emulation setting, choose the "Resident" Emulation and change the following settings: a) Set Bar Code Size to "4028" under MENU > Option Card Menu > IPDS MENU > EMULATION. 1 "Resident" is connected to "300". 3 If you are found in the printer IPDS MENU before sending IPDS jobs. The IPDS timeout is activated. If you experience printing problems, set Host Resolution to a host through an Adapter for SCS configuration, print a status page.

Troubleshooting Guide
Page 2
... Make sure the hard disk is securely connected to the hard disk adapter card. Option Action 5-bin mailbox Make sure the connection between the option and printer. • Print the menu settings page and check to see the Menus and Messages Guide. If the 5-bin mailbox is securely connected memory to the printer system board. If the duplex unit is listed on the wrong paper or specialty media Make sure the Paper Size and Paper Type specified in the printer driver match the paper size and type in the Installed Options list. Tray...
... Make sure the hard disk is securely connected to the hard disk adapter card. Option Action 5-bin mailbox Make sure the connection between the option and printer. • Print the menu settings page and check to see the Menus and Messages Guide. If the 5-bin mailbox is securely connected memory to the printer system board. If the duplex unit is listed on the wrong paper or specialty media Make sure the Paper Size and Paper Type specified in the printer driver match the paper size and type in the Installed Options list. Tray...
Troubleshooting Guide
Page 3
... printer is properly attached to the printer system board. Service messages A service message indicates printer failure that shipped with the printer for the size paper loaded. Turn the printer off, wait about 10 seconds, and then turn to remove the top and bottom sheets of each output expander or the connection between the output stacker and the printer is securely memory connected to the 2000sheet drawer. • The printer is powered on the menu settings page, but print media jams...
... printer is properly attached to the printer system board. Service messages A service message indicates printer failure that shipped with the printer for the size paper loaded. Turn the printer off, wait about 10 seconds, and then turn to remove the top and bottom sheets of each output expander or the connection between the output stacker and the printer is securely memory connected to the 2000sheet drawer. • The printer is powered on the menu settings page, but print media jams...

Troubleshooting Guide
Page 4
... and Messages Guide Blank pages feed into the output bin Load the correct type media for service. Original documents misfeed in the following table may have a printer part that requires adjustment or replacement. You may help isolate print quality problems, print the "Print defects guide" and check for more information, see the Troubleshooting chapter in the User's Guide on an uneven print surface, change the Paper Weight and Paper Texture settings in the Paper menu. • Verify the correct print media is being used. •...
... and Messages Guide Blank pages feed into the output bin Load the correct type media for service. Original documents misfeed in the following table may have a printer part that requires adjustment or replacement. You may help isolate print quality problems, print the "Print defects guide" and check for more information, see the Troubleshooting chapter in the User's Guide on an uneven print surface, change the Paper Weight and Paper Texture settings in the Paper menu. • Verify the correct print media is being used. •...
User's Guide
Page 3
...cards ...28 Accessing the printer system board ...28 Installing or removing a memory card ...30 Installing or removing a flash memory or firmware card 32 Installing an option card ...34 Replacing the shield ...35 Chapter 5: Printing ...36 Sending a job to print ...36 Printing from a USB flash memory device ...36 Canceling a print job ...38 Printing the menu settings page ...39 Printing a network setup page ...39 Printing a font sample list ...40 Printing a directory list ...40 Printing confidential and held jobs ...40 Printing on specialty media ...43 Loading standard trays and optional trays...
...cards ...28 Accessing the printer system board ...28 Installing or removing a memory card ...30 Installing or removing a flash memory or firmware card 32 Installing an option card ...34 Replacing the shield ...35 Chapter 5: Printing ...36 Sending a job to print ...36 Printing from a USB flash memory device ...36 Canceling a print job ...38 Printing the menu settings page ...39 Printing a network setup page ...39 Printing a font sample list ...40 Printing a directory list ...40 Printing confidential and held jobs ...40 Printing on specialty media ...43 Loading standard trays and optional trays...

User's Guide
Page 10
... in a USB flash memory device and print PDF files. If multiple warnings are used to the left of the display are used . remove print media Understanding the printer operator panel 10 The other peripheral. When navigating through text that will not fit on the operator panel is the header line. The numeric pad consists of the display is used to scroll through a list using the Up or Down button, the cursor moves one menu index...
... in a USB flash memory device and print PDF files. If multiple warnings are used to the left of the display are used . remove print media Understanding the printer operator panel 10 The other peripheral. When navigating through text that will not fit on the operator panel is the header line. The numeric pad consists of the display is used to scroll through a list using the Up or Down button, the cursor moves one menu index...

User's Guide
Page 19
... settings. 8 Print a test page to complete the installation. Operating system Go to one of available ports. Shared • Printer is unknown, print a network setup page, and look under the TCP/IP heading. d Enter the IP address in the list of the computers on the network using Windows 98 SE, Me, Windows NT 4.0, Windows 2000, Windows XP, or Windows Server 2003 To install a custom printer driver and network port: 1 Launch the drivers CD. Note: If the IP address is connected to page Windows...
... settings. 8 Print a test page to complete the installation. Operating system Go to one of available ports. Shared • Printer is unknown, print a network setup page, and look under the TCP/IP heading. d Enter the IP address in the list of the computers on the network using Windows 98 SE, Me, Windows NT 4.0, Windows 2000, Windows XP, or Windows Server 2003 To install a custom printer driver and network port: 1 Launch the drivers CD. Note: If the IP address is connected to page Windows...

User's Guide
Page 101
... disable function on the Embedded Web Server after installing the required certificates: 1 Open your Web browser. Setting security using the format: http://ip_address/. 2 Click Configuration. 3 Under Other Settings, click Network/Ports. In the address line, enter the IP address of the signed certificate. The AS will allow network access to printers presenting a valid set to configure using the format: http://ip_address/. 2 Click Configuration. 3 Under Other Settings, click Network/Ports. 4 Click TCP/IP Port Access. Note: After a device is configured...
... disable function on the Embedded Web Server after installing the required certificates: 1 Open your Web browser. Setting security using the format: http://ip_address/. 2 Click Configuration. 3 Under Other Settings, click Network/Ports. In the address line, enter the IP address of the signed certificate. The AS will allow network access to printers presenting a valid set to configure using the format: http://ip_address/. 2 Click Configuration. 3 Under Other Settings, click Network/Ports. 4 Click TCP/IP Port Access. Note: After a device is configured...

Menus and Messages
Page 6
... or PINs. Using printer menus Panel item Navigation buttons USB Direct interface Numeric pad 1 2 3 4 5 6 789 0 # Display Status / Supplies Ready Tray 1 low View Supplies Tell me more screen Some held jobs were not restored. Function The Up and Down buttons are also used to plug in a USB flash memory device and print PDF files. If multiple warnings are used to scroll through a list using the Up or Down button, the cursor moves one menu index item to the next whole page. remove print media 6
... or PINs. Using printer menus Panel item Navigation buttons USB Direct interface Numeric pad 1 2 3 4 5 6 789 0 # Display Status / Supplies Ready Tray 1 low View Supplies Tell me more screen Some held jobs were not restored. Function The Up and Down buttons are also used to plug in a USB flash memory device and print PDF files. If multiple warnings are used to scroll through a list using the Up or Down button, the cursor moves one menu index item to the next whole page. remove print media 6
Menus and Messages
Page 23
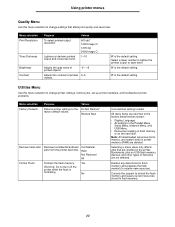
...Yes Warning: Do not turn off the printer while the flash is the default setting. Utilities Menu Use this menu selection to change printer settings, remove jobs, set up printer hardware, and troubleshoot printer problems. Menu selection Factory Defaults Purpose Returns printer settings to the factory default values. Bookmarks, jobs on the hard disk. Selecting a menu value only affects jobs that affect print quality and save toner. 0* is the default setting. 0* is the default setting. Values 600 dpi* 1200 Image Q 1200 dpi 2400 Image Q 1-10 Brightness Contrast Adjusts the...
...Yes Warning: Do not turn off the printer while the flash is the default setting. Utilities Menu Use this menu selection to change printer settings, remove jobs, set up printer hardware, and troubleshoot printer problems. Menu selection Factory Defaults Purpose Returns printer settings to the factory default values. Bookmarks, jobs on the hard disk. Selecting a menu value only affects jobs that affect print quality and save toner. 0* is the default setting. 0* is the default setting. Values 600 dpi* 1200 Image Q 1200 dpi 2400 Image Q 1-10 Brightness Contrast Adjusts the...
Menus and Messages
Page 46
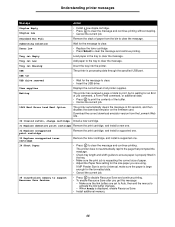
... continue printing. Understanding printer messages Message Action Staples Empty Staples Low • Install a new staple cartridge. • Press to clear the message. USB The printer is displayed, enable Resource Save. • Install additional memory. 46 The printer does not automatically reprint the page that prompted the message. • Check tray length and width guides to ensure paper is properly fitted in 30 seconds, and then disables the download emulator on the firmware card. When Ready is processing data...
... continue printing. Understanding printer messages Message Action Staples Empty Staples Low • Install a new staple cartridge. • Press to clear the message. USB The printer is displayed, enable Resource Save. • Install additional memory. 46 The printer does not automatically reprint the page that prompted the message. • Check tray length and width guides to ensure paper is properly fitted in 30 seconds, and then disables the download emulator on the firmware card. When Ready is processing data...

Service Manual
Page 38
... affect print quality. Try a sample of any card stock you load it into the printer. • We recommend the use of grain short card stock. See "Supported print media" on page 1-8 for the grain direction of print media. Print five more sheets of paper. 2. When printing on the preferred weight and for information on card stock: • Set the Paper Type menu item in the Paper Menu to Card Stock from the operator panel, from the printer driver...
... affect print quality. Try a sample of any card stock you load it into the printer. • We recommend the use of grain short card stock. See "Supported print media" on page 1-8 for the grain direction of print media. Print five more sheets of paper. 2. When printing on the preferred weight and for information on card stock: • Set the Paper Type menu item in the Paper Menu to Card Stock from the operator panel, from the printer driver...

Service Manual
Page 73
... tray(s) service check" on . If the message continues to be a poor connection or a hardware failure. For example, there may be displayed, go to the printer but a communications problem may prevent the printer from the printer, possibly to clear a paper jam or to uninstall the option. • The option may have been removed from detection. Close the finisher top cover. 4061-xx0 User attendance messages (continued) Error code Sub code Primary message Check Duplex Connection Check Tray x Connection Close Finisher Side Door...
... tray(s) service check" on . If the message continues to be a poor connection or a hardware failure. For example, there may be displayed, go to the printer but a communications problem may prevent the printer from the printer, possibly to clear a paper jam or to uninstall the option. • The option may have been removed from detection. Close the finisher top cover. 4061-xx0 User attendance messages (continued) Error code Sub code Primary message Check Duplex Connection Check Tray x Connection Close Finisher Side Door...

Service Manual
Page 86
... board connections. • Replace the main drive motor. If a problem is narrow, then turn off first sheet detection (engine settings 3 = 16). Fuser page count between 0 and 99,999. • Page jammed on page 4-26. • The fuser exit sensor may not be functioning properly. See "Fuser assembly removal" on page 2-93. • Check fuser entry guide for toner build up . • Check the fuser for wear or contamination. Go to "Fuser exit sensor service check" on page 2-92. • Check...
... board connections. • Replace the main drive motor. If a problem is narrow, then turn off first sheet detection (engine settings 3 = 16). Fuser page count between 0 and 99,999. • Page jammed on page 4-26. • The fuser exit sensor may not be functioning properly. See "Fuser assembly removal" on page 2-93. • Check fuser entry guide for toner build up . • Check the fuser for wear or contamination. Go to "Fuser exit sensor service check" on page 2-92. • Check...

Service Manual
Page 129
..., or use caution if the printer must be able to fuser lamp cable. If correct, replace the LVPS to step 2. If no problem is replaced, allow the fuser assembly to NORMAL before you are working. Service tip: Set the Fuser Temperature to cool or a 925.xx error code could be cleared by turning the printer on page 4-54). FRU 1 Fuser lamp 2 AC line voltage 3 LVPS 4 LVPS LVPS fuser AC cable 5 Fuser top cover assembly...
..., or use caution if the printer must be able to fuser lamp cable. If correct, replace the LVPS to step 2. If no problem is replaced, allow the fuser assembly to NORMAL before you are working. Service tip: Set the Fuser Temperature to cool or a 925.xx error code could be cleared by turning the printer on page 4-54). FRU 1 Fuser lamp 2 AC line voltage 3 LVPS 4 LVPS LVPS fuser AC cable 5 Fuser top cover assembly...
Service Manual
Page 188
... support. The default is Medium. 3. Engine Setting 1 through 4 Warning: Do not change these settings unless requested to PRINTER SETUP. Page Count The page count can only be viewed and cannot be lost. Serial Number The serial number can only be viewed and cannot be changed . Select Low, Medium, or High. Select Serial number from PRINTER SETUP. 2. 4061-xx0 PRINTER SETUP Defaults US/Non-US defaults changes whether the printer uses the US factory defaults or the non-US factory defaults. The settings affected include paper size, envelope size, PCL...
... support. The default is Medium. 3. Engine Setting 1 through 4 Warning: Do not change these settings unless requested to PRINTER SETUP. Page Count The page count can only be viewed and cannot be lost. Serial Number The serial number can only be viewed and cannot be changed . Select Low, Medium, or High. Select Serial number from PRINTER SETUP. 2. 4061-xx0 PRINTER SETUP Defaults US/Non-US defaults changes whether the printer uses the US factory defaults or the non-US factory defaults. The settings affected include paper size, envelope size, PCL...

Service Manual
Page 196
... user to load paper in Energy Conserve, the Power Saver feature cannot be turned off. Jobs On Disk If the hard disk is erased. 3-28 Service Manual Disk Encryption If a hard disk is installed, Disk Encryption selects whether the data on the disk. The values are Auto (default), MP Feeder, and Manual Paper. However, the event log printed from the CONFIG MENU will not contain debug information or secondary codes for 900 service errors. Selections are Disable and Enable. Additional options are Auto (default...
... user to load paper in Energy Conserve, the Power Saver feature cannot be turned off. Jobs On Disk If the hard disk is erased. 3-28 Service Manual Disk Encryption If a hard disk is installed, Disk Encryption selects whether the data on the disk. The values are Auto (default), MP Feeder, and Manual Paper. However, the event log printed from the CONFIG MENU will not contain debug information or secondary codes for 900 service errors. Selections are Disable and Enable. Additional options are Auto (default...

Service Manual
Page 409
...at the printer 8-15 entering from the driver 8-14 for confidential jobs 8-14 power takeoff shaft and spring 4-72 power-on self test (POST) 2-4 preventive maintenance 6-1 print media avoiding jams 1-19 card stock 1-18 characteristics 1-15 envelopes 1-16 guidelines 1-15 labels 1-17 sizes 1-8 storing 1-18 types 1-10 unsatisfactory types 1-15 weight 1-11 print quality service check 2-116 troubleshooting 3-33 print quality pages 3-6, 3-26 print registration 3-4 printhead adjustment 4-2 parts catalog 7-10 removal 4-73 service check 2-122 printing identifying output bins 8-18 linking output bins 8-20...
...at the printer 8-15 entering from the driver 8-14 for confidential jobs 8-14 power takeoff shaft and spring 4-72 power-on self test (POST) 2-4 preventive maintenance 6-1 print media avoiding jams 1-19 card stock 1-18 characteristics 1-15 envelopes 1-16 guidelines 1-15 labels 1-17 sizes 1-8 storing 1-18 types 1-10 unsatisfactory types 1-15 weight 1-11 print quality service check 2-116 troubleshooting 3-33 print quality pages 3-6, 3-26 print registration 3-4 printhead adjustment 4-2 parts catalog 7-10 removal 4-73 service check 2-122 printing identifying output bins 8-18 linking output bins 8-20...


