User's Guide
Page 1
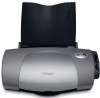
January 2003 www.lexmark.com Z700 Series Color Jetprinter™ P700 Series Photo Jetprinter™ User's Guide for Windows • Setup troubleshooting A checklist to find solutions to common setup problems. • Printer overview Learn about the printer parts and the printer software. • Printing ideas How to print several projects on various types of paper. • Maintenance Caring for your cartridges and ordering supplies. • General troubleshooting Error messages, print quality problems, paper jams, and much more.
January 2003 www.lexmark.com Z700 Series Color Jetprinter™ P700 Series Photo Jetprinter™ User's Guide for Windows • Setup troubleshooting A checklist to find solutions to common setup problems. • Printer overview Learn about the printer parts and the printer software. • Printing ideas How to print several projects on various types of paper. • Maintenance Caring for your cartridges and ordering supplies. • General troubleshooting Error messages, print quality problems, paper jams, and much more.

User's Guide
Page 2
..., U.S.A. You can purchase additional copies of publications related to state or imply that only that does not infringe any of Lexmark International, Inc., registered in certain transactions; Any reference to a product, program, or service is not intended to this...be addressed to Lexmark International Ltd., Marketing and Services Department, Westhorpe House, Westhorpe, Marlow Bucks SL7 3RQ. This publication could include technical inaccuracies or typographical errors. Improvements or changes in conjunction with diamond design are commercial computer software and documentation developed...
..., U.S.A. You can purchase additional copies of publications related to state or imply that only that does not infringe any of Lexmark International, Inc., registered in certain transactions; Any reference to a product, program, or service is not intended to this...be addressed to Lexmark International Ltd., Marketing and Services Department, Westhorpe House, Westhorpe, Marlow Bucks SL7 3RQ. This publication could include technical inaccuracies or typographical errors. Improvements or changes in conjunction with diamond design are commercial computer software and documentation developed...
User's Guide
Page 3
Contents Chapter 1: Printer overview 5 Understanding the printer parts 5 Using memory cards (Lexmark P700 Series only 7 Using the printer software 8 Using the paper type sensor 12 Chapter 2: Printing ideas 13 Printing on plain paper 13 Printing photos 14 Printing on premium or coated paper 16 ...
Contents Chapter 1: Printer overview 5 Understanding the printer parts 5 Using memory cards (Lexmark P700 Series only 7 Using the printer software 8 Using the paper type sensor 12 Chapter 2: Printing ideas 13 Printing on plain paper 13 Printing photos 14 Printing on premium or coated paper 16 ...
User's Guide
Page 4
Preserving the print cartridges 49 Ordering supplies 50 Chapter 4: Setup troubleshooting 51 Troubleshooting checklist 51 Solving printer software installation problems 52 Chapter 5: General troubleshooting 55 Solving network printing problems 55 Understanding error messages and flashing lights 55 Resolving unsuccessful or slow printing 57 Clearing paper misfeeds or jams 59 Solving print quality problems 60 Solving specialty media problems 63 Notices 64 Glossary 66 Index 70 Contents 4
Preserving the print cartridges 49 Ordering supplies 50 Chapter 4: Setup troubleshooting 51 Troubleshooting checklist 51 Solving printer software installation problems 52 Chapter 5: General troubleshooting 55 Solving network printing problems 55 Understanding error messages and flashing lights 55 Resolving unsuccessful or slow printing 57 Clearing paper misfeeds or jams 59 Solving print quality problems 60 Solving specialty media problems 63 Notices 64 Glossary 66 Index 70 Contents 4
User's Guide
Page 8
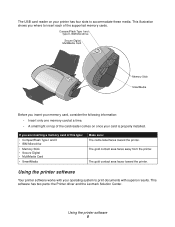
... to insert each of the card reader comes on once your card is properly installed. This software has two parts: the Printer driver and the Lexmark Solution Center. Using the printer software 8 Using the printer software Your printer software works with your printer has four slots to accommodate these media. The USB card reader on...
... to insert each of the card reader comes on once your card is properly installed. This software has two parts: the Printer driver and the Lexmark Solution Center. Using the printer software 8 Using the printer software Your printer software works with your printer has four slots to accommodate these media. The USB card reader on...

User's Guide
Page 9
... type and size setting. 5 From the Print Layout tab, change the layout of print jobs, see "Printing ideas" on plain paper, you install the printer software, the Print Properties are set to change your printer settings in the printer driver. Customizing the settings for different types of your document. To print... about the printer settings for your document 1 With your document open, click File Print. Printer driver You can change your printer settings. Using the printer software 9
... type and size setting. 5 From the Print Layout tab, change the layout of print jobs, see "Printing ideas" on plain paper, you install the printer software, the Print Properties are set to change your printer settings in the printer driver. Customizing the settings for different types of your document. To print... about the printer settings for your document 1 With your document open, click File Print. Printer driver You can change your printer settings. Using the printer software 9
User's Guide
Page 10
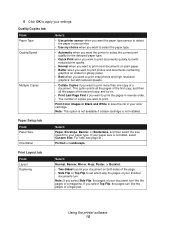
..., the pages of your document turn like the pages of a magazine. If your finished documents turn like the pages of a legal pad. Using the printer software 10 For help, see page 41. Print Layout tab From: Layout Duplexing Select: Normal, Banner, Mirror, N-up, Poster, or Booklet. • Two-Sided to print...
..., the pages of your document turn like the pages of a magazine. If your finished documents turn like the pages of a legal pad. Using the printer software 10 For help, see page 41. Print Layout tab From: Layout Duplexing Select: Normal, Banner, Mirror, N-up, Poster, or Booklet. • Two-Sided to print...
User's Guide
Page 11
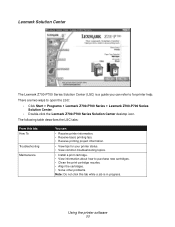
... to open the LSC: • Click Start Programs Lexmark Z700-P700 Series Lexmark Z700-P700 Series Solution Center. • Double-click the Lexmark Z700-P700 Series Solution Center desktop icon. Lexmark Solution Center The Lexmark Z700-P700 Series Solution Center (LSC) is in progress. Using the printer software 11 The following table describes the LSC tabs...
... to open the LSC: • Click Start Programs Lexmark Z700-P700 Series Lexmark Z700-P700 Series Solution Center. • Double-click the Lexmark Z700-P700 Series Solution Center desktop icon. Lexmark Solution Center The Lexmark Z700-P700 Series Solution Center (LSC) is in progress. Using the printer software 11 The following table describes the LSC tabs...
User's Guide
Page 12
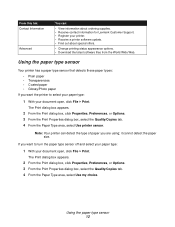
... printer to turn the paper type sensor off and select your paper type: 1 With your printer. • Receive a printer software update. • Find out about ordering supplies. • Receive contact information for Lexmark Customer Support. • Register your document open , click File Print. The Print dialog box appears. 2 From the Print dialog... area, select Use my choice. Note: Your printer can : • View information about special offers. • Change printing status appearance options. • Download the latest software files from the World Wide Web.
... printer to turn the paper type sensor off and select your paper type: 1 With your printer. • Receive a printer software update. • Find out about ordering supplies. • Receive contact information for Lexmark Customer Support. • Register your document open , click File Print. The Print dialog box appears. 2 From the Print dialog... area, select Use my choice. Note: Your printer can : • View information about special offers. • Change printing status appearance options. • Download the latest software files from the World Wide Web.
User's Guide
Page 14
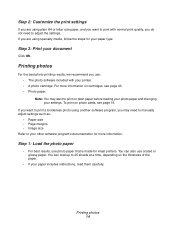
..., you may want to print on the thickness of the paper. • If your other software program's documentation for more information on photo cards, see page 43. • Photo paper. You can also use coated or glossy paper. Step 1: Load the ...photo paper • For best results, use : • The photo software included with normal print quality, you do not need to manually adjust settings such as: • Paper size • Page margins • Image size Refer...
..., you may want to print on the thickness of the paper. • If your other software program's documentation for more information on photo cards, see page 43. • Photo paper. You can also use coated or glossy paper. Step 1: Load the ...photo paper • For best results, use : • The photo software included with normal print quality, you do not need to manually adjust settings such as: • Paper size • Page margins • Image size Refer...
User's Guide
Page 19
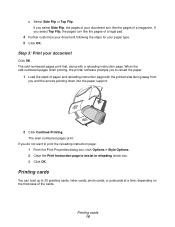
When the odd-numbered pages finish printing, the printer software prompts you to assist in reloading check box. 3 Click OK. The odd-numbered pages print first, along with the printed side facing away from you ...
When the odd-numbered pages finish printing, the printer software prompts you to assist in reloading check box. 3 Click OK. The odd-numbered pages print first, along with the printed side facing away from you ...
User's Guide
Page 22
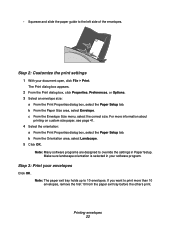
... From the Envelope Size menu, select the correct size. Make sure landscape orientation is selected in Paper Setup. Printing envelopes 22 Note: Many software programs are designed to print more information about printing on custom size paper, see page 41. 4 Select the orientation: a From the Print ... want to override the settings in your envelopes Click OK. b From the Orientation area, select Landscape. 5 Click OK. Step 3: Print your software program. Note: The paper exit tray holds up to the left side of the envelopes. Step 2: Customize the print settings 1 With your document...
... From the Envelope Size menu, select the correct size. Make sure landscape orientation is selected in Paper Setup. Printing envelopes 22 Note: Many software programs are designed to print more information about printing on custom size paper, see page 41. 4 Select the orientation: a From the Print ... want to override the settings in your envelopes Click OK. b From the Orientation area, select Landscape. 5 Click OK. Step 3: Print your software program. Note: The paper exit tray holds up to the left side of the envelopes. Step 2: Customize the print settings 1 With your document...
User's Guide
Page 26
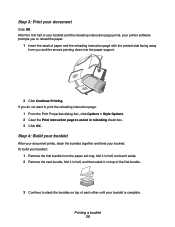
Step 4: Build your booklet After your document prints, stack the bundles together and bind your printer software prompts you to stack the bundles on top of your booklet and the reloading instruction page prints, your booklet. After the first half of each ...
Step 4: Build your booklet After your document prints, stack the bundles together and bind your printer software prompts you to stack the bundles on top of your booklet and the reloading instruction page prints, your booklet. After the first half of each ...
User's Guide
Page 31
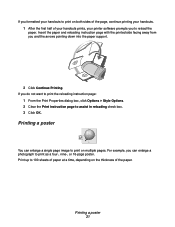
... a poster 31 Printing a poster You can enlarge a photograph to 100 sheets of paper at a time, depending on the thickness of your handouts prints, your printer software prompts you do not want to print the reloading instruction page: 1 From the Print Properties dialog box, click Options Style Options. 2 Clear the Print instruction...
... a poster 31 Printing a poster You can enlarge a photograph to 100 sheets of paper at a time, depending on the thickness of your handouts prints, your printer software prompts you do not want to print the reloading instruction page: 1 From the Print Properties dialog box, click Options Style Options. 2 Clear the Print instruction...
User's Guide
Page 35
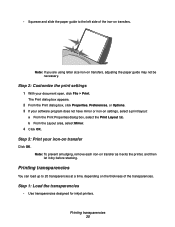
... guide may not be necessary. Printing transparencies You can load up to the left side of the transparencies. Step 2: Customize the print settings 1 With your software program does not have mirror or iron-on transfer as it exits the printer, and then let it dry before stacking. Note: To prevent smudging...
... guide may not be necessary. Printing transparencies You can load up to the left side of the transparencies. Step 2: Customize the print settings 1 With your software program does not have mirror or iron-on transfer as it exits the printer, and then let it dry before stacking. Note: To prevent smudging...
User's Guide
Page 46
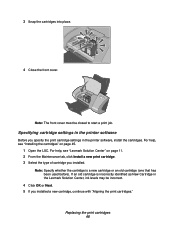
...the Maintenance tab, click Install a new print cartridge. 3 Select the type of cartridge you specify the print cartridge settings in the Lexmark Solution Center, ink levels may be closed to start a print job. Note: Specify whether the cartridge is incorrectly identified as New ...Cartridge in the printer software, install the cartridges. For help , see "Lexmark Solution Center" on page 45. 1 Open the LSC. Replacing the print cartridges 46 Specifying cartridge settings in the printer software Before you installed. 3 Snap the cartridges into place...
...the Maintenance tab, click Install a new print cartridge. 3 Select the type of cartridge you specify the print cartridge settings in the Lexmark Solution Center, ink levels may be closed to start a print job. Note: Specify whether the cartridge is incorrectly identified as New ...Cartridge in the printer software, install the cartridges. For help , see "Lexmark Solution Center" on page 45. 1 Open the LSC. Replacing the print cartridges 46 Specifying cartridge settings in the printer software Before you installed. 3 Snap the cartridges into place...
User's Guide
Page 47
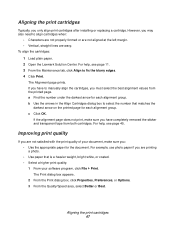
... cartridges after installing or replacing a cartridge. For help , see page 45. Aligning the print cartridges 47 To align the cartridges: 1 Load plain paper. 2 Open the Lexmark Solution Center. b Use the arrows in the Align Cartridges dialog box to manually align the cartridges, you have to select the number that is a heavier... you may also need to fix the blurry edges. 4 Click Print. Improving print quality If you are not satisfied with the print quality of your software program, click File Print.
... cartridges after installing or replacing a cartridge. For help , see page 45. Aligning the print cartridges 47 To align the cartridges: 1 Load plain paper. 2 Open the Lexmark Solution Center. b Use the arrows in the Align Cartridges dialog box to manually align the cartridges, you have to select the number that is a heavier... you may also need to fix the blurry edges. 4 Click Print. Improving print quality If you are not satisfied with the print quality of your software program, click File Print.
User's Guide
Page 51
...indicator lights are on page 55. For help , see page 13. From your desktop, click Start Programs or All Programs. If Lexmark Z700-P700 Series does not appear in your printer and computer on? 4 Setup troubleshooting Troubleshooting checklist Is the power supply firmly attached...help, see page 45. Is the paper loaded correctly? For more information, refer to your Lexmark adapter is connected to your computer or Lexmark adapter? Did you install the printer software correctly? Make sure you install the print cartridges correctly? Setup troubleshooting 51 Are both print ...
...indicator lights are on page 55. For help , see page 13. From your desktop, click Start Programs or All Programs. If Lexmark Z700-P700 Series does not appear in your printer and computer on? 4 Setup troubleshooting Troubleshooting checklist Is the power supply firmly attached...help, see page 45. Is the paper loaded correctly? For more information, refer to your Lexmark adapter is connected to your computer or Lexmark adapter? Did you install the printer software correctly? Make sure you install the print cartridges correctly? Setup troubleshooting 51 Are both print ...
User's Guide
Page 52
...directly to your computer with a USB cable. 3 Follow these instructions to remove the printer software, and then reinstall it is selected. When I insert the printer software CD, nothing happens. 1 Close all open software programs. 2 Restart your external devices for further troubleshooting information. b From the Maintenance tab... printer software Help for help , see page 11. Is the printer set the printer to your computer through an external device, such as the default printer? You may be the default printer: 1 Click Start Settings Printers 2 Right-click the Lexmark Z700 ...
...directly to your computer with a USB cable. 3 Follow these instructions to remove the printer software, and then reinstall it is selected. When I insert the printer software CD, nothing happens. 1 Close all open software programs. 2 Restart your external devices for further troubleshooting information. b From the Maintenance tab... printer software Help for help , see page 11. Is the printer set the printer to your computer through an external device, such as the default printer? You may be the default printer: 1 Click Start Settings Printers 2 Right-click the Lexmark Z700 ...
User's Guide
Page 53
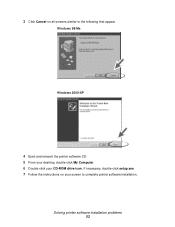
Windows 98/Me Windows 2000/XP 4 Eject and reinsert the printer software CD. 5 From your desktop, double-click My Computer. 6 Double-click your screen to the following that appear. Solving printer software installation problems 53 If necessary, double-click setup.exe. 7 Follow the instructions on all screens similar to complete printer software installation. 3 Click Cancel on your CD-ROM drive icon.
Windows 98/Me Windows 2000/XP 4 Eject and reinsert the printer software CD. 5 From your desktop, double-click My Computer. 6 Double-click your screen to the following that appear. Solving printer software installation problems 53 If necessary, double-click setup.exe. 7 Follow the instructions on all screens similar to complete printer software installation. 3 Click Cancel on your CD-ROM drive icon.


