User's Guide
Page 10
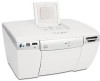
... a PictBridge-enabled digital camera or USB flash drive to use the control panel, be sure on the front of the screen for five minutes, the ink level screen appears. Operate the printer. Before attempting to the printer.
... a PictBridge-enabled digital camera or USB flash drive to use the control panel, be sure on the front of the screen for five minutes, the ink level screen appears. Operate the printer. Before attempting to the printer.
User's Guide
Page 36
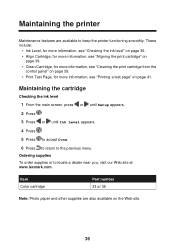
...2 Press . 3 Press or until Ink Level appears. 4 Press . 5 Press to accept Done. 6 Press to return to locate a dealer near you, visit our Web site at www.lexmark.com. Ordering supplies To order supplies or to the previous menu. These include: • Ink Level, for more information, see "Checking... the ink level" on page 36. • Align Cartridge, for more information, see "...
...2 Press . 3 Press or until Ink Level appears. 4 Press . 5 Press to accept Done. 6 Press to return to locate a dealer near you, visit our Web site at www.lexmark.com. Ordering supplies To order supplies or to the previous menu. These include: • Ink Level, for more information, see "Checking... the ink level" on page 36. • Align Cartridge, for more information, see "...
User's Guide
Page 41
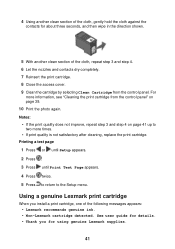
... three seconds, and then wipe in the direction shown. 5 With another clean section of the following messages appears: • Lexmark recommends genuine ink. • Non-Lexmark cartridge detected. See user guide for using genuine Lexmark supplies. 41 Notes: • If the print quality does not improve, repeat step 3 and step 4 on page 39. 10...
... three seconds, and then wipe in the direction shown. 5 With another clean section of the following messages appears: • Lexmark recommends genuine ink. • Non-Lexmark cartridge detected. See user guide for using genuine Lexmark supplies. 41 Notes: • If the print quality does not improve, repeat step 3 and step 4 on page 39. 10...
User's Guide
Page 45
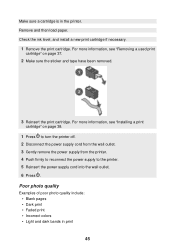
Make sure a cartridge is in print 45 Check the ink level, and install a new print cartridge if necessary. 1 Remove the print cartridge. For more information, see "Installing a print cartridge" on page 37. 2 Make sure the ...
Make sure a cartridge is in print 45 Check the ink level, and install a new print cartridge if necessary. 1 Remove the print cartridge. For more information, see "Installing a print cartridge" on page 37. 2 Make sure the ...
User's Guide
Page 46
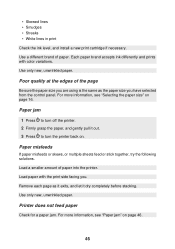
• Skewed lines • Smudges • Streaks • White lines in print Check the ink level, and install a new print cartridge if necessary. For more information, see "Selecting the paper size" on page 16. For more information, see "Paper jam" ... page 46. 46 Load paper with color variations. Remove each page as the paper size you . Use only new, unwrinkled paper. Each paper brand accepts ink differently and prints with the print side facing you have selected from the control panel.
• Skewed lines • Smudges • Streaks • White lines in print Check the ink level, and install a new print cartridge if necessary. For more information, see "Selecting the paper size" on page 16. For more information, see "Paper jam" ... page 46. 46 Load paper with color variations. Remove each page as the paper size you . Use only new, unwrinkled paper. Each paper brand accepts ink differently and prints with the print side facing you have selected from the control panel.

User's Guide
Page 54
... site 8 flash drives see USB flash drives G general troubleshooting 43 I Image Enhance feature 23 incorrect language appears on display 44 index page 17 information finding 7 Ink Level feature 36 ink level, checking 36 inserting USB flash drives 29 installing print cartridge 38 J jam, paper 46 L language incorrect 44 54
... site 8 flash drives see USB flash drives G general troubleshooting 43 I Image Enhance feature 23 incorrect language appears on display 44 index page 17 information finding 7 Ink Level feature 36 ink level, checking 36 inserting USB flash drives 29 installing print cartridge 38 J jam, paper 46 L language incorrect 44 54


