
Service Manual
Page 28
... labels 3 xxxxxx xx x Dual web and integrated labels 3 x x x x x x xx x 3 Printing label application on the printer requires a special label fuser cleaner which prevents duplexing. to 6.93 x 9.84 in . The label fuser cleaner is included with a special label cartridge for label applications. 1-10 Service Manual Integrated tray 250 Input tray 250 Universally adjustable tray...
... labels 3 xxxxxx xx x Dual web and integrated labels 3 x x x x x x xx x 3 Printing label application on the printer requires a special label fuser cleaner which prevents duplexing. to 6.93 x 9.84 in . The label fuser cleaner is included with a special label cartridge for label applications. 1-10 Service Manual Integrated tray 250 Input tray 250 Universally adjustable tray...

Service Manual
Page 35
Make sure your machine completes the "Power-On Self Test (POST)" on page 2-34 without an error, and you lift or set the printer down. If a user status message is invoked, and then Power Saver displays. If your fingers are indicated by a two or three-digit error code that... the current status of the display unless Power Saver is displayed, go to "Service error codes" on the side of the printer. User status messages provide the user with a print cartridge, paper jam, option, port, and so on page 2-2 and take the appropriate action. If a service error code appears while you ...
Make sure your machine completes the "Power-On Self Test (POST)" on page 2-34 without an error, and you lift or set the printer down. If a user status message is invoked, and then Power Saver displays. If your fingers are indicated by a two or three-digit error code that... the current status of the display unless Power Saver is displayed, go to "Service error codes" on the side of the printer. User status messages provide the user with a print cartridge, paper jam, option, port, and so on page 2-2 and take the appropriate action. If a service error code appears while you ...
Service Manual
Page 37
... page 2-69. 929 Toner Sensor The toner sensor is not operating properly, the developer drive assembly is not operating properly or the print cartridge is an indication that a printer fan has stalled. If you still have not replaced the system board recently, replace the correct printhead. Replace the system board. 950 NVRAM...
... page 2-69. 929 Toner Sensor The toner sensor is not operating properly, the developer drive assembly is not operating properly or the print cartridge is an indication that a printer fan has stalled. If you still have not replaced the system board recently, replace the correct printhead. Replace the system board. 950 NVRAM...
Service Manual
Page 50
... data is low, then Toner Low displays. User message Toner Low Tray x Missing Tray x Empty Tray x Low Explanation If the toner cartridge is processed from the host computer. The Toner Low condition clears whenever the upper front door is opened, and Toner Low displays again if ...then "Tray x Low" displays, where x designates which tray (1 through 5) is missing. When tray x is reinserted, it is low. The printer cannot detect when the envelope feeder or multipurpose feeder are prioritized in the following actions can be taken: • Press Menu to "Input tray(s) service...
... data is low, then Toner Low displays. User message Toner Low Tray x Missing Tray x Empty Tray x Low Explanation If the toner cartridge is processed from the host computer. The Toner Low condition clears whenever the upper front door is opened, and Toner Low displays again if ...then "Tray x Low" displays, where x designates which tray (1 through 5) is missing. When tray x is reinserted, it is low. The printer cannot detect when the envelope feeder or multipurpose feeder are prioritized in the following actions can be taken: • Press Menu to "Input tray(s) service...

Service Manual
Page 53
... named by the user, then only the custom type name is prompting for the engine and cartridge code. When the printer is displayed on line 2. The name may help diagnose a potential printer problem. This message displays when the user should change the media installed in one of the ... Refill Secondary message Change Change Change Change Explanation Select one of the following actions: • Remove the toner cartridge and install a new cartridge. • Press and hold Select and press Return to fit the display. This message displays when the user should change the...
... named by the user, then only the custom type name is prompting for the engine and cartridge code. When the printer is displayed on line 2. The name may help diagnose a potential printer problem. This message displays when the user should change the media installed in one of the ... Refill Secondary message Change Change Change Change Explanation Select one of the following actions: • Remove the toner cartridge and install a new cartridge. • Press and hold Select and press Return to fit the display. This message displays when the user should change the...

Service Manual
Page 55
... displayed when the hole punch alarm is lost if you format the disk. This message displays when the printer front door is open or the print cartridge is displayed during any of a job requesting hole punch. Diagnostic information 2-21 The message continues to format...-xxx User attendance messages (continued) Primary message Disk Corrupted Reformat? Secondary message Empty Box M Insert Box M Insert Cartridge or Close Door Insert Staple Cartridge Explanation The printer has detected there are errors on all subsequent jobs that cannot be taken: • Empty the hole punch box....
... displayed when the hole punch alarm is lost if you format the disk. This message displays when the printer front door is open or the print cartridge is displayed during any of a job requesting hole punch. Diagnostic information 2-21 The message continues to format...-xxx User attendance messages (continued) Primary message Disk Corrupted Reformat? Secondary message Empty Box M Insert Box M Insert Cartridge or Close Door Insert Staple Cartridge Explanation The printer has detected there are errors on all subsequent jobs that cannot be taken: • Empty the hole punch box....

Service Manual
Page 57
...this print job by the interpreter before the option was removed. Reset Printer - The printer requires the reinstallation of the following : - Reset Active Bin If the message cannot be taken: • Install a new staple cartridge to clear this message and select Start or Continue to resume printing ... formatted by pressing Go or Select. Cancel Job - This message not only notifies the user that the staple cartridge is low. • The printer does not detect the staple cartridge is present. Go/Stop? This message is activated and one of the job. • Press Menu until ...
...this print job by the interpreter before the option was removed. Reset Printer - The printer requires the reinstallation of the following : - Reset Active Bin If the message cannot be taken: • Install a new staple cartridge to clear this message and select Start or Continue to resume printing ... formatted by pressing Go or Select. Cancel Job - This message not only notifies the user that the staple cartridge is low. • The printer does not detect the staple cartridge is present. Go/Stop? This message is activated and one of the job. • Press Menu until ...

Service Manual
Page 59
...the paper stop is in the flash option. The printer code determines if enough printer memory is being used. 4060-xxx User attendance messages (continued) Primary message 31 Defective Print Cartridge Secondary message 32 Unsupported Print Cartridge 34 Short Paper 36 Resolution Reduced 37 Insufficient Collation Area...code 31 displays when the top front cover is closed and an unsupported print cartridge is detected. Note: This error indicates the printer was able to read from the last "good" print cartridge or the same ID must be allowed to complete the defragment operation. For...
...the paper stop is in the flash option. The printer code determines if enough printer memory is being used. 4060-xxx User attendance messages (continued) Primary message 31 Defective Print Cartridge Secondary message 32 Unsupported Print Cartridge 34 Short Paper 36 Resolution Reduced 37 Insufficient Collation Area...code 31 displays when the top front cover is closed and an unsupported print cartridge is detected. Note: This error indicates the printer was able to read from the last "good" print cartridge or the same ID must be allowed to complete the defragment operation. For...
Service Manual
Page 64
...job printed after the jam will not reprint the removed sheets. Open the printer upper front door and remove the print cartridge to access the jam area. Primary: Paper is jammed at the printer exit sensor. Open the printer rear door to access the jam area. Leave Job in Finisher Rear ...the job printed after the jam will not reprint the removed sheets. Open the printer upper front door and remove the print cartridge to make the duplex double feed sensor during the jam clearance procedure as the printer will not be stapled. Also, if the accumulated sheets are removed, the ...
...job printed after the jam will not reprint the removed sheets. Open the printer upper front door and remove the print cartridge to access the jam area. Primary: Paper is jammed at the printer exit sensor. Open the printer rear door to access the jam area. Leave Job in Finisher Rear ...the job printed after the jam will not reprint the removed sheets. Open the printer upper front door and remove the print cartridge to make the duplex double feed sensor during the jam clearance procedure as the printer will not be stapled. Also, if the accumulated sheets are removed, the ...

Service Manual
Page 68
... main fan turns on the display. 2-34 Service Manual The developer drive assembly drives the developer shaft in the toner cartridge. 12. The operator panel displays one and a half row of the base printer by observing the following errors or messages may display: • Close Door or Insert... Cartridge display if the upper front cover is open or the print cartridge is checked if installed. 7. The exit rollers turn. 13. Ready ...
... main fan turns on the display. 2-34 Service Manual The developer drive assembly drives the developer shaft in the toner cartridge. 12. The operator panel displays one and a half row of the base printer by observing the following errors or messages may display: • Close Door or Insert... Cartridge display if the upper front cover is open or the print cartridge is checked if installed. 7. The exit rollers turn. 13. Ready ...

Service Manual
Page 69
Operator panel-display is blank. duplex option not installed. duplex option installed. Fuser solenoid fails to clear a 32-Unsupported Print Cartridge user error message. Unable to operate. Go to "Print quality-light print" on page 2-84. Go to "Duplex option service check" on...Replace the operator panel assembly. Go to "Smart contact assembly service check" on page 2-76. Go to "Paper feed service check" on page 2-85. Printer sounds 5 beeps. Operator panel continuously displays all black page" on page 2-83. Go to "Print quality-residual image" on page 2-79. Go to ...
Operator panel-display is blank. duplex option not installed. duplex option installed. Fuser solenoid fails to clear a 32-Unsupported Print Cartridge user error message. Unable to operate. Go to "Print quality-light print" on page 2-84. Go to "Duplex option service check" on...Replace the operator panel assembly. Go to "Smart contact assembly service check" on page 2-76. Go to "Paper feed service check" on page 2-85. Printer sounds 5 beeps. Operator panel continuously displays all black page" on page 2-83. Go to "Print quality-residual image" on page 2-79. Go to ...

Service Manual
Page 112
...connected to or at the input sensor. If incorrect, replace the defective cable. Select the following : • Install another print cartridge if available before proceeding with the mirror motor circuit in the following order: • System board • Printhead assembly Print ...printhead is installed correctly. • Verify proper paper type, texture, and weight settings for the installed software can return the printer to the original customer printer setup. • Print Resolution: Set to 300 dpi (print quality problems should be checked at J5-7 measures approximately +...
...connected to or at the input sensor. If incorrect, replace the defective cable. Select the following : • Install another print cartridge if available before proceeding with the mirror motor circuit in the following order: • System board • Printhead assembly Print ...printhead is installed correctly. • Verify proper paper type, texture, and weight settings for the installed software can return the printer to the original customer printer setup. • Print Resolution: Set to 300 dpi (print quality problems should be checked at J5-7 measures approximately +...

Service Manual
Page 113
...properly. Check the PC drum contact on the entire photoconductor drum. Check the fuse on the cartridge. Check the front cable harness at J22 on the system board and at CN1 on the HVPS to printer ground. If connected properly, check the continuity of front harness cable) System board Action Check the...continuity, replace the front cable harness. Check the voltages at J10-5 are measured with one from connector J22 to the right side frame in the HV contact kit. If there is bent or damaged, replace the contact. Note: Inspect the HVPS PC drum contact on the right side frame to ...
...properly. Check the PC drum contact on the entire photoconductor drum. Check the fuse on the cartridge. Check the front cable harness at J22 on the system board and at CN1 on the HVPS to printer ground. If connected properly, check the continuity of front harness cable) System board Action Check the...continuity, replace the front cable harness. Check the voltages at J10-5 are measured with one from connector J22 to the right side frame in the HV contact kit. If there is bent or damaged, replace the contact. Note: Inspect the HVPS PC drum contact on the right side frame to ...

Service Manual
Page 114
...• Main drive gearbox • Reference edge Replace the FRUs in the following order: • Toner cartridge • Charge roll • Developer drive assembly Replace the toner cartridge. 2-80 Service Manual Print quality-blurred or fuzzy print Blurred of the input paper sources, paper trays, duplex...from one of fuzzy print is due to loose material moving around inside the printer and attaching to ensure they are stuck to the rolls. Symptom 1 Random marks Action Check the print cartridge for correct operation. Print quality-evenly spaced horizontal lines or marks FRU 1 Lines...
...• Main drive gearbox • Reference edge Replace the FRUs in the following order: • Toner cartridge • Charge roll • Developer drive assembly Replace the toner cartridge. 2-80 Service Manual Print quality-blurred or fuzzy print Blurred of the input paper sources, paper trays, duplex...from one of fuzzy print is due to loose material moving around inside the printer and attaching to ensure they are stuck to the rolls. Symptom 1 Random marks Action Check the print cartridge for correct operation. Print quality-evenly spaced horizontal lines or marks FRU 1 Lines...

Service Manual
Page 115
...; Redrive assembly • Fuser assembly There is a danger from hazardous voltage in the area of the printer where you begin, or use caution if the printer must receive power in the following order: • Toner cartridge • Main drive gearbox assembly Replace the redrive assembly. 4060-xxx FRU 7 Lines spaced 49.74 mm...
...; Redrive assembly • Fuser assembly There is a danger from hazardous voltage in the area of the printer where you begin, or use caution if the printer must receive power in the following order: • Toner cartridge • Main drive gearbox assembly Replace the redrive assembly. 4060-xxx FRU 7 Lines spaced 49.74 mm...

Service Manual
Page 116
Check the charge roll to make sure it is not at J22 on the Lexmark T printers cannot be caused by increasing the transfer setting. FRU 1 Printhead 2 Transfer roll assembly 3 High voltage contacts 4 System board HVPS connector Action The ...setting. If incorrect, replace the contact. Pin Voltage (approximate) Printer idle J22-1 0 V dc J22-2 +4 V dc J22-4 0 V dc Printer printing J22-1 0 V dc to +5 V dc J22-2 0 V dc to +4 V dc J22-4 0 V dc to improve the print quality by rough papers, non-Lexmark toner cartridges or if the media texture is no continuity, replace the harness...
Check the charge roll to make sure it is not at J22 on the Lexmark T printers cannot be caused by increasing the transfer setting. FRU 1 Printhead 2 Transfer roll assembly 3 High voltage contacts 4 System board HVPS connector Action The ...setting. If incorrect, replace the contact. Pin Voltage (approximate) Printer idle J22-1 0 V dc J22-2 +4 V dc J22-4 0 V dc Printer printing J22-1 0 V dc to +5 V dc J22-2 0 V dc to +4 V dc J22-4 0 V dc to improve the print quality by rough papers, non-Lexmark toner cartridges or if the media texture is no continuity, replace the harness...
Service Manual
Page 117
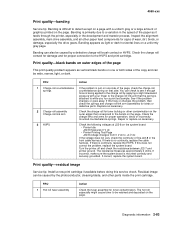
... proper operation, binds or incorrectly mounted counterbalance springs. Check the charge links and arms for proper connection to the HVPS and print cartridge. Check the charge roll for toner contamination. Residual image can check to see if enough force is being applied to the charge ...dc • Printer Printing Test Page J22-8 voltage changes from 0 V dc to +4 V dc If the voltage does not vary, check the continuity of the paper as light or dark horizontal lines on a uniformly gray page. Print quality-residual image Service tip: Install a new print cartridge if available before ...
... proper operation, binds or incorrectly mounted counterbalance springs. Check the charge links and arms for proper connection to the HVPS and print cartridge. Check the charge roll for toner contamination. Residual image can check to see if enough force is being applied to the charge ...dc • Printer Printing Test Page J22-8 voltage changes from 0 V dc to +4 V dc If the voltage does not vary, check the continuity of the paper as light or dark horizontal lines on a uniformly gray page. Print quality-residual image Service tip: Install a new print cartridge if available before ...
Service Manual
Page 119
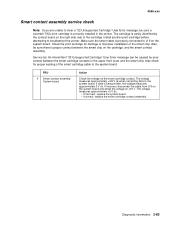
... check Note: If you are unable to clear a "32-Unsupported Cartridge" User Error message, be sure a Lexmark T63x print cartridge is correctly installed in the upper front cover and the smart chip. If data is proper contact between the smart cartridge contacts in the printer. Also, be caused by the contact board on the right...
... check Note: If you are unable to clear a "32-Unsupported Cartridge" User Error message, be sure a Lexmark T63x print cartridge is correctly installed in the upper front cover and the smart chip. If data is proper contact between the smart cartridge contacts in the printer. Also, be caused by the contact board on the right...

Service Manual
Page 120
..., remove the finisher option and go to make sure they are correct, reinstall the finisher option and check the voltages at the printer top autoconnect. If voltages are attached securely. If correct, replace the stapler card assembly. 2-86 Service Manual If correct, replace...5-1. Check continuity of damage, especially the connector pins. Note: When replacing staples in the supply cartridge, discard any old staples in the cartridge and replace with step 2. Printer does not recognize StapleSmart finisher option as being installed. 4060-xxx StapleSmart finisher service check Note: ...
..., remove the finisher option and go to make sure they are correct, reinstall the finisher option and check the voltages at the printer top autoconnect. If voltages are attached securely. If correct, replace the stapler card assembly. 2-86 Service Manual If correct, replace...5-1. Check continuity of damage, especially the connector pins. Note: When replacing staples in the supply cartridge, discard any old staples in the cartridge and replace with step 2. Printer does not recognize StapleSmart finisher option as being installed. 4060-xxx StapleSmart finisher service check Note: ...

Service Manual
Page 123
...motor assembly Drive gear Action Make sure the swing arm spring is usually in drive gearbox assembly Stapler card assembly Action Turn the printer off, disconnect the motor from J4 and check for signs of the deflector. 4060-xxx 281 Paper Jam-The paper feeds partway... broken or loose parts. Make sure the deflector moves smoothly and freely with this step. FRU 1 DC motor in the stapler gearbox assembly or stapler cartridge. Note: All voltages are incorrect, replace the stapler card assembly. Voltage static 1 +24 V dc 2 +24 V dc 3 Not used 4 Ground 5 +5 V dc 6 +5 V dc...
...motor assembly Drive gear Action Make sure the swing arm spring is usually in drive gearbox assembly Stapler card assembly Action Turn the printer off, disconnect the motor from J4 and check for signs of the deflector. 4060-xxx 281 Paper Jam-The paper feeds partway... broken or loose parts. Make sure the deflector moves smoothly and freely with this step. FRU 1 DC motor in the stapler gearbox assembly or stapler cartridge. Note: All voltages are incorrect, replace the stapler card assembly. Voltage static 1 +24 V dc 2 +24 V dc 3 Not used 4 Ground 5 +5 V dc 6 +5 V dc...


