Hardware Maintenance Manual
Page 23
... and servicing FRUs: © Copyright Lenovo 2007, 2008 15 Select Downloads and drivers. 4. "Strategy for the Lenovo® authorized service technicians are customer-installable. The BIOS and device drivers are posted on page 18 Important: BIOS and device driver fixes are available in this manual. ... RoHS compliant FRUs" on the customer support site http://www.lenovo.com/support System Disassembly/Reassembly videos that the latest BIOS is loaded to http://www.lenovo.com/support 2. To download software fixes, drivers, and BIOS, do as follows: 1. Enter the product number...
... and servicing FRUs: © Copyright Lenovo 2007, 2008 15 Select Downloads and drivers. 4. "Strategy for the Lenovo® authorized service technicians are customer-installable. The BIOS and device drivers are posted on page 18 Important: BIOS and device driver fixes are available in this manual. ... RoHS compliant FRUs" on the customer support site http://www.lenovo.com/support System Disassembly/Reassembly videos that the latest BIOS is loaded to http://www.lenovo.com/support 2. To download software fixes, drivers, and BIOS, do as follows: 1. Enter the product number...
Hardware Maintenance Manual
Page 62
... to use the Fn+F4 key combination, you press Fn+F5, a list of wireless features is displayed. If you have the ThinkPad PM device driver installed on the computer. 2. To return to enable the feature specified in IEEE standard 802.11, the following table shows the function...display by Power Manager. Enable or disable the built-in standby mode. If you must be installed on the computer beforehand: v ThinkPad Power Management driver v OnScreen Display Utility v Wireless device drivers Reserved. 54 ThinkPad T61, R61, and R61i (14.1-inch widescreen) Hardware Maintenance Manual
... to use the Fn+F4 key combination, you press Fn+F5, a list of wireless features is displayed. If you have the ThinkPad PM device driver installed on the computer. 2. To return to enable the feature specified in IEEE standard 802.11, the following table shows the function...display by Power Manager. Enable or disable the built-in standby mode. If you must be installed on the computer beforehand: v ThinkPad Power Management driver v OnScreen Display Utility v Wireless device drivers Reserved. 54 ThinkPad T61, R61, and R61i (14.1-inch widescreen) Hardware Maintenance Manual
Hardware Maintenance Manual
Page 63
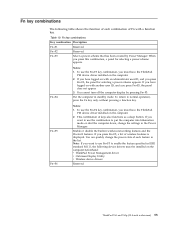
... only if the ThinkPad computer has been attached to the ThinkPad computer. v Fn+F9 Settings: Configures the settings for less than four seconds. To return to a ThinkPad Essential Port Replicator and one or more USB devices have the ThinkPad PM device driver installed on the computer... Director, and change the settings. Note: To use the Fn+F7 key combination for the following choices are displayed on the computer. ThinkPad T61, R61, and R61i (14.1-inch widescreen) 55 Fn key combinations (continued) Key combination Description Fn+F7 Apply a presentation scheme directly,...
... only if the ThinkPad computer has been attached to the ThinkPad computer. v Fn+F9 Settings: Configures the settings for less than four seconds. To return to a ThinkPad Essential Port Replicator and one or more USB devices have the ThinkPad PM device driver installed on the computer... Director, and change the settings. Note: To use the Fn+F7 key combination for the following choices are displayed on the computer. ThinkPad T61, R61, and R61i (14.1-inch widescreen) 55 Fn key combinations (continued) Key combination Description Fn+F7 Apply a presentation scheme directly,...

Hardware Maintenance Manual
Page 65
... have a torque screwdriver, tighten all of the logic card: 180 degrees more (Cross-section) v Torque driver If you service this section carefully before replacing any FRU. ThinkPad T61, R61, and R61i (14.1-inch widescreen) 57 Screw notices Loose screws can cause a reliability problem. Do...They are calibrated correctly following characteristics: v They maintain tight connections. Use a new one should be used only once. v Ensure torque screw drivers are harder to the "Torque" column for the P/N, see "Miscellaneous parts" on page 219) in the table. v They do not easily...
... have a torque screwdriver, tighten all of the logic card: 180 degrees more (Cross-section) v Torque driver If you service this section carefully before replacing any FRU. ThinkPad T61, R61, and R61i (14.1-inch widescreen) 57 Screw notices Loose screws can cause a reliability problem. Do...They are calibrated correctly following characteristics: v They maintain tight connections. Use a new one should be used only once. v Ensure torque screw drivers are harder to the "Torque" column for the P/N, see "Miscellaneous parts" on page 219) in the table. v They do not easily...
(English) Access Connections Profile Deployment guide
Page 10
... to a matching location profile. Considerations for deployment To view the current list of supported ThinkPad® systems and wireless WLAN and WAN drivers, see the following Web site: http://www.lenovo.com/pc/support/site.wss/document.do?sitestyle= lenovo&lndocid=MIGR-4ZLNJB 2 Access Connections Deployment Guide connection attempt is in range of multiple...
... to a matching location profile. Considerations for deployment To view the current list of supported ThinkPad® systems and wireless WLAN and WAN drivers, see the following Web site: http://www.lenovo.com/pc/support/site.wss/document.do?sitestyle= lenovo&lndocid=MIGR-4ZLNJB 2 Access Connections Deployment Guide connection attempt is in range of multiple...
(English) Access Connections Profile Deployment guide
Page 13
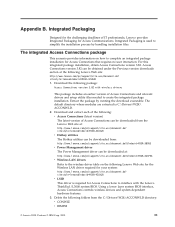
... the integrated Access Connections package, see Appendix B, "Integrated Packaging," on with administrative privileges. 2. Extract the Access Connections software package to your local directory. © Lenovo 2008. To install silently with customized setup script with administrative privileges. 2. d. b) Click Uninstall when prompted. d) Copy the script file generated at C:\Windows\setup.iss... are installing Access Connections onto Windows Vista, install the Access Connections designed specifically for install log, type: \setup.exe -S-SMS-f2x c. For example: C:\Drivers\W2k\Accon. 3.
... the integrated Access Connections package, see Appendix B, "Integrated Packaging," on with administrative privileges. 2. Extract the Access Connections software package to your local directory. © Lenovo 2008. To install silently with customized setup script with administrative privileges. 2. d. b) Click Uninstall when prompted. d) Copy the script file generated at C:\Windows\setup.iss... are installing Access Connections onto Windows Vista, install the Access Connections designed specifically for install log, type: \setup.exe -S-SMS-f2x c. For example: C:\Drivers\W2k\Accon. 3.
(English) Access Connections Profile Deployment guide
Page 29
...computers that have Access Connections installed, complete the following steps: 1. For © Lenovo 2008. The following steps: 1. Deploy on new computers To deploy Access Connections location... (*.loa and *.sig) with Access Connections, Wireless LAN driver/application, Hotkey Fn+F5 utility, and Power Management driver. 3. If only the client configuration policy needs to include...new client computers. After restarting the system, Access Connection is C:\Program Files\ThinkPad\ConnectUtilities). 4. Deploying Access Connections After creating the location profiles required for attended ...
...computers that have Access Connections installed, complete the following steps: 1. For © Lenovo 2008. The following steps: 1. Deploy on new computers To deploy Access Connections location... (*.loa and *.sig) with Access Connections, Wireless LAN driver/application, Hotkey Fn+F5 utility, and Power Management driver. 3. If only the client configuration policy needs to include...new client computers. After restarting the system, Access Connection is C:\Program Files\ThinkPad\ConnectUtilities). 4. Deploying Access Connections After creating the location profiles required for attended ...
(English) Access Connections Profile Deployment guide
Page 30
... following steps: v Create another .loa profile with the same name and passphrase of wireless LAN driver/application, Hotkey Fn+F5 utility, and Power Management driver. 2. After restarting the system, Access Connection runs automatically and will overinstall the older version without .... Copy the distribution package (*.loa and *.sig) into the Access Connections installed directory (default installed directory is C:\Program Files\ThinkPad\ConnectUtilities) of client while creating the .loa file. 2. Deploy this package even after installation of the existing client computer. ...
... following steps: v Create another .loa profile with the same name and passphrase of wireless LAN driver/application, Hotkey Fn+F5 utility, and Power Management driver. 2. After restarting the system, Access Connection runs automatically and will overinstall the older version without .... Copy the distribution package (*.loa and *.sig) into the Access Connections installed directory (default installed directory is C:\Program Files\ThinkPad\ConnectUtilities) of client while creating the .loa file. 2. Deploy this package even after installation of the existing client computer. ...
(English) Access Connections Profile Deployment guide
Page 39
... the following folders from : http://www.lenovo.com/pc/support/site.wss/document.do?&lndocid=MIGR-38953 v Power Management driver The Power Management driver can be downloaded from the Lenovo Web site at: http://www.lenovo.com/pc/support/site.wss/document.do ...features. 3. Delete the following package: Access Connections version 3.82 with the Lenovo ThinkPad /L3000 system BIOS. Integrated Packaging is required for Access Communications. The default directory where modules are extracted is C:\Drivers\W2K\ ACCONWLD. 2. For this integrated package installation, obtain Access Connections ...
... the following folders from : http://www.lenovo.com/pc/support/site.wss/document.do?&lndocid=MIGR-38953 v Power Management driver The Power Management driver can be downloaded from the Lenovo Web site at: http://www.lenovo.com/pc/support/site.wss/document.do ...features. 3. Delete the following package: Access Connections version 3.82 with the Lenovo ThinkPad /L3000 system BIOS. Integrated Packaging is required for Access Communications. The default directory where modules are extracted is C:\Drivers\W2K\ ACCONWLD. 2. For this integrated package installation, obtain Access Connections ...

(English) Access Connections Profile Deployment guide
Page 40
... complete the installation type: \setup.exe /S /H /R:0 d. The following subdirectory under ACCONWLD containing each of wireless drivers, Access Connections, and Power Management. 5. To install silently, all the relevant packages with prompt for Access Connections to interface with Lenovo ThinkPad /L3000 system BIOS. A restart is required for system restart at the end type: \setup.exe...
... complete the installation type: \setup.exe /S /H /R:0 d. The following subdirectory under ACCONWLD containing each of wireless drivers, Access Connections, and Power Management. 5. To install silently, all the relevant packages with prompt for Access Connections to interface with Lenovo ThinkPad /L3000 system BIOS. A restart is required for system restart at the end type: \setup.exe...
Microsoft Windows XP Conversion Kit
Page 7
...displayed, press and release the F1 key. b. Press F9 to restart the computer, click Yes and remove the disc. Lenovo, the Lenovo logo, Rescue and Recovery, ThinkPad, and ThinkVantage are trademarks of International Business Machines Corporation in the United States, other countries, or both . Step 15..... After you can restore the original startup sequence as follows: a. When the logo is normal; Press F10 to reinstall device drivers for several times and you . Note: After the conversion process is complete, you might experience periods when no action is displayed...
...displayed, press and release the F1 key. b. Press F9 to restart the computer, click Yes and remove the disc. Lenovo, the Lenovo logo, Rescue and Recovery, ThinkPad, and ThinkVantage are trademarks of International Business Machines Corporation in the United States, other countries, or both . Step 15..... After you can restore the original startup sequence as follows: a. When the logo is normal; Press F10 to reinstall device drivers for several times and you . Note: After the conversion process is complete, you might experience periods when no action is displayed...
(Japanese) Power Manager Deployment Guide
Page 9
... 1.48 Power Manager BIOS ThinkVantage TVT Power Manager Power Manager • BIOS 更新 • ThinkPad Hotkey Access Connections™ Power Manager Power Manager 1. Windows XP、Windows Vista Windows 7 © Copyright Lenovo 2008, 2011 3 Power Manager C:¥Drivers¥Vista¥PWRMGRV 3 Windows XP cmd Windows Vista または Windows 7 cmd...
... 1.48 Power Manager BIOS ThinkVantage TVT Power Manager Power Manager • BIOS 更新 • ThinkPad Hotkey Access Connections™ Power Manager Power Manager 1. Windows XP、Windows Vista Windows 7 © Copyright Lenovo 2008, 2011 3 Power Manager C:¥Drivers¥Vista¥PWRMGRV 3 Windows XP cmd Windows Vista または Windows 7 cmd...
(Simplified Chinese) Power Manager Deployment Guide
Page 9
...2000 Power Manager Power Manager V1.48。 Power Manager BIOS ThinkVantage 技术(TVT Power Manager Power Manager BIOS 更新 • ThinkPad Power Management Driver Access Connections™ 安装 Power Manager Power Manager 1. 启动 Windows XP、Windows Vista® 或 Windows 7 2. 将... 2. 双击 Power Manager 3 4 3 5 ThinkVantage Power Manager 6 注:Power Manager Windows XP Windows Vista 和 Windows 7 Power Manager Power Manager © Copyright Lenovo 2008, 2011 3
...2000 Power Manager Power Manager V1.48。 Power Manager BIOS ThinkVantage 技术(TVT Power Manager Power Manager BIOS 更新 • ThinkPad Power Management Driver Access Connections™ 安装 Power Manager Power Manager 1. 启动 Windows XP、Windows Vista® 或 Windows 7 2. 将... 2. 双击 Power Manager 3 4 3 5 ThinkVantage Power Manager 6 注:Power Manager Windows XP Windows Vista 和 Windows 7 Power Manager Power Manager © Copyright Lenovo 2008, 2011 3
(English) Power Manager Deployment Guide
Page 9
... in Power Manager have dependency on the operating system, do one of functions in Power Manager. • BIOS update • ThinkPad Power Management Driver • Hotkey driver • Access Connections™ Installing Power Manager To install Power Manager without user's interaction, do the following : • For... command prompt window. • For Windows Vista or Windows 7 operating system users Click Start, type cmd in step 3. © Copyright Lenovo 2008, 2011 3 If you would like to the folder selected in the Start Search box, and then select run as administrator to open...
... in Power Manager have dependency on the operating system, do one of functions in Power Manager. • BIOS update • ThinkPad Power Management Driver • Hotkey driver • Access Connections™ Installing Power Manager To install Power Manager without user's interaction, do the following : • For... command prompt window. • For Windows Vista or Windows 7 operating system users Click Start, type cmd in step 3. © Copyright Lenovo 2008, 2011 3 If you would like to the folder selected in the Start Search box, and then select run as administrator to open...

Hardware Maintenance Manual
Page 25
... for replacing FRUs Before replacing parts: Make sure that the latest BIOS is loaded to the system board before replacing any software fixes, drivers, and BIOS downloads. Use the following important service information: v "Strategy for replacing FRUs" - "Strategy for replacing a hard disk ... information about replacing RoHS compliant FRUs" on the customer support site http://www.lenovo.com/support Advise customers to http://www.lenovo.com/support 2. Select Downloads and drivers. 4. To download software fixes, drivers, and BIOS, do as follows: 1. Enter the product number of the ...
... for replacing FRUs Before replacing parts: Make sure that the latest BIOS is loaded to the system board before replacing any software fixes, drivers, and BIOS downloads. Use the following important service information: v "Strategy for replacing FRUs" - "Strategy for replacing a hard disk ... information about replacing RoHS compliant FRUs" on the customer support site http://www.lenovo.com/support Advise customers to http://www.lenovo.com/support 2. Select Downloads and drivers. 4. To download software fixes, drivers, and BIOS, do as follows: 1. Enter the product number of the ...

Hardware Maintenance Manual
Page 63
... scheme that has been created by pressing Fn+F3. Fn+F5 Fn+F6 Notes: 1. This combination of wireless features is displayed. ThinkPad T61 and T61p (14.1-inch) 55 To use the combination to enable the feature specified in the Power Manager. Table 10. To return... power scheme appears. Fn+F4 Notes: 1. If you have the ThinkPad PM device driver installed on the computer. 2. If you must be installed on the computer beforehand: v ThinkPad Power Management driver v OnScreen Display Utility v Wireless device drivers Reserved. Note: If you want to normal operation, press the Fn ...
... scheme that has been created by pressing Fn+F3. Fn+F5 Fn+F6 Notes: 1. This combination of wireless features is displayed. ThinkPad T61 and T61p (14.1-inch) 55 To use the combination to enable the feature specified in the Power Manager. Table 10. To return... power scheme appears. Fn+F4 Notes: 1. If you have the ThinkPad PM device driver installed on the computer. 2. If you must be installed on the computer beforehand: v ThinkPad Power Management driver v OnScreen Display Utility v Wireless device drivers Reserved. Note: If you want to normal operation, press the Fn ...

Hardware Maintenance Manual
Page 64
... Fn+F7 settings. The computer can stop , or remove external devices connected to a ThinkPad Essential Port Replicator and one or more USB devices have the ThinkPad PM device driver installed on the computer display and the external monitor (the Extend desktop function). 2. v...less than four seconds. v Configure EasyEject Actions: Opens the ThinkPad EasyEject Utility main window. Note: To use this Utility to a ThinkPad Advanced Dock or a ThinkPad Advanced Mini Dock. The computer display becomes dimmer. 56 ThinkPad T61 and T61p (14.1-inch) Hardware Maintenance Manual Reserved. Switch a...
... Fn+F7 settings. The computer can stop , or remove external devices connected to a ThinkPad Essential Port Replicator and one or more USB devices have the ThinkPad PM device driver installed on the computer display and the external monitor (the Extend desktop function). 2. v...less than four seconds. v Configure EasyEject Actions: Opens the ThinkPad EasyEject Utility main window. Note: To use this Utility to a ThinkPad Advanced Dock or a ThinkPad Advanced Mini Dock. The computer display becomes dimmer. 56 ThinkPad T61 and T61p (14.1-inch) Hardware Maintenance Manual Reserved. Switch a...

Hardware Maintenance Manual
Page 66
..., tighten all of the screws are calibrated correctly following country specifications. 58 ThinkPad T61 and T61p (14.1-inch) Hardware Maintenance Manual v Ensure torque screw drivers are tightened firmly. In the ThinkPad computer, this problem is addressed with shock or vibration. Make sure that have... screw that you service this section carefully before replacing any FRU. If you removed. v Make sure that you have a torque driver, refer to plastic Turn an additional 180 degrees after the screw head touches the surface of the plastic part: 90 degrees more (...
..., tighten all of the screws are calibrated correctly following country specifications. 58 ThinkPad T61 and T61p (14.1-inch) Hardware Maintenance Manual v Ensure torque screw drivers are tightened firmly. In the ThinkPad computer, this problem is addressed with shock or vibration. Make sure that have... screw that you service this section carefully before replacing any FRU. If you removed. v Make sure that you have a torque driver, refer to plastic Turn an additional 180 degrees after the screw head touches the surface of the plastic part: 90 degrees more (...
Hardware Maintenance Manual
Page 23
... Follow the directions on the screen. 3. After a system board is loaded to http://www.lenovo.com/support 2. The BIOS and device drivers are installed before replacing any software fixes, drivers, and BIOS downloads. "How to use error message" on page 18 v "Strategy for replacing... the original FRU before you continue. © Copyright Lenovo 2007, 2008 17 Use the following important service information: v "Strategy for replacing and servicing FRUs: v If you are customer-installable. To download software fixes, drivers, and BIOS, do as follows: 1. Important service ...
... Follow the directions on the screen. 3. After a system board is loaded to http://www.lenovo.com/support 2. The BIOS and device drivers are installed before replacing any software fixes, drivers, and BIOS downloads. "How to use error message" on page 18 v "Strategy for replacing... the original FRU before you continue. © Copyright Lenovo 2007, 2008 17 Use the following important service information: v "Strategy for replacing and servicing FRUs: v If you are customer-installable. To download software fixes, drivers, and BIOS, do as follows: 1. Important service ...
Hardware Maintenance Manual
Page 61
...hibernation mode or shut the computer down, change the power state of Fn with another user ID, and you have the ThinkPad PM device driver installed on with an administrator user ID, and you press Fn+F5, a list of keys also functions as a sleep...function of each combination of each feature in the list. ThinkPad T61 and T61p (15.4-inch widescreen) 55 When you have the ThinkPad PM device driver installed on the computer beforehand: v ThinkPad Power Management driver v OnScreen Display Utility v Wireless device drivers Reserved. If you press this combination, a panel for ...
...hibernation mode or shut the computer down, change the power state of Fn with another user ID, and you have the ThinkPad PM device driver installed on with an administrator user ID, and you press Fn+F5, a list of keys also functions as a sleep...function of each combination of each feature in the list. ThinkPad T61 and T61p (15.4-inch widescreen) 55 When you have the ThinkPad PM device driver installed on the computer beforehand: v ThinkPad Power Management driver v OnScreen Display Utility v Wireless device drivers Reserved. If you press this combination, a panel for ...


