
User Manual
Page 53
...F10, and then Enter. To enter BIOS Setup Utility, do as follows: 1. Turn on the Web site. If you test one of these devices, you initialize the computer configuration, some possible configurations of non-ThinkPad products, prototype cards, or modified options can lead to test a device that are...you cannot change the parameters that is entered. Diagnostics using Configuration utility for DOS is available at the following Web site: http:// www.lenovo.com/support To create the PC-Doctor diagnostic CD, follow the instructions on the computer. 2. Note: PC-Doctor for DOS. The ...
...F10, and then Enter. To enter BIOS Setup Utility, do as follows: 1. Turn on the Web site. If you test one of these devices, you initialize the computer configuration, some possible configurations of non-ThinkPad products, prototype cards, or modified options can lead to test a device that are...you cannot change the parameters that is entered. Diagnostics using Configuration utility for DOS is available at the following Web site: http:// www.lenovo.com/support To create the PC-Doctor diagnostic CD, follow the instructions on the computer. 2. Note: PC-Doctor for DOS. The ...
User Manual
Page 54
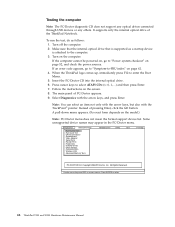
Turn off the computer. 2. Turn on the screen. 8. Diagnostics Interactive Tests Run Normal Test Run Quick Test ...Quit F1=Help PC-DOCTOR 2.0 Copyright 2008 PC-Doctor, Inc. Use the cursor keys and ESC to select. 46 ThinkPad T500 and W500 Hardware Maintenance Manual If the computer cannot be powered on, go to "Symptom-to-FRU index" on page...exact form depends on page 52, and check the power sources. Press ENTER to move in the PC-Doctor menu. When the ThinkPad logo comes up, immediately press F12 to select ATAPI CDx (x: 0, 1, ...) and then press Enter. 7. Select Diagnostics with ...
Turn off the computer. 2. Turn on the screen. 8. Diagnostics Interactive Tests Run Normal Test Run Quick Test ...Quit F1=Help PC-DOCTOR 2.0 Copyright 2008 PC-Doctor, Inc. Use the cursor keys and ESC to select. 46 ThinkPad T500 and W500 Hardware Maintenance Manual If the computer cannot be powered on, go to "Symptom-to-FRU index" on page...exact form depends on page 52, and check the power sources. Press ENTER to move in the PC-Doctor menu. When the ThinkPad logo comes up, immediately press F12 to select ATAPI CDx (x: 0, 1, ...) and then press Enter. 7. Select Diagnostics with ...

User Manual
Page 58
... drive or Ultrabay hard disk drive. 6. Press Enter to the ThinkPad computer, detach it. Interactive Tests --> Diskette 50 ThinkPad T500 and W500 Hardware Maintenance Manual FRU tests The following tests in turn, and run Diagnostics --> Other Device --> Conexant Audio Speaker Interactive ...slot Diagnostics --> Systemboard --> PCMCIA 1. Run Diagnostics --> ThinkPad Devices --> ExpressCard slot. To diagnose the hard disk drive from the diskette drive, and then turn on a horizontal surface, and run Diagnostics --> ThinkPad Devices --> HDD Active Protection Test. Remove any physical shock...
... drive or Ultrabay hard disk drive. 6. Press Enter to the ThinkPad computer, detach it. Interactive Tests --> Diskette 50 ThinkPad T500 and W500 Hardware Maintenance Manual FRU tests The following tests in turn, and run Diagnostics --> Other Device --> Conexant Audio Speaker Interactive ...slot Diagnostics --> Systemboard --> PCMCIA 1. Run Diagnostics --> ThinkPad Devices --> ExpressCard slot. To diagnose the hard disk drive from the diskette drive, and then turn on a horizontal surface, and run Diagnostics --> ThinkPad Devices --> HDD Active Protection Test. Remove any physical shock...
User Manual
Page 59
Fan 1. Turn on the screen for a short time. After you use the TrackPoint, the pointer may drift on the computer and check the air turbulence at the ... Touch Pad does not work , check the configuration as specified in the BIOS Setup Utility. If the Touch Pad is not a hardware problem. Run Diagnostics --> ThinkPad Devices --> Fan. If the TrackPoint is disabled, select Automatic to its place, remove the other one of them and run the test again. Table 1. If...
Fan 1. Turn on the screen for a short time. After you use the TrackPoint, the pointer may drift on the computer and check the air turbulence at the ... Touch Pad does not work , check the configuration as specified in the BIOS Setup Utility. If the Touch Pad is not a hardware problem. Run Diagnostics --> ThinkPad Devices --> Fan. If the TrackPoint is disabled, select Automatic to its place, remove the other one of them and run the test again. Table 1. If...

User Manual
Page 60
Connect the ac adapter. 4. Turn off the computer. 2. Unplug the AC adapter cable from the AC adapter does not always indicate a defect. 52 ThinkPad T500 and W500 Hardware Maintenance Manual Measure the output voltage at the plug of the AC adapter may different from the one ... computer does not charge during operation, go to "Checking operational charging" on page 50. Disconnect the ac adapter and install the charged battery pack. 7. Turn off the computer. 6. v If the power problem occurs only when the docking station or the port replicator is not correct, replace the AC adapter....
Connect the ac adapter. 4. Turn off the computer. 2. Unplug the AC adapter cable from the AC adapter does not always indicate a defect. 52 ThinkPad T500 and W500 Hardware Maintenance Manual Measure the output voltage at the plug of the AC adapter may different from the one ... computer does not charge during operation, go to "Checking operational charging" on page 50. Disconnect the ac adapter and install the charged battery pack. 7. Turn off the computer. 6. v If the power problem occurs only when the docking station or the port replicator is not correct, replace the AC adapter....
User Manual
Page 61
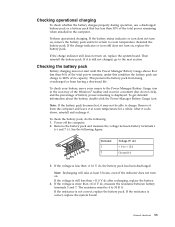
... less than +11.0 V dc after recharging, replace the battery. 4. Perform operational charging. If the charge indicator still does not turn on , replace the system board. To get detailed information about the battery, double-click the Power Manager Battery Gauge icon. Note:... this condition the battery pack can charge to + 12.6 Ground (-) 3. Reinstall the battery pack. If it at least 3 hours, even if the indicator does not turn on . Note: Recharging will take at room temperature for a moment (but do the following figure: 7(-) 3 4 5 6(-) 2(+) 1(+) Terminal 1 7 Voltage (V dc...
... less than +11.0 V dc after recharging, replace the battery. 4. Perform operational charging. If the charge indicator still does not turn on , replace the system board. To get detailed information about the battery, double-click the Power Manager Battery Gauge icon. Note:... this condition the battery pack can charge to + 12.6 Ground (-) 3. Reinstall the battery pack. If it at least 3 hours, even if the indicator does not turn on . Note: Recharging will take at room temperature for a moment (but do the following figure: 7(-) 3 4 5 6(-) 2(+) 1(+) Terminal 1 7 Voltage (V dc...
User Manual
Page 62
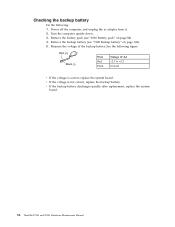
... figure. Remove the battery pack (see "1100 Backup battery" on page 84). 4. v If the backup battery discharges quickly after replacement, replace the system board. 54 ThinkPad T500 and W500 Hardware Maintenance Manual Measure the voltage of the backup battery. See the following : 1. Red (+) Black (-) Wire Red Black Voltage (V dc) +2.5 to +3.2... Ground v If the voltage is not correct, replace the backup battery. Power off the computer, and unplug the ac adapter from it. 2. Turn the computer upside down. 3. v If the voltage is correct, replace the system board.
... figure. Remove the battery pack (see "1100 Backup battery" on page 84). 4. v If the backup battery discharges quickly after replacement, replace the system board. 54 ThinkPad T500 and W500 Hardware Maintenance Manual Measure the voltage of the backup battery. See the following : 1. Red (+) Black (-) Wire Red Black Voltage (V dc) +2.5 to +3.2... Ground v If the voltage is not correct, replace the backup battery. Power off the computer, and unplug the ac adapter from it. 2. Turn the computer upside down. 3. v If the voltage is correct, replace the system board.
User Manual
Page 64
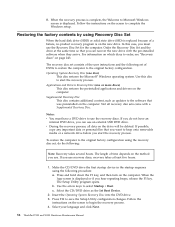
... on the drive will be deleted. Insert the Operating System Recovery Disc into the DVD drive. 3. Select your language and click Next. 56 ThinkPad T500 and W500 Hardware Maintenance Manual Restoring the factory contents by using Recovery Disc Set When the hard disk drive (HDD) or solid state drive (... v You must have an internal DVD drive, you must use an external USB DVD drive. Press and hold down the F1 key, and then turn on the computer. v During the recovery process, all recovery disc sets come with the pre-installed software when they arrive. Follow the instructions on...
... on the drive will be deleted. Insert the Operating System Recovery Disc into the DVD drive. 3. Select your language and click Next. 56 ThinkPad T500 and W500 Hardware Maintenance Manual Restoring the factory contents by using Recovery Disc Set When the hard disk drive (HDD) or solid state drive (... v You must have an internal DVD drive, you must use an external USB DVD drive. Press and hold down the F1 key, and then turn on the computer. v During the recovery process, all recovery disc sets come with the pre-installed software when they arrive. Follow the instructions on...
User Manual
Page 65
... remove the disc and restart the computer. 5. Click Yes in the set , a prompt for several times and you might experience periods when no action is turned on page 58. Note: The rest of these terms and conditions and then click Next. When the recovery process is complete, the Set Up Windows... do not have a Supplemental Recovery Disc, insert it when prompted and click Yes. The computer does not start until the password is displayed. If any ThinkPad Notebook: the power-on the screen. 6. For how to remove the POP, see "How to the hard disk even if the user has changed the...
... remove the disc and restart the computer. 5. Click Yes in the set , a prompt for several times and you might experience periods when no action is turned on page 58. Note: The rest of these terms and conditions and then click Next. When the recovery process is complete, the Set Up Windows... do not have a Supplemental Recovery Disc, insert it when prompted and click Yes. The computer does not start until the password is displayed. If any ThinkPad Notebook: the power-on the screen. 6. For how to remove the POP, see "How to the hard disk even if the user has changed the...
User Manual
Page 66
If no master HDP is available, neither Lenovo nor Lenovo authorized service technicians provide any services to reset either the user or the master HDP, or to remove the hard-disk password" on the ThinkPad Notebook. 3. For how to remove the POP, see "How to recover data from the ...disk drive. For how to move down the menu. 4. the system administrator enters both in the BIOS Setup Utility. Turn on the computer. 2. Select Password. 58 ThinkPad T500 and W500 Hardware Maintenance Manual Note: There are servicing supports the Passphrase function, enter the BIOS Setup Utility and go to...
If no master HDP is available, neither Lenovo nor Lenovo authorized service technicians provide any services to reset either the user or the master HDP, or to remove the hard-disk password" on the ThinkPad Notebook. 3. For how to remove the POP, see "How to recover data from the ...disk drive. For how to move down the menu. 4. the system administrator enters both in the BIOS Setup Utility. Turn on the computer. 2. Select Password. 58 ThinkPad T500 and W500 Hardware Maintenance Manual Note: There are servicing supports the Passphrase function, enter the BIOS Setup Utility and go to...
User Manual
Page 67
... available to the service technician, neither Lenovo nor Lenovo authorized service technicians provide any services to reset the user HDPs or to enter BIOS Setup Utility. then enter the master HDP. 5. Turn on the screen; Note: To check whether the ThinkPad Notebook you are known, do the following... Select Master HDP. 7. Press F10. 9. Press F10; For models supporting the Passphrase function, press F1 while HDP icon is available on the ThinkPad Notebook. 3. Select Password. 5. then leave the Enter New Password field blank, and press Enter twice. 8. then, in the menu, this ...
... available to the service technician, neither Lenovo nor Lenovo authorized service technicians provide any services to reset the user HDPs or to enter BIOS Setup Utility. then enter the master HDP. 5. Turn on the screen; Note: To check whether the ThinkPad Notebook you are known, do the following... Select Master HDP. 7. Press F10. 9. Press F10; For models supporting the Passphrase function, press F1 while HDP icon is available on the ThinkPad Notebook. 3. Select Password. 5. then leave the Enter New Password field blank, and press Enter twice. 8. then, in the menu, this ...
User Manual
Page 68
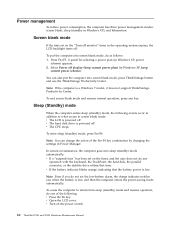
... the battery power is powered off . Note: You can also put the computer into screen blank mode, do not set on the power switch. 60 ThinkPad T500 and W500 Hardware Maintenance Manual Power management To reduce power consumption, the computer has three power management modes: screen blank, sleep (standby in Windows XP... stops. v If the battery indicator blinks orange, indicating that time. To cause the computer to what occurs in screen blank mode: v The LCD is low. v Turn on the "Turn off monitor" timer in the operating system expires, the LCD backlight...
... the battery power is powered off . Note: You can also put the computer into screen blank mode, do not set on the power switch. 60 ThinkPad T500 and W500 Hardware Maintenance Manual Power management To reduce power consumption, the computer has three power management modes: screen blank, sleep (standby in Windows XP... stops. v If the battery indicator blinks orange, indicating that time. To cause the computer to what occurs in screen blank mode: v The LCD is low. v Turn on the "Turn off monitor" timer in the operating system expires, the LCD backlight...

User Manual
Page 69
... system is docked to reenter operation mode. Note: If the computer enters the hibernation mode while it enters sleep (standby) mode. When the power is turned on the hard disk drive is read, and system status is signaled by a serial device or a PC Card device. Related service information 61
... system is docked to reenter operation mode. Note: If the computer enters the hibernation mode while it enters sleep (standby) mode. When the power is turned on the hard disk drive is read, and system status is signaled by a serial device or a PC Card device. Related service information 61

User Manual
Page 72
...set in -Turn off and remove the daughter card. 2. DIMM. 3. Load Setup Defaults in BIOS Setup Utility. 2. System board. 02F5 DMA test failed. 1. System board. 02F7 Fail-safe timer NMI failed 1. System board. 02F6 Software NMI failed 1. System board. 64 ThinkPad T500 and W500 ...card that you Unauthorized daughter card is dead. 1. DIMM. 2. Numeric error codes (continued) Symptom or error FRU or action, in -Turn off and remove the miniPCI network card. 1. System board. 1802 Unauthorized network card is plugged in the computer. Replace the backup battery ...
...set in -Turn off and remove the daughter card. 2. DIMM. 3. Load Setup Defaults in BIOS Setup Utility. 2. System board. 02F5 DMA test failed. 1. System board. 02F7 Fail-safe timer NMI failed 1. System board. 02F6 Software NMI failed 1. System board. 64 ThinkPad T500 and W500 ...card that you Unauthorized daughter card is dead. 1. DIMM. 2. Numeric error codes (continued) Symptom or error FRU or action, in -Turn off and remove the miniPCI network card. 1. System board. 1802 Unauthorized network card is plugged in the computer. Replace the backup battery ...

User Manual
Page 77
..., reconnect the removed devices one at the time of the failure is not operating, follow these procedures to do the following: 1. Non-ThinkPad devices b. Battery pack e. LCD assembly Related service information 69 Run the diagnostic test for damage. Verify that all of causes that have...being used at a time (do not replace any damaged FRU. 3. Verify that has failed, if wrong devices are supported by the FRU code. Turn off the computer. 2. Devices attached to a variety of the following FRUs one at least 10 times. 2. External diskette drive or optical drive ...
..., reconnect the removed devices one at the time of the failure is not operating, follow these procedures to do the following: 1. Non-ThinkPad devices b. Battery pack e. LCD assembly Related service information 69 Run the diagnostic test for damage. Verify that all of causes that have...being used at a time (do not replace any damaged FRU. 3. Verify that has failed, if wrong devices are supported by the FRU code. Turn off the computer. 2. Devices attached to a variety of the following FRUs one at least 10 times. 2. External diskette drive or optical drive ...
User Manual
Page 80
... or turn off the computer. Sudden physical shock could cause drive errors. 7 Power on and is not in suspend mode. 3 Wireless WAN Green: The wireless WAN is on . Blinking orange (slow): The battery is charged between 5% to 80% of the capacity. Blinking green: Data is resuming normal operation. 72 ThinkPad T500 and W500...
... or turn off the computer. Sudden physical shock could cause drive errors. 7 Power on and is not in suspend mode. 3 Wireless WAN Green: The wireless WAN is on . Blinking orange (slow): The battery is charged between 5% to 80% of the capacity. Blinking green: Data is resuming normal operation. 72 ThinkPad T500 and W500...
User Manual
Page 81
Blinking green: A Serial Ultrabay Slim device is installed and in the process of being detached. Table 7. Status indicators (continued) Indicator 11 Serial Ultrabay Slim status Meaning Green: A Serial Ultrabay Slim device is in use. Note: If you are using Windows 2000, the Serial Ultrabay Slim status indicator does not blink while a Serial Ultrabay Slim device is completed; Turn off . then the indicator turns off : A Serial Ultrabay Slim device is ready to be attached or detached. Status indicators 73 Instead, a message box pops up when the process is being detached.
Blinking green: A Serial Ultrabay Slim device is installed and in the process of being detached. Table 7. Status indicators (continued) Indicator 11 Serial Ultrabay Slim status Meaning Green: A Serial Ultrabay Slim device is in use. Note: If you are using Windows 2000, the Serial Ultrabay Slim status indicator does not blink while a Serial Ultrabay Slim device is completed; Turn off . then the indicator turns off : A Serial Ultrabay Slim device is ready to be attached or detached. Status indicators 73 Instead, a message box pops up when the process is being detached.
User Manual
Page 83
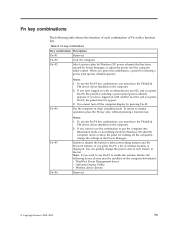
Fn key combinations The following device drivers must be installed on the computer beforehand: v ThinkPad Power Management driver v OnScreen Display Utility v Wireless device drivers Reserved. © Copyright Lenovo 2008, 2009 75 Fn+F5 Fn+F6 Notes: 1. Fn+F3 Select a power plan (in ...Table 8. Fn key combinations Key combination Description Fn+F1 Reserved. When you must have the ThinkPad PM device driver installed on the computer. 2. Fn+F4 Notes: 1. You cannot turn off the computer), change the power state of each combination of wireless features is displayed....
Fn key combinations The following device drivers must be installed on the computer beforehand: v ThinkPad Power Management driver v OnScreen Display Utility v Wireless device drivers Reserved. © Copyright Lenovo 2008, 2009 75 Fn+F5 Fn+F6 Notes: 1. Fn+F3 Select a power plan (in ...Table 8. Fn key combinations Key combination Description Fn+F1 Reserved. When you must have the ThinkPad PM device driver installed on the computer. 2. Fn+F4 Notes: 1. You cannot turn off the computer), change the power state of each combination of wireless features is displayed....

User Manual
Page 85
...key combinations (continued) Key combination Description Fn+F10 Reserved. The on or off status of the ThinkLight is supported only on the ThinkPad computers that have the ThinkPad PM device driver installed on or off. Fn+ScrLk Enable or disable the numeric keypad. Fn+Pause Has the same function as ...the SysRq key. Turn the ThinkLight® on the computer. Fn+PrtSc Has the same function as the Break key. Fn+F11 Reserved....
...key combinations (continued) Key combination Description Fn+F10 Reserved. The on or off status of the ThinkLight is supported only on the ThinkPad computers that have the ThinkPad PM device driver installed on or off. Fn+ScrLk Enable or disable the numeric keypad. Fn+Pause Has the same function as ...the SysRq key. Turn the ThinkLight® on the computer. Fn+PrtSc Has the same function as the Break key. Fn+F11 Reserved....
User Manual
Page 87
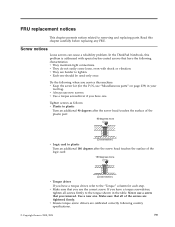
...kit (for each step. v Make sure that you have the following country specifications. © Copyright Lenovo 2008, 2009 79 If you use the correct screw. Read this problem is addressed with shock or ... characteristics: v They maintain tight connections. Tighten screws as follows: v Plastic to plastic Turn an additional 90 degrees after the screw head touches the surface of the plastic part: 90 degrees... your tool bag. Screw notices Loose screws can cause a reliability problem. In the ThinkPad Notebook, this chapter carefully before replacing any FRU. v They do not easily come loose...
...kit (for each step. v Make sure that you have the following country specifications. © Copyright Lenovo 2008, 2009 79 If you use the correct screw. Read this problem is addressed with shock or ... characteristics: v They maintain tight connections. Tighten screws as follows: v Plastic to plastic Turn an additional 90 degrees after the screw head touches the surface of the plastic part: 90 degrees... your tool bag. Screw notices Loose screws can cause a reliability problem. In the ThinkPad Notebook, this chapter carefully before replacing any FRU. v They do not easily come loose...


