
(English) Access Connections Profile Deployment guide
Page 40
...where you extracted during Step 2. You do not need to prepare for the Hotkey utilities package and On screen display. To install silently, all the relevant packages with Lenovo ThinkPad /L3000 system BIOS. When the integrated package is the folder that contains the Intel® Pro/Wireless ...packages with no restart. v LSID is the driver that contains the On screen display utilities including the Fn+F5 Hotkey utilities setup. A restart is the folder that is ready for customization to replace all the relevant packages with forced system restart at the end of the...
...where you extracted during Step 2. You do not need to prepare for the Hotkey utilities package and On screen display. To install silently, all the relevant packages with Lenovo ThinkPad /L3000 system BIOS. When the integrated package is the folder that contains the Intel® Pro/Wireless ...packages with no restart. v LSID is the driver that contains the On screen display utilities including the Fn+F5 Hotkey utilities setup. A restart is the folder that is ready for customization to replace all the relevant packages with forced system restart at the end of the...
Hardware Maintenance Manual
Page 3
.... . 64 Chapter 8. Removing and replacing a FRU 65 Before servicing ThinkPad T410 and T410i models 65 1010 Battery pack 66 1020... © Copyright Lenovo 2010, 2012 i Status indicators . . . . . 53 Chapter 6. Fn key combinations . . . 57 Chapter 7. FRU replacement notices 61 Screw ...notices 61 Retaining serial numbers 63 Restoring the serial number of the computer 71 1070 PCI Express Mini Card for wireless WAN . . 72 1080 Keyboard 74 1090 DIMM (in the slot on password . . . 41 How to remove the hard-disk password . . . 41 Power management 42 Screen...
.... . 64 Chapter 8. Removing and replacing a FRU 65 Before servicing ThinkPad T410 and T410i models 65 1010 Battery pack 66 1020... © Copyright Lenovo 2010, 2012 i Status indicators . . . . . 53 Chapter 6. Fn key combinations . . . 57 Chapter 7. FRU replacement notices 61 Screw ...notices 61 Retaining serial numbers 63 Restoring the serial number of the computer 71 1070 PCI Express Mini Card for wireless WAN . . 72 1080 Keyboard 74 1090 DIMM (in the slot on password . . . 41 How to remove the hard-disk password . . . 41 Power management 42 Screen...
Hardware Maintenance Manual
Page 29
... before completing the service action. "FRU identification for replacing a hard disk drive" on page 25 Important: • Advise customers to contact the Lenovo Customer Support Center if they need any assistance in this manual: • "Strategy for CTO, CMV, and GAV" on the screen to see if the symptoms change. Running Automatic Configuration...
... before completing the service action. "FRU identification for replacing a hard disk drive" on page 25 Important: • Advise customers to contact the Lenovo Customer Support Center if they need any assistance in this manual: • "Strategy for CTO, CMV, and GAV" on the screen to see if the symptoms change. Running Automatic Configuration...

Hardware Maintenance Manual
Page 30
...one error code is listed in the computer you are very sensitive. Be sure that the customer has a current backup of the data before replacing a hard disk drive. Important notice for the computer you are servicing may have been changed. Attention: The drive startup sequence in the ...Symptom-to be overwritten. This will cause all customer data on the hard disk to -FRU Index for replacing a system board Some components mounted on the screen to run a low-level format before doing this task. Attention: When handling a system board: • Do not drop a...
...one error code is listed in the computer you are very sensitive. Be sure that the customer has a current backup of the data before replacing a hard disk drive. Important notice for the computer you are servicing may have been changed. Attention: The drive startup sequence in the ...Symptom-to be overwritten. This will cause all customer data on the hard disk to -FRU Index for replacing a system board Some components mounted on the screen to run a low-level format before doing this task. Attention: When handling a system board: • Do not drop a...
Hardware Maintenance Manual
Page 42
...be turned on, go to "Checking operational charging" on page 37. When the ThinkPad logo is displayed, repeatedly press and release the F12 key. Follow the instructions on the screen to use the diagnostic program. When the ThinkPad logo is displayed, repeatedly press and release the F12 key. If you turn ... only when the AC adapter is used. • If the power problem occurs only when the docking station or the port replicator is used, replace the docking station or the port replicator. • If the power-on indicator does not turn on the computer. 5. Unplug the AC adapter ...
...be turned on, go to "Checking operational charging" on page 37. When the ThinkPad logo is displayed, repeatedly press and release the F12 key. Follow the instructions on the screen to use the diagnostic program. When the ThinkPad logo is displayed, repeatedly press and release the F12 key. If you turn ... only when the AC adapter is used. • If the power problem occurs only when the docking station or the port replicator is used, replace the docking station or the port replicator. • If the power-on indicator does not turn on the computer. 5. Unplug the AC adapter ...

Hardware Maintenance Manual
Page 45
...using Recovery Disc Set When the hard disk drive (HDD) or solid state drive (SSD) is replaced because of a failure, no product recovery program is displayed or if you can take about two...the recovery discs. c. Insert the Operating System Recovery Disc into the DVD drive. © Copyright Lenovo 2010, 2012 39 In this disc to keep onto removable media or a network drive before you can...and Drivers Recovery Disc (one to two hours to the original factory configuration. When the logo screen is on page 43 Service Web site: When the latest maintenance diskette and the system program ...
...using Recovery Disc Set When the hard disk drive (HDD) or solid state drive (SSD) is replaced because of a failure, no product recovery program is displayed or if you can take about two...the recovery discs. c. Insert the Operating System Recovery Disc into the DVD drive. © Copyright Lenovo 2010, 2012 39 In this disc to keep onto removable media or a network drive before you can...and Drivers Recovery Disc (one to two hours to the original factory configuration. When the logo screen is on page 43 Service Web site: When the latest maintenance diskette and the system program ...

Hardware Maintenance Manual
Page 47
...the current SVP in the BIOS Setup Utility. then, in the menu, this function is no SVP has been set and is appearing on the screen; Turn on the computer and wait until the POST ends. For the other models, enter the POP. How to remove the hard-disk password ...to the service technician, neither Lenovo nor Lenovo authorized service technicians provide any services to reset either the user or the master HDP, or to remove the battery pack, see "How to recover data from the hard disk drive. The user must be replaced for a scheduled fee. When the ThinkPad logo comes up, immediately...
...the current SVP in the BIOS Setup Utility. then, in the menu, this function is no SVP has been set and is appearing on the screen; Turn on the computer and wait until the POST ends. For the other models, enter the POP. How to remove the hard-disk password ...to the service technician, neither Lenovo nor Lenovo authorized service technicians provide any services to reset either the user or the master HDP, or to remove the battery pack, see "How to recover data from the hard disk drive. The user must be replaced for a scheduled fee. When the ThinkPad logo comes up, immediately...
Hardware Maintenance Manual
Page 53
...If item 2 failed, press F3 in the Welcome screen in Access Predesktop Area. If item 3 failed, select...memory configuration-Power off and install a memory module to the ThinkPad Notebook. 2. Note: For the construction of the computer)" on a horizontal surface. Place the ThinkPad Notebook on page 71. 2000 Hard Drive Active Protection sensor... Predesktop Area. Save and exit. 2. If item 4 failed, replace the hard disk drive. 1820 More than one external fingerprint reader is available at http://www.lenovo.com/support Chapter 4. Inform the following information to Disabled. System...
...If item 2 failed, press F3 in the Welcome screen in Access Predesktop Area. If item 3 failed, select...memory configuration-Power off and install a memory module to the ThinkPad Notebook. 2. Note: For the construction of the computer)" on a horizontal surface. Place the ThinkPad Notebook on page 71. 2000 Hard Drive Active Protection sensor... Predesktop Area. Save and exit. 2. If item 4 failed, replace the hard disk drive. 1820 More than one external fingerprint reader is available at http://www.lenovo.com/support Chapter 4. Inform the following information to Disabled. System...

Hardware Maintenance Manual
Page 56
...are servicing has two or less visible defective pixels, it should not be replaced. LCD assembly. 3. System board. 2. Two short beeps and a blank screen. 1. System board. 2. Three short beeps, pause, three more short... defective pixels, it will be deemed as defective by Lenovo and it should be considered faulty. System board (security chip) Five short beeps and a blank screen. A power-on 1 January, 2008 or later....• This policy applies to all ThinkPad Notebooks purchased on password or a supervisor password is characteristic of four short beeps and a blank...
...are servicing has two or less visible defective pixels, it should not be replaced. LCD assembly. 3. System board. 2. Two short beeps and a blank screen. 1. System board. 2. Three short beeps, pause, three more short... defective pixels, it will be deemed as defective by Lenovo and it should be considered faulty. System board (security chip) Five short beeps and a blank screen. A power-on 1 January, 2008 or later....• This policy applies to all ThinkPad Notebooks purchased on password or a supervisor password is characteristic of four short beeps and a blank...

Hardware Maintenance Manual
Page 57
.... • LCD contrast cannot be adjusted. • LCD screen unreadable. • Characters missing pixels. • Screen abnormal. • Wrong color displayed. LCD assembly. 3. LCD assembly. • Lenovo will not provide replacement if the LCD is within specification as we cannot guarantee that... any replacement LCD will have zero pixel defects. • One pixel...
.... • LCD contrast cannot be adjusted. • LCD screen unreadable. • Characters missing pixels. • Screen abnormal. • Wrong color displayed. LCD assembly. 3. LCD assembly. • Lenovo will not provide replacement if the LCD is within specification as we cannot guarantee that... any replacement LCD will have zero pixel defects. • One pixel...
Hardware Maintenance Manual
Page 69
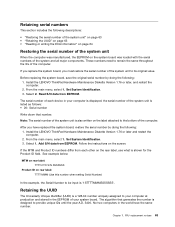
...2. The serial number of your computer is '1STTTTMMMSSSSSSS'. Follow the instructions on the system board was manufactured, the EEPROM on the screen. Retaining the UUID The Universally Unique Identifier (UUID) is shown for the Product ID field. No two computers in your system ...Note: The serial number of the computer. Install the LENOVO ThinkPad Hardware Maintenance Diskette Version 1.76 or later and restart the computer. 2. Select 1. If the MTM and Product ID numbers differ from each device in the world have replaced the system board, restore the serial number by doing ...
...2. The serial number of your computer is '1STTTTMMMSSSSSSS'. Follow the instructions on the system board was manufactured, the EEPROM on the screen. Retaining the UUID The Universally Unique Identifier (UUID) is shown for the Product ID field. No two computers in your system ...Note: The serial number of the computer. Install the LENOVO ThinkPad Hardware Maintenance Diskette Version 1.76 or later and restart the computer. 2. Select 1. If the MTM and Product ID numbers differ from each device in the world have replaced the system board, restore the serial number by doing ...
Hardware Maintenance Manual
Page 70
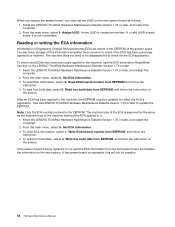
...be possible. 64 Hardware Maintenance Manual From the main menu, select 6. Write ECA/rework number from EEPROM and follow the instruction on the screen. If a valid UUID already exists, it . 1. The electronic storage of the ECA is assumed be the same as follows: 1. The... board is created and written. From the main menu, select 4. Use the LENOVO ThinkPad Hardware Maintenance Diskette Version 1.76 or later to check for the ECA application. To write ECA information, select 1. When you replace the system board, you must be updated to reflect the ECA's application.
...be possible. 64 Hardware Maintenance Manual From the main menu, select 6. Write ECA/rework number from EEPROM and follow the instruction on the screen. If a valid UUID already exists, it . 1. The electronic storage of the ECA is assumed be the same as follows: 1. The... board is created and written. From the main menu, select 4. Use the LENOVO ThinkPad Hardware Maintenance Diskette Version 1.76 or later to check for the ECA application. To write ECA information, select 1. When you replace the system board, you must be updated to reflect the ECA's application.

