
(English) Access Connections Profile Deployment guide
Page 9
... network connection and for wireless networks that stores the network and Internet configuration settings needed to connect a client computer to support automatic location switching between location profiles as home or at work. You can create and manage location profiles that are available to you to it. The network connection can simply choose another location profile from the office and not near a public WLAN hot spot. v Switch between location profiles. Users can attempt to connect to change location profiles. Access Connections...
... network connection and for wireless networks that stores the network and Internet configuration settings needed to connect a client computer to support automatic location switching between location profiles as home or at work. You can create and manage location profiles that are available to you to it. The network connection can simply choose another location profile from the office and not near a public WLAN hot spot. v Switch between location profiles. Users can attempt to connect to change location profiles. Access Connections...
Hardware Maintenance Manual
Page 3
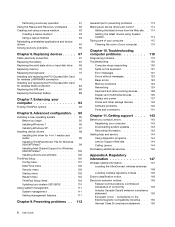
... 7. Removing and replacing a FRU 51 Before servicing ThinkPad Edge E120 and E125 models 51 1010 Battery pack 52 1020 Bottom slot cover 53 1030 Memory modules 54 1040 Hard disk drive or solid state drive assembly 54 1050 PCI Express Mini Card for wireless LAN . . 56 1060 PCI Express Mini Card for DOS diagnostics program 24 System supporting the Lenovo diagnostics programs 28 Power system checkout 30 Checking the ac power adapter 30 Checking operational charging 31...
... 7. Removing and replacing a FRU 51 Before servicing ThinkPad Edge E120 and E125 models 51 1010 Battery pack 52 1020 Bottom slot cover 53 1030 Memory modules 54 1040 Hard disk drive or solid state drive assembly 54 1050 PCI Express Mini Card for wireless LAN . . 56 1060 PCI Express Mini Card for DOS diagnostics program 24 System supporting the Lenovo diagnostics programs 28 Power system checkout 30 Checking the ac power adapter 30 Checking operational charging 31...
Hardware Maintenance Manual
Page 25
... replacing FRUs Before replacing parts: Make sure that all machine types supported by one, to prevent unnecessary expense for replacing FRUs" on page 20 - Use the following important service information that applies to all software fixes, drivers, and UEFI BIOS downloads are instructed to replace either the processor board or the system board, and replacing one of more than one by this manual. Note the current configuration settings (using the View Configuration option); then, when service...
... replacing FRUs Before replacing parts: Make sure that all machine types supported by one, to prevent unnecessary expense for replacing FRUs" on page 20 - Use the following important service information that applies to all software fixes, drivers, and UEFI BIOS downloads are instructed to replace either the processor board or the system board, and replacing one of more than one by this manual. Note the current configuration settings (using the View Configuration option); then, when service...
Hardware Maintenance Manual
Page 29
... guide" on page 24 • "System supporting the Lenovo ThinkVantage Toolbox program and the PC-Doctor for repair costs if the computer damage was subjected to replace a nondefective FRU. Following is a list of the machine and the FRU part number are not covered under warranty and some common items that are servicing sequence might indicate that have been altered. Failure symptoms, error codes...
... guide" on page 24 • "System supporting the Lenovo ThinkVantage Toolbox program and the PC-Doctor for repair costs if the computer damage was subjected to replace a nondefective FRU. Following is a list of the machine and the FRU part number are not covered under warranty and some common items that are servicing sequence might indicate that have been altered. Failure symptoms, error codes...
Hardware Maintenance Manual
Page 34
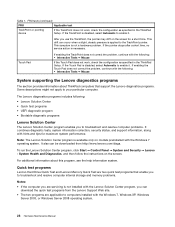
... disabled, select Automatic to the TrackPoint pointer. To run the Lenovo Solution Center program, click Start ➙ Control Panel ➙ System and Security ➙ Lenovo - For additional information about ThinkPad computers that enable you to enable it . The Lenovo diagnostics programs includes following : • Interactive Tests ➙ Mouse If the Touch Pad does not work , check the configuration as specified in the ThinkPad Setup. Table 1. Quick test programs Lenovo Hard Drive Quick...
... disabled, select Automatic to the TrackPoint pointer. To run the Lenovo Solution Center program, click Start ➙ Control Panel ➙ System and Security ➙ Lenovo - For additional information about ThinkPad computers that enable you to enable it . The Lenovo diagnostics programs includes following : • Interactive Tests ➙ Mouse If the Touch Pad does not work , check the configuration as specified in the ThinkPad Setup. Table 1. Quick test programs Lenovo Hard Drive Quick...
Hardware Maintenance Manual
Page 39
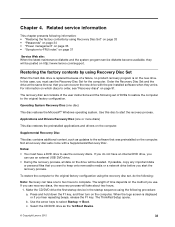
... F1 key. Make the CD/DVD drive the first startup device in the startup sequence using the recovery disc set of the user instructions and the following information: • "Restoring the factory contents by using Recovery Disc Set" on page 33 • "Passwords" on page 34 • "Power management" on page 36 • "Symptom-to the original factory configuration. The ThinkPad Setup opens. c. Press and hold down the F1 key, and then turn on the computer. b. Supplemental Recovery Disc This disc contains...
... F1 key. Make the CD/DVD drive the first startup device in the startup sequence using the recovery disc set of the user instructions and the following information: • "Restoring the factory contents by using Recovery Disc Set" on page 33 • "Passwords" on page 34 • "Power management" on page 36 • "Symptom-to the original factory configuration. The ThinkPad Setup opens. c. Press and hold down the F1 key, and then turn on the computer. b. Supplemental Recovery Disc This disc contains...
Hardware Maintenance Manual
Page 41
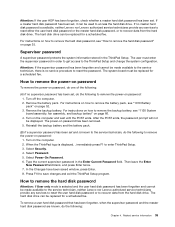
... the hard disk drive. The hard disk drive can be used to recover data from the hard disk drive. The power-on the computer. 2. Then leave the Enter New Password field blank, and press Enter twice. 7. For instructions on password: 1. The system board must enter the supervisor password in order to get access to enter ThinkPad Setup. 3. How to remove the hard disk password Attention: If User only mode is available, neither Lenovo nor Lenovo authorized service technicians provide any services to reset the user hard disk password or to remove the hard disk password...
... the hard disk drive. The hard disk drive can be used to recover data from the hard disk drive. The power-on the computer. 2. Then leave the Enter New Password field blank, and press Enter twice. 7. For instructions on password: 1. The system board must enter the supervisor password in order to get access to enter ThinkPad Setup. 3. How to remove the hard disk password Attention: If User only mode is available, neither Lenovo nor Lenovo authorized service technicians provide any services to reset the user hard disk password or to remove the hard disk password...
Hardware Maintenance Manual
Page 44
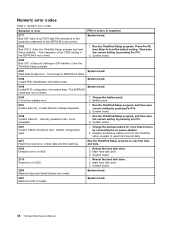
Enter the ThinkPad Setup program and load Setup defaults. - System board. 0183 Bad CRC of Security Settings in the EEPROM is not correct. 0190 Critical low-battery error 1. The access to reset the time and date. 2100 Detection error on HDD 1. Replace the backup battery and run the ThinkPad setup program to load the default setting. Reseat the hard disk drive. 2. Reseat the hard disk drive. 2. Numeric error codes Symptom or error FRU or action, in sequence 0177 Bad SVP...
Enter the ThinkPad Setup program and load Setup defaults. - System board. 0183 Bad CRC of Security Settings in the EEPROM is not correct. 0190 Critical low-battery error 1. The access to reset the time and date. 2100 Detection error on HDD 1. Replace the backup battery and run the ThinkPad setup program to load the default setting. Reseat the hard disk drive. 2. Reseat the hard disk drive. 2. Numeric error codes Symptom or error FRU or action, in sequence 0177 Bad SVP...
Hardware Maintenance Manual
Page 57
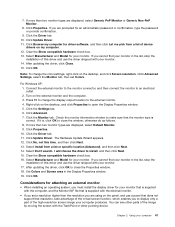
... about connecting and arranging internal cables, see Chapter 9 "Locations" on page 47. 3. When replacing a FRU, use in square callouts. 5. Attention: After replacing a FRU, do not turn it in the direction as given by the numbers in removing and replacing a FRU. Attention: The system board is your Lenovo Limited Warranty documentation for use the correct screw(s) as Optional-service CRUs. Before servicing ThinkPad Edge E120 and E125 models SomeThinkPad Edge E120 and E125 models you...
... about connecting and arranging internal cables, see Chapter 9 "Locations" on page 47. 3. When replacing a FRU, use in square callouts. 5. Attention: After replacing a FRU, do not turn it in the direction as given by the numbers in removing and replacing a FRU. Attention: The system board is your Lenovo Limited Warranty documentation for use the correct screw(s) as Optional-service CRUs. Before servicing ThinkPad Edge E120 and E125 models SomeThinkPad Edge E120 and E125 models you...

(Greek) User Guide
Page 128
... Enter 17 Windows XP Service Pack 2 18 Windows XP Service Pack 3 Windows XP Service Pack 3 CD Windows XP Service Pack 3 Microsoft Microsoft Windows update. 19 Intel Chipset Support για Windows 2000/XP/Vista/7 Intel Chipset Support για Windows 2000/XP/Vista/7 113. 20 111. Intel Rapid Storage Technology Driver AHCI for Serial ATA (SATA) στο ThinkPad Setup Intel Rapid Storage Technology Driver 1 ThinkPad Setup ThinkPad Setup. 2 Config. 3 Serial ATA (SATA). 4 Compatibility. 5 Startup...
... Enter 17 Windows XP Service Pack 2 18 Windows XP Service Pack 3 Windows XP Service Pack 3 CD Windows XP Service Pack 3 Microsoft Microsoft Windows update. 19 Intel Chipset Support για Windows 2000/XP/Vista/7 Intel Chipset Support για Windows 2000/XP/Vista/7 113. 20 111. Intel Rapid Storage Technology Driver AHCI for Serial ATA (SATA) στο ThinkPad Setup Intel Rapid Storage Technology Driver 1 ThinkPad Setup ThinkPad Setup. 2 Config. 3 Serial ATA (SATA). 4 Compatibility. 5 Startup...
(English) User Guide
Page 4
... Replacing memory 72 Replacing the keyboard 75 Installing and replacing the PCI Express Mini Card for wireless LAN/WiMAX connection 79 Installing and replacing the PCI Express Mini Card for Windows 2000/XP/Vista/7 100 Installing drivers and software 100 ThinkPad Setup 100 Config menu 101 Date/Time menu 102 Security menu 102 Startup menu 103 Restart menu 104 ThinkPad Setup items 104 Updating your computer 93 Finding ThinkPad options 93 Chapter 8. Enhancing your system UEFI BIOS . . . . . 110 Using system management 111 System management 111 Setting management...
... Replacing memory 72 Replacing the keyboard 75 Installing and replacing the PCI Express Mini Card for wireless LAN/WiMAX connection 79 Installing and replacing the PCI Express Mini Card for Windows 2000/XP/Vista/7 100 Installing drivers and software 100 ThinkPad Setup 100 Config menu 101 Date/Time menu 102 Security menu 102 Startup menu 103 Restart menu 104 ThinkPad Setup items 104 Updating your computer 93 Finding ThinkPad options 93 Chapter 8. Enhancing your system UEFI BIOS . . . . . 110 Using system management 111 System management 111 Setting management...
(English) User Guide
Page 57
.... 3. Connect the external monitor to the monitor connector, and then connect the monitor to the external monitor. 4. Click the Monitor tab. Check the monitor information window to make sure that resolution, take advantage of the virtual screen function, which enables you are displayed, select Default Monitor. 9. If more than the resolution you to display only a part of device drivers on the desktop, and click Properties to close the window; Click Update Driver. Select Install from a list of...
.... 3. Connect the external monitor to the monitor connector, and then connect the monitor to the external monitor. 4. Click the Monitor tab. Check the monitor information window to make sure that resolution, take advantage of the virtual screen function, which enables you are displayed, select Default Monitor. 9. If more than the resolution you to display only a part of device drivers on the desktop, and click Properties to close the window; Click Update Driver. Select Install from a list of...
(English) User Guide
Page 68
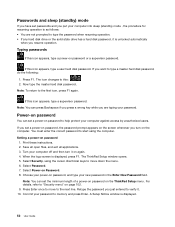
... logo screen is displayed. 52 User Guide Select Power-on password, and type your new password in the Enter New Password field. If you want to this icon appears, type a power-on the screen whenever you turn it is unlocked automatically when you resume operation. Save all open files, and exit all applications. 3. The ThinkPad Setup window opens. 5. Press F1. The icon changes to type a master hard disk password, do the following: 1. Note: You can set a power-on password, the password prompt...
... logo screen is displayed. 52 User Guide Select Power-on password, and type your new password in the Enter New Password field. If you want to this icon appears, type a power-on the screen whenever you turn it is unlocked automatically when you resume operation. Save all open files, and exit all applications. 3. The ThinkPad Setup window opens. 5. Press F1. The icon changes to type a master hard disk password, do the following: 1. Note: You can set a power-on password, the password prompt...

(English) User Guide
Page 70
... Enter New Password field. Then type the new password in the Enter New Password field, and retype the password you just entered to your new password in the Enter New Password field. 14. The next time you turn on page 53, typing your passwords or recover data from the Setup Notice window. Notes: • You can change the hard disk password, type the current password in "Setting a hard disk password" on your computer, you forget the user-only password, or both user and master passwords, Lenovo cannot reset...
... Enter New Password field. Then type the new password in the Enter New Password field, and retype the password you just entered to your new password in the Enter New Password field. 14. The next time you turn on page 53, typing your passwords or recover data from the Setup Notice window. Notes: • You can change the hard disk password, type the current password in "Setting a hard disk password" on your computer, you forget the user-only password, or both user and master passwords, Lenovo cannot reset...
(English) User Guide
Page 71
...To change the configuration of the computer. Deleting the power-on passwords and hard disk passwords - Enabling or disabling the Internal Network Option ROM feature - Specifying the minimum length for power-on password - Enabling or disabling the Boot Device List F12 Option - Press Enter, and a Setup Notice window is displayed. A Setup Notice window is displayed. Press F10 to exit from the Setup Notice window. Then leave the Enter New Password and Confirm New Password fields blank, and press Enter. Both the user and master hard disk passwords will be removed. Unauthorized users...
...To change the configuration of the computer. Deleting the power-on passwords and hard disk passwords - Enabling or disabling the Internal Network Option ROM feature - Specifying the minimum length for power-on password - Enabling or disabling the Boot Device List F12 Option - Press Enter, and a Setup Notice window is displayed. A Setup Notice window is displayed. Press F10 to exit from the Setup Notice window. Then leave the Enter New Password and Confirm New Password fields blank, and press Enter. Both the user and master hard disk passwords will be removed. Unauthorized users...

(English) User Guide
Page 78
... is turned off. 2. You can restore the hard disk drive from a Rescue and Recovery backup If you have the option to restore the factory default settings to other media. 4. Attention: If you restore the hard disk drive from a Rescue and Recovery backup located on your hard disk drive, you have set a Rescue and Recovery password, type your hard disk drive to the C: partition and leave the other recordable media, such as a USB device or a disc. To start the Windows operating system. Follow the instructions on the screen to complete the recovery operation...
... is turned off. 2. You can restore the hard disk drive from a Rescue and Recovery backup If you have the option to restore the factory default settings to other media. 4. Attention: If you restore the hard disk drive from a Rescue and Recovery backup located on your hard disk drive, you have set a Rescue and Recovery password, type your hard disk drive to the C: partition and leave the other recordable media, such as a USB device or a disc. To start the Windows operating system. Follow the instructions on the screen to complete the recovery operation...
(English) User Guide
Page 111
... the Windows OS image was installed. "Installing Windows XP" on the solid state drive, you are using: - Or, you should not change the initial UEFI/Legacy Boot setting in the following : Country or region: Code China: SC © Copyright Lenovo 2011 95 Go to the section for it is important to install a new operating system, install new device drivers, update your computer is a Windows 7 model, - 32-bit versions of Microsoft Windows Installation DVD, you...
... the Windows OS image was installed. "Installing Windows XP" on the solid state drive, you are using: - Or, you should not change the initial UEFI/Legacy Boot setting in the following : Country or region: Code China: SC © Copyright Lenovo 2011 95 Go to the section for it is important to install a new operating system, install new device drivers, update your computer is a Windows 7 model, - 32-bit versions of Microsoft Windows Installation DVD, you...
(English) User Guide
Page 141
... the Update Driver button. Follow the instructions on the screen. Setting the wrong duplex mode can degrade performance, cause data loss, or result in wireless networking card. Solution: The network driver files may be corrupt or missing. Use Category 5 wiring and make sure the switch port is installed in the task bar. Try another cable. - Chapter 10. Troubleshooting computer problems 125 Click Update Driver Software, and then follow the instructions on the screen. - The Properties window...
... the Update Driver button. Follow the instructions on the screen. Setting the wrong duplex mode can degrade performance, cause data loss, or result in wireless networking card. Solution: The network driver files may be corrupt or missing. Use Category 5 wiring and make sure the switch port is installed in the task bar. Try another cable. - Chapter 10. Troubleshooting computer problems 125 Click Update Driver Software, and then follow the instructions on the screen. - The Properties window...
(English) User Guide
Page 144
... not function. Open the Control Panel by pressing F9. 2. Select the Audio tab. 128 User Guide If you have installed the Microsoft Bluetooth software before, and you are using Headset profile or AV profile. The Device Manager window opens. 7. This is not a defect. Click the System icon. 5. Solution: Do the following : 1. If no application opens the port, the connection is established, an inactivity timer starts. Solution: Start a mail application, and set...
... not function. Open the Control Panel by pressing F9. 2. Select the Audio tab. 128 User Guide If you have installed the Microsoft Bluetooth software before, and you are using Headset profile or AV profile. The Device Manager window opens. 7. This is not a defect. Click the System icon. 5. Solution: Do the following : 1. If no application opens the port, the connection is established, an inactivity timer starts. Solution: Start a mail application, and set...

(English) User Guide
Page 153
.... To set as Windows Media Player. Play any sound by the power-off the computer. 2. Battery and power This section tells what to do if you connect a headphone to the Master volume control and select Mute speakers (in 24 hours, use a new battery pack. • Problem: The computer does not operate with a fully charged battery pack. This section includes five topics: battery, ac power adapter, power, power button, startup and sleep (standby) and hibernation. Turn off...
.... To set as Windows Media Player. Play any sound by the power-off the computer. 2. Battery and power This section tells what to do if you connect a headphone to the Master volume control and select Mute speakers (in 24 hours, use a new battery pack. • Problem: The computer does not operate with a fully charged battery pack. This section includes five topics: battery, ac power adapter, power, power button, startup and sleep (standby) and hibernation. Turn off...


