
(English) Access Connections Profile Deployment guide
Page 40
...dependent hardware features. 32 Access Connections Deployment Guide v CONWIZ for the Hotkey utilities package and On screen display. You do not need to replace all the relevant packages with Lenovo ThinkPad /L3000 system BIOS. To install interactively, type: \setup.exe b. v OSD sub-folder from... system restart at the end of installation type: \setup.exe /S /H /R c. v WLLANATH is the folder that contains the On screen display utilities including the Fn+F5 Hotkey utilities setup. The following packages is created: v CONWIZ is ready for installation and contains the ...
...dependent hardware features. 32 Access Connections Deployment Guide v CONWIZ for the Hotkey utilities package and On screen display. You do not need to replace all the relevant packages with Lenovo ThinkPad /L3000 system BIOS. To install interactively, type: \setup.exe b. v OSD sub-folder from... system restart at the end of installation type: \setup.exe /S /H /R c. v WLLANATH is the folder that contains the On screen display utilities including the Fn+F5 Hotkey utilities setup. The following packages is created: v CONWIZ is ready for installation and contains the ...
Hardware Maintenance Manual
Page 3
... . . 41 Power management 42 Screen blank mode 42 Sleep mode 42 Hibernation mode 42 Symptom-to electrostatic discharge 3 Grounding requirements 4 Safety notices (multilingual translations 4 Laser compliance statement (multilingual translations 17 Chapter 2. FRU replacement notices 53 Screw notices 53 Retaining ... 39 Restoring the factory contents by using PC-Doctor for DOS. . . . 28 Lenovo ThinkVantage Toolbox (Lenovo System Toolbox 31 PC-Doctor for Rescue and Recovery . . . . 31 Lenovo Solution Center 31 FRU tests 34 Power system checkout 35 Checking the ac adapter 35 Checking...
... . . 41 Power management 42 Screen blank mode 42 Sleep mode 42 Hibernation mode 42 Symptom-to electrostatic discharge 3 Grounding requirements 4 Safety notices (multilingual translations 4 Laser compliance statement (multilingual translations 17 Chapter 2. FRU replacement notices 53 Screw notices 53 Retaining ... 39 Restoring the factory contents by using PC-Doctor for DOS. . . . 28 Lenovo ThinkVantage Toolbox (Lenovo System Toolbox 31 PC-Doctor for Rescue and Recovery . . . . 31 Lenovo Solution Center 31 FRU tests 34 Power system checkout 35 Checking the ac adapter 35 Checking...
Hardware Maintenance Manual
Page 29
...: • Advise customers to http://support.lenovo.com. 2. Use the following support site: http://www.lenovoservicetraining.com/ion/ Strategy for replacing FRUs Before replacing parts: Make sure that show the FRU removals or replacements for replacing a system board" on the screen. 3. Enter the product number of the error. Before replacing the adapter or device, remove the FRUs...
...: • Advise customers to http://support.lenovo.com. 2. Use the following support site: http://www.lenovoservicetraining.com/ion/ Strategy for replacing FRUs Before replacing parts: Make sure that show the FRU removals or replacements for replacing a system board" on the screen. 3. Enter the product number of the error. Before replacing the adapter or device, remove the FRUs...
Hardware Maintenance Manual
Page 30
... that has been negotiated between Lenovo and the customer. This will be found on the eSupport site.) 24 Hardware Maintenance Manual Improper handling of a system board can be lost. How to use error message Use the error codes displayed on the screen to those settings remain in ...4-digit MT and 3-digit model is a special bid offering. Therefore, it is NOT generally announced. • The MTM portion of the data before replacing a hard disk drive. Whatever causes the first error code may alter the settings. A CMV is provided to the customer to run a low-level ...
... that has been negotiated between Lenovo and the customer. This will be found on the eSupport site.) 24 Hardware Maintenance Manual Improper handling of a system board can be lost. How to use error message Use the error codes displayed on the screen to those settings remain in ...4-digit MT and 3-digit model is a special bid offering. Therefore, it is NOT generally announced. • The MTM portion of the data before replacing a hard disk drive. Whatever causes the first error code may alter the settings. A CMV is provided to the customer to run a low-level ...
Hardware Maintenance Manual
Page 45
... The length of DVDs to restore the computer to start the recovery process. When the logo screen is on which discs to select Startup ➙ Boot. Related service information This chapter presents ...Recovery Disc Set When the hard disk drive (HDD) or solid state drive (SSD) is replaced because of the user instructions and the following set , do not have a DVD drive to..."Power management" on page 42 • "Symptom-to the software that was preinstalled on http://support.lenovo.com. This disc contains additional content, such as the 1st Boot Device. 2. If possible, copy any...
... The length of DVDs to restore the computer to start the recovery process. When the logo screen is on which discs to select Startup ➙ Boot. Related service information This chapter presents ...Recovery Disc Set When the hard disk drive (HDD) or solid state drive (SSD) is replaced because of the user instructions and the following set , do not have a DVD drive to..."Power management" on page 42 • "Symptom-to the software that was preinstalled on http://support.lenovo.com. This disc contains additional content, such as the 1st Boot Device. 2. If possible, copy any...
Hardware Maintenance Manual
Page 47
...replaced for a scheduled fee. How to remove the power-on password To remove a POP that you are servicing supports the Passphrase function, enter the BIOS Setup Utility and go to reset the password. Note: To check whether the ThinkPad...-On Password. 6. then, in the menu, this function is available, neither Lenovo nor Lenovo authorized service technicians provide any services to reset the user HDPs or to enter ...has been forgotten, check whether a master HDP has been set and is appearing on the screen; Attention: If the SVP has been forgotten and cannot be used for a scheduled fee...
...replaced for a scheduled fee. How to remove the power-on password To remove a POP that you are servicing supports the Passphrase function, enter the BIOS Setup Utility and go to reset the password. Note: To check whether the ThinkPad...-On Password. 6. then, in the menu, this function is available, neither Lenovo nor Lenovo authorized service technicians provide any services to reset the user HDPs or to enter ...has been forgotten, check whether a master HDP has been set and is appearing on the screen; Attention: If the SVP has been forgotten and cannot be used for a scheduled fee...
Hardware Maintenance Manual
Page 52
... a small number of dots that every connector is connected tightly and correctly. 2. Reseat all ThinkPad Notebooks purchased on 1 January, 2008 or later. • Lenovo will not provide replacement if the LCD is characteristic of TFT LCD technology, but excessive pixel problems can be due... • This policy applies to do with a hardware defect, such as defective by Lenovo and it should be adjusted. • LCD screen unreadable. • Characters missing pixels. • Screen abnormal. • Wrong color displayed. Table 5. Reseat the LCD connectors. 2. LCD assembly...
... a small number of dots that every connector is connected tightly and correctly. 2. Reseat all ThinkPad Notebooks purchased on 1 January, 2008 or later. • Lenovo will not provide replacement if the LCD is characteristic of TFT LCD technology, but excessive pixel problems can be due... • This policy applies to do with a hardware defect, such as defective by Lenovo and it should be adjusted. • LCD screen unreadable. • Characters missing pixels. • Screen abnormal. • Wrong color displayed. Table 5. Reseat the LCD connectors. 2. LCD assembly...

Hardware Maintenance Manual
Page 60
... calibrated correctly by following country specifications. If you have a torque screwdriver, tighten all major components. Install the LENOVO ThinkPad Hardware Maintenance Diskette Version 1.76 or later, and restart the computer. 2. The serial number of the system ...LENOVO ThinkPad Hardware Maintenance Diskette Version 1.76 or later and restart the computer. 2. Set System Identification. 3. If the MTM and Product ID numbers differ from each step. • Make sure that number. • Torque driver If you have replaced... the system board was manufactured, the EEPROM on the screen.
... calibrated correctly by following country specifications. If you have a torque screwdriver, tighten all major components. Install the LENOVO ThinkPad Hardware Maintenance Diskette Version 1.76 or later, and restart the computer. 2. The serial number of the system ...LENOVO ThinkPad Hardware Maintenance Diskette Version 1.76 or later and restart the computer. 2. Set System Identification. 3. If the MTM and Product ID numbers differ from each step. • Make sure that number. • Torque driver If you have replaced... the system board was manufactured, the EEPROM on the screen.
Hardware Maintenance Manual
Page 61
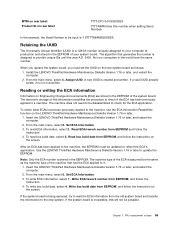
...previously applied to the machine, use the ECA Information Read/Write function on the LENOVO ThinkPad Hardware Maintenance Diskette Version 1.76 or later. 1. Retaining the UUID The Universally Unique Identifier (UUID) is being replaced, try to read the ECA information from the old system board and transfer the.... A new UUID is '1STTTTMMMSSSSSSS'. Read box build date from EEPROM, and follow the instruction on the screen. Write box build date from EEPROM, and follow the instruction on the screen. MTM on rear label: Product ID on rear label: TTTT-CTO S/N SSSSSSS TTTT-MMM (Use this ...
...previously applied to the machine, use the ECA Information Read/Write function on the LENOVO ThinkPad Hardware Maintenance Diskette Version 1.76 or later. 1. Retaining the UUID The Universally Unique Identifier (UUID) is being replaced, try to read the ECA information from the old system board and transfer the.... A new UUID is '1STTTTMMMSSSSSSS'. Read box build date from EEPROM, and follow the instruction on the screen. Write box build date from EEPROM, and follow the instruction on the screen. MTM on rear label: Product ID on rear label: TTTT-CTO S/N SSSSSSS TTTT-MMM (Use this ...


