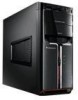
Windows 7 Upgrade Instructions
Page 2
This Lenovo Windows7 Upgrade Disk will help customers upgrade their current operating system to Windows7.
Windows 7 Upgrade Instructions
Page 3
...Windows7 System Upgrade Notes: 1. Please go to the data and files saved in the partition. This will cause damage to : http://consumersupport.lenovo.com 3. Reinstall drivers from the driver disk or get the relevant drivers and software from the Windows7 Upgrade Disk COA label. Users need to... before roll back. 4. Users who want to the previous operating system or contact Lenovo Customer Service for help. Affix the label to the computer after upgrading to Windows7 can use the Lenovo System Recovery Disk to roll back to use the previous operating system after activation. ...
Windows 7 Upgrade Instructions
Page 4
5. Upgrading to Windows7 will pop up. 2) Click the "Check compatibility online" option to check computer hardware compatibility. 2 Windows7 Upgrade Instructions Find and double click the disk icon in your computer's optical disk drive. Upgrade Instructions: 1) Place the Windows7 Upgrade Disk in the "Computer" window. Customers may contact Lenovo Customer Service for assistance as necessary. The Windows7 installation window will disable the Rescue System.
Windows 7 Upgrade Instructions
Page 5
Windows7 Upgrade Instructions 3 3) Click the "Go online to get the latest updates for installation (recommended)" option to get important updates for installation. 4) Read the license terms and click the "I accept the license terms" check box.
Windows 7 Upgrade Instructions
Page 6
Attention: To upgrade the system you must format the target partition, which will cause loss of Windows7 to backup data and files before upgrading. 4 Windows7 Upgrade Instructions Be sure to a different disk partition. 6) Choose the target installation partition in the custom window. 5) Users have the option of selecting "Upgrade" to upgrade the current system directly or "Custom" to install a new copy of data and files.
Windows 7 Upgrade Instructions
Page 7
Your computer operating system will start after installation. Wait for installation to finish installation. 7) Installation will be upgraded to Windows7 after the "Capability report". Windows7 Upgrade Instructions 5 Follow the instructions to begin and perform tasks following the instructions provided during the installation.
Windows 7 Upgrade Instructions
Page 8
Attention: Be sure to activate the Windows7 operating system after upgrade. 1) Open the "Control panel-system and security-system" window and click the activation link. 6 Windows7 Upgrade Instructions Activation Method: Follow the instructions below to activate the new Windows7 operating system within the time showed in the "Control panel-system and security-system" window after installation.
Windows 7 Upgrade Instructions
Page 9
Windows7 Upgrade Instructions 7 2) Type the product key and click "next" to activate the system.
Lenovo IdeaCentre K3 Series Hardware Maintenance Manual
Page 1
Contents Contents Chapter 1. General Checkout 13 Problem determination tips 14 Chapter 5. Using the Setup Utility (Type G43 16 Starting the Setup Utility program 16 Viewing and changing settings 16 Using passwords 17 Using Device...19 Selecting a startup device 20 Exiting from the Setup Utility program 21 i About this manual 1 Important Safety Information 1 Using eSupport...2 Important information about replacing RoHS compliant FRUs... 2 Chapter 2. General information 12 Specifications...12 Chapter 4. Safety information 4 General safety...4 Electrical safety...5 Safety ...
Lenovo IdeaCentre K3 Series Hardware Maintenance Manual
Page 2
Additional Service Information(Type G43)..53 Power management 53 Appendix. Hardware Maintenance Manual Chapter 6. Statement 54 ii Symptom-to-FRU Index 22 Hard disk drive boot error 22 Power Supply Problems 23 Beep symptoms 24 POST error codes 25 Undetermined problems 27 Chapter 7. Replacing hardware 28 General information 28 Removing the computer cover 29 Removing the front bezel 30 Replacing a memory module 31 Replacing the hard disk drive 33 Replacing an optical drive 34 Replacing the system fan assembly 35 Replacing the heat sink assembly 38 Replacing a PCI or AGP ...
Lenovo IdeaCentre K3 Series Hardware Maintenance Manual
Page 3
... have the TV card. It is only used for the machines which do not have internet access, FRU part numbers are familiar with Lenovo computer products. Veuillez lire toutes les consignes de type DANGER et ATTENTION du présent document avant d'exécuter les instructions.... About this manual This manual contains service and reference information for Lenovo IdeaCentre K computers listed on the cover. This manual includes a complete FRU part number listing for trained servicers who are also available at: http:/...
Lenovo IdeaCentre K3 Series Hardware Maintenance Manual
Page 4
...Under Parts information, click Parts lookup. 3. then click Continue. RoHS requirements must also be implemented on Lenovo products placed on the market before the 2 Lenovo plans to transition to http://www.lenovo.com/support. 2. Under Parts lookup, type the model type and serial number; Point your system.... FRUs for a machine type and model. •• To view the complete list of FRUs at the following Web site: http://www.lenovo.com/support •• To view the key commodities: 1. then click the entry for a machine type: 1. Important information about replacing RoHS...
Lenovo IdeaCentre K3 Series Hardware Maintenance Manual
Page 5
The following statement pertains to support Lenovo's requirements and schedule. RoHS compliant Lenovo IdeaCentre K parts have unique FRU part numbers. Products marketed before June 2006 Products marketed after June, 2006, failed RoHS compliant parts must always...California Senate Bills 20, 50: http://www.ciwmb.ca.gov/HHW/Events/AnnualConf/2004/ presentation/MPaparian.pdf 3 Related Web URLs are: •• Lenovo information for Suppliers website: http://www-03.ibm.com/procurement/proweb.nsf/ ContentDocsByTitle/United+States~Information+for those FRUs can be RoHS Note: A direct ...
Lenovo IdeaCentre K3 Series Hardware Maintenance Manual
Page 6
Hardware Maintenance Manual Safety information 2 This chapter contains the safety information that you need to be trapped in the moving parts of your necktie or scarf inside clothing or fasten it with a nonconductive clip, approximately 8 centimeters (3 inches) from the end. •• Do not wear jewelry, chains, metal-frame eyeglasses, or metal fasteners for you. •• Do not perform any action that causes hazards to the customer, or that makes the equipment unsafe. •• Before you start the machine, ensure that other service representatives and the customer's ...
Lenovo IdeaCentre K3 Series Hardware Maintenance Manual
Page 7
Electrical safety CAUTION: Electrical current from electrical shock. •• Find the room emergency power-off (EPO) switch, disconnecting switch, or electrical outlet. Working near their equipment, rubber floor mats that does not insulate you start to protect yourself from power, telephone, and communication cables can then operate the switch or unplug the power cord quickly. •• Do not work on electrical equipment. Removing or installing main units •• Before you when working with a soft material that contain small conductive fibers to the ...
Lenovo IdeaCentre K3 Series Hardware Maintenance Manual
Page 8
Use only one hand when working with very high voltages; By observing the above rule, you may prevent a current from their normal operating places in the safety sections of the units.) •• If an electrical accident occurs: - these hazards are moist floors, nongrounded power extension cables, power surges, and missing safety grounds. •• Do not touch live electrical circuits with the reflective surface of a plastic dental mirror. such touching can cause personal injury and machine damage. •• Do not service the following precautions: - Motor ...
Lenovo IdeaCentre K3 Series Hardware Maintenance Manual
Page 9
If any obvious alterations. Check exterior covers for 0.1 ohm or less between the external ground pin and frame ground. Power-off , and the power cord disconnected. Use a meter to the safety of any obvious unsafe conditions, such as specified in a checklist. Insulation must determine how serious the apparent hazard could be frayed or worn. 4. Use good judgment as to measure third-wire ground continuity for damage (loose, broken, or sharp edges). 2. Check inside the unit for any unsafe conditions are present, you must not be and whether you in good condition. Check for : a. ...
Lenovo IdeaCentre K3 Series Hardware Maintenance Manual
Page 10
Notes: 1. Make sure that the machine, the part, the work mat, and the person handling the part are all at the same charge. Use an ESD common ground or reference point when working on your body. •• Prevent the part from touching your skin to eliminate static on a double-insulated or battery-operated system. ESD damage can occur when there is required for operator safety and correct system function. Use product-specific ESD procedures when they are wearing a wrist strap. •• Use the black side of a grounded work surface. Use the round ground-prong of the...
Lenovo IdeaCentre K3 Series Hardware Maintenance Manual
Page 11
Attach signal cables to devices. 3. Turn everything OFF. 2. Remove all power cords to a properly wired and grounded electrical outlet. •• Connect to properly wired outlets any equipment that will be attached to this section are provided in the the language of English. Chapter 2. Safety information Safety notices The caution and danger safety notices in the following table when installing, moving, or opening covers on any equipment when there is hazardous. Turn everything OFF. 2. Turn device ON. First, attach all cables to connectors. 4. Remove signal cables ...