
Owner's Manual
Page 4
... off. Otherwise, you may only be injured by the protruding sections of the stand. A3 Connecting the Display Before setting up the monitor, ensure that the power to the monitor, the computer system, and other attached devices is pulled up. Connecting the stand base or Removing the stand base 1. Align the hooks... on a cushion or soft cloth. 2. Stand Body Hook Stand Base Slot Warning The tape and locking pin may be removed from those monitors equipped with the matching slots in the Stand Base. 3. Insert the hooks into slots.
... off. Otherwise, you may only be injured by the protruding sections of the stand. A3 Connecting the Display Before setting up the monitor, ensure that the power to the monitor, the computer system, and other attached devices is pulled up. Connecting the stand base or Removing the stand base 1. Align the hooks... on a cushion or soft cloth. 2. Stand Body Hook Stand Base Slot Warning The tape and locking pin may be removed from those monitors equipped with the matching slots in the Stand Base. 3. Insert the hooks into slots.

Owner's Manual
Page 5
Important This illustration depicts the general model of the cable you're attaching. 6. Your monitor may fall and get damaged or injure your foot. Do not carry the product upside down holding only the stand base. The product may differ ... the Display 4. Screw : Turn the screw by turning to the left to separate the monitor and Stand Base. Lift and turn the monitor to face towards the front after the connection is made to the right. Attach the monitor to the Stand Base by turning the screw to the female part of connection.
Important This illustration depicts the general model of the cable you're attaching. 6. Your monitor may fall and get damaged or injure your foot. Do not carry the product upside down holding only the stand base. The product may differ ... the Display 4. Screw : Turn the screw by turning to the left to separate the monitor and Stand Base. Lift and turn the monitor to face towards the front after the connection is made to the right. Attach the monitor to the Stand Base by turning the screw to the female part of connection.

Owner's Manual
Page 6
... angle of the screen, do not need to replace the Locking pin after it is turned off. It is recommended that the power to the monitor, the computer system, and other attached devices is removed, to adjust its height. Positioning your finger(s) in between the head of the... monitor and the stand body. Ergonomic You do not put your display 1. You can hurt your finger(s). Adjust the position of the panel in various ways ...
... angle of the screen, do not need to replace the Locking pin after it is turned off. It is recommended that the power to the monitor, the computer system, and other attached devices is removed, to adjust its height. Positioning your finger(s) in between the head of the... monitor and the stand body. Ergonomic You do not put your display 1. You can hurt your finger(s). Adjust the position of the panel in various ways ...

Owner's Manual
Page 7
Power Cord 2 Varies according to secure the connection. 3. Touch the power button on the front of the monitor to turn on the PC, monitor and peripheral equipment are off and then, connect as follows. 2. Connect DVI-D signal cable 1 . Power button A6 First, make sure that the power on the monitor. Insert the power cord 2 into the outlet. Connecting the Display Using the Computer 1. When attached, tighten the thumbscrews to model. 1 Signal Cable Wall-outlet type DVI-D signal cable PC 4.
Power Cord 2 Varies according to secure the connection. 3. Touch the power button on the front of the monitor to turn on the PC, monitor and peripheral equipment are off and then, connect as follows. 2. Connect DVI-D signal cable 1 . Power button A6 First, make sure that the power on the monitor. Insert the power cord 2 into the outlet. Connecting the Display Using the Computer 1. When attached, tighten the thumbscrews to model. 1 Signal Cable Wall-outlet type DVI-D signal cable PC 4.

Owner's Manual
Page 8
... compliant peripherals-such as mouse, memory stick or USB hard disk, etc. When connecting the USB cable, check that the shape of the display. The monitor's USB terminal supports USB 2.0 and High Speed cables. A7 and you to connect a chain of the USB compliant PC or another hub with the USB...
... compliant peripherals-such as mouse, memory stick or USB hard disk, etc. When connecting the USB cable, check that the shape of the display. The monitor's USB terminal supports USB 2.0 and High Speed cables. A7 and you to connect a chain of the USB compliant PC or another hub with the USB...

Owner's Manual
Page 10
... is on. Power Indicator This Indicator lights up blue when the display operates normally(On Mode). When adjusting brightness, it off. Buttons You can adjust monitor brightness to be turned on. *What is turned on, the power indicator (blue light) flickers once after the beep. When DFC is DFC (Digital Fine...
... is on. Power Indicator This Indicator lights up blue when the display operates normally(On Mode). When adjusting brightness, it off. Buttons You can adjust monitor brightness to be turned on. *What is turned on, the power indicator (blue light) flickers once after the beep. When DFC is DFC (Digital Fine...

Owner's Manual
Page 12
... inserted in the slot. • Set the color setting higher than 24 bits (true color) at Control Panel - G Have you see an "Unrecognized monitor, Plug&Play (VESA DDC) monitor found" message? • Make sure to check if the video card supports Plug&Play function. G Do you installed the display driver? • Be...
... inserted in the slot. • Set the color setting higher than 24 bits (true color) at Control Panel - G Have you see an "Unrecognized monitor, Plug&Play (VESA DDC) monitor found" message? • Make sure to check if the video card supports Plug&Play function. G Do you installed the display driver? • Be...

Owner's Manual
Page 16
Installing the Wall mount plate This monitor satisfies the specifications of the Wall mount plate or the interchange device. 1. Remove the screw by using a screwdriver, and pull the Stand part in the ...
Installing the Wall mount plate This monitor satisfies the specifications of the Wall mount plate or the interchange device. 1. Remove the screw by using a screwdriver, and pull the Stand part in the ...

Specification
Page 1
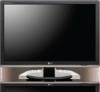
WIDESCREEN FORMAT See the whole picture with LG's widescreen LCD monitors. The FLATRON f-ENGINETM adjusts the contrast and brightness independently of the innovative operating system. CERTIFIED FOR WINDOWS VISTATM This FLATRON monitor is Certified for demanding applications that provides not only astounding ... aspect ratio deliver a better view. perfect for Windows Vista and complements the new look of each other to produce amazing images. W3000H WIDESCREEN LCD MONITOR 30" Class (29.7" diagonal) • 2560 x 1600 Resolution • Supports Full HD (1080p) • Wide Color ...
WIDESCREEN FORMAT See the whole picture with LG's widescreen LCD monitors. The FLATRON f-ENGINETM adjusts the contrast and brightness independently of the innovative operating system. CERTIFIED FOR WINDOWS VISTATM This FLATRON monitor is Certified for demanding applications that provides not only astounding ... aspect ratio deliver a better view. perfect for Windows Vista and complements the new look of each other to produce amazing images. W3000H WIDESCREEN LCD MONITOR 30" Class (29.7" diagonal) • 2560 x 1600 Resolution • Supports Full HD (1080p) • Wide Color ...

Specification
Page 2
... Customer Service and Technical Support: (800) 243-0000 • LGusa.com © 2008 LG Electronics U.S.A., Inc., Englewood Cliffs, NJ. Design, features and specifications subject to change without notice. 11/16/09 All rights reserved. W3000H TECHNICAL SPECIFICATIONS WIDESCREEN LCD MONITOR 30" Class (29.7" diagonal) LCD PANEL SPECS Type 30" Widescreen LCD (29.7" diagonal...
... Customer Service and Technical Support: (800) 243-0000 • LGusa.com © 2008 LG Electronics U.S.A., Inc., Englewood Cliffs, NJ. Design, features and specifications subject to change without notice. 11/16/09 All rights reserved. W3000H TECHNICAL SPECIFICATIONS WIDESCREEN LCD MONITOR 30" Class (29.7" diagonal) LCD PANEL SPECS Type 30" Widescreen LCD (29.7" diagonal...


