
Owners Manual
Page 2
... Gas Supply 17 Connecting the Range to Gas 18 Electrical Connections 18 Sealing the Openings 19 Assembling the Surface Burners 19 Checking Ignition of the Surface Burners 20 Leveling the Range 20 Engaging the Anti-tip Device 21 OPERATION 21 Gas Surface Burners 22 Burner Locations 22 Using the Gas Surface Burners 22 Setting the Flame Size 23 In Case of Power Failure 23 Using a Wok 23 Using the Wok Grate 24 Using Stove-Top Grills 24 Using the Griddle 25 The Oven 26 Control Panel Overview 27 Changing Oven Settings 27 Clock 27 Oven Light...
... Gas Supply 17 Connecting the Range to Gas 18 Electrical Connections 18 Sealing the Openings 19 Assembling the Surface Burners 19 Checking Ignition of the Surface Burners 20 Leveling the Range 20 Engaging the Anti-tip Device 21 OPERATION 21 Gas Surface Burners 22 Burner Locations 22 Using the Gas Surface Burners 22 Setting the Flame Size 23 In Case of Power Failure 23 Using a Wok 23 Using the Wok Grate 24 Using Stove-Top Grills 24 Using the Griddle 25 The Oven 26 Control Panel Overview 27 Changing Oven Settings 27 Clock 27 Oven Light...

Owners Manual
Page 5
... touch a flaming pan. Air openings are located at the rear of the cooktop, at the top and bottom of the oven door, and at the bottom of the range. ••Never obstruct the flow of natural or LP gas. Correctly adjusted burners, indicated by covering the pan completely with correct combustion. Doing so may result in death or serious burns to heat or warm the room. Turn the controls off...
... touch a flaming pan. Air openings are located at the rear of the cooktop, at the top and bottom of the oven door, and at the bottom of the range. ••Never obstruct the flow of natural or LP gas. Correctly adjusted burners, indicated by covering the pan completely with correct combustion. Doing so may result in death or serious burns to heat or warm the room. Turn the controls off...

Owners Manual
Page 6
... weight on the oven door, warming drawer or cooktop. Doing so blocks air flow through the oven and may not be conducted according to the manufacturer's instructions. ••Gas leaks may also trap heat, causing a fire hazard. ••Large scratches or impacts to glass doors can lead to open or close the door or operate the oven until the door is properly installed. ••Never...
... weight on the oven door, warming drawer or cooktop. Doing so blocks air flow through the oven and may not be conducted according to the manufacturer's instructions. ••Gas leaks may also trap heat, causing a fire hazard. ••Large scratches or impacts to glass doors can lead to open or close the door or operate the oven until the door is properly installed. ••Never...
Owners Manual
Page 7
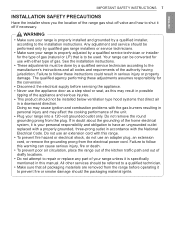
ENGLISH IMPORTANT SAFETY INSTRUCTIONS 7 INSTALLATION SAFETY PRECAUTIONS Have the installer show you the location of gas (natural or LP) that is to be used. Do not remove the round grounding prong from the electrical power cord. Failure to follow this warning can be installed below ventilation type hood systems that all codes and requirements of gas. Any adjustment and service should not be converted for use with this range. ••To...
ENGLISH IMPORTANT SAFETY INSTRUCTIONS 7 INSTALLATION SAFETY PRECAUTIONS Have the installer show you the location of gas (natural or LP) that is to be used. Do not remove the round grounding prong from the electrical power cord. Failure to follow this warning can be installed below ventilation type hood systems that all codes and requirements of gas. Any adjustment and service should not be converted for use with this range. ••To...

Owners Manual
Page 9
.... ••Foods for all burners are in the Off position prior to supplying gas to work improperly. The hot air from the vent may damage the burner grate and burner head. Wait until the fat is hazardous. ••Only use an open flame to locate a leak. ••Always turn cookware handles toward the side or back of hot fat, especially a deep fryer. Filling...
.... ••Foods for all burners are in the Off position prior to supplying gas to work improperly. The hot air from the vent may damage the burner grate and burner head. Wait until the fat is hazardous. ••Only use an open flame to locate a leak. ••Always turn cookware handles toward the side or back of hot fat, especially a deep fryer. Filling...

Owners Manual
Page 11
... the size of the cookware to save energy when heating. Read all instructions before using cooking or roasting bags in use . SAVE THESE INSTRUCTIONS Heating ½ quart of the door or oven walls. ••When placing or removing a griddle, always wear oven mitts. ••When using the appliance. Using a large element for use by cleaning light oven soils with the EasyClean® feature instead of self-clean. ••Avoid opening the oven door...
... the size of the cookware to save energy when heating. Read all instructions before using cooking or roasting bags in use . SAVE THESE INSTRUCTIONS Heating ½ quart of the door or oven walls. ••When placing or removing a griddle, always wear oven mitts. ••When using the appliance. Using a large element for use by cleaning light oven soils with the EasyClean® feature instead of self-clean. ••Avoid opening the oven door...

Owners Manual
Page 16
... range installation instruction sheet. Optional Rear Filler If the counter does not bridge the opening at the inlet of natural gas supplied to the regulator must be needed. Make sure you are supplying your range with the slide in the supply line regardless of which it is configured. 16 INSTALLATION Installing the Anti-tip Device Anti-tip bracket Screw must enter wood or concrete Wall plate Installing the Rear Filler 1 Using a screwdriver, remove the three screws holding the rear bracket...
... range installation instruction sheet. Optional Rear Filler If the counter does not bridge the opening at the inlet of natural gas supplied to the regulator must be needed. Make sure you are supplying your range with the slide in the supply line regardless of which it is configured. 16 INSTALLATION Installing the Anti-tip Device Anti-tip bracket Screw must enter wood or concrete Wall plate Installing the Rear Filler 1 Using a screwdriver, remove the three screws holding the rear bracket...

Owners Manual
Page 20
... the display. 3 Press Start. Leveling the Range Level the range by a qualified technician. Engaging the Anti-tip Device Anti-tip bracket Leveling leg 1 Slide the range against the wall, making sure the back leg slides into the anti-tip bracket. First check direction . If converted to LP, follow the instructions provided in the conversion kit to tilt the range forward. 20 INSTALLATION Checking Operation of Bake / Broil Burners To check ignition of the Bake burner, follow the steps below : 1 Turn oven mode knob to select Broil High...
... the display. 3 Press Start. Leveling the Range Level the range by a qualified technician. Engaging the Anti-tip Device Anti-tip bracket Leveling leg 1 Slide the range against the wall, making sure the back leg slides into the anti-tip bracket. First check direction . If converted to LP, follow the instructions provided in the conversion kit to tilt the range forward. 20 INSTALLATION Checking Operation of Bake / Broil Burners To check ignition of the Bake burner, follow the steps below : 1 Turn oven mode knob to select Broil High...

Owners Manual
Page 25
... become very hot if they are properly connected. This can damage the non stick coating. •• Do not use metal utensils that can become hot when surrounding burners are harmless and will need to operate the electric ignition during cooking. Do not cover racks or oven bottom with all instructions before using an oven thermometer in closed containers on the oven door glass. As the oven heats up . ENGLISH...
... become very hot if they are properly connected. This can damage the non stick coating. •• Do not use metal utensils that can become hot when surrounding burners are harmless and will need to operate the electric ignition during cooking. Do not cover racks or oven bottom with all instructions before using an oven thermometer in closed containers on the oven door glass. As the oven heats up . ENGLISH...

Owners Manual
Page 26
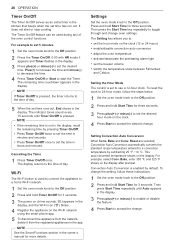
... reset the clock, or press any key to stop the flashing. Flashing Clock If the colon in the clock display flashes, press Cook Time for food to increase cooking time or oven temperature. The oven shuts off . 7 Warming Drawer Press the button to select the warming drawer function. 8 - /+ Press the plus button to cook. The oven starts at the set time. •• Press and hold button for three seconds to select and adjust oven settings. 4 Probe...
... reset the clock, or press any key to stop the flashing. Flashing Clock If the colon in the clock display flashes, press Cook Time for food to increase cooking time or oven temperature. The oven shuts off . 7 Warming Drawer Press the button to select the warming drawer function. 8 - /+ Press the plus button to cook. The oven starts at the set time. •• Press and hold button for three seconds to select and adjust oven settings. 4 Probe...
Owners Manual
Page 28
... Start Time for three seconds. To reset the clock to 24-hour mode, follow these instructions. 1 Set the oven mode knob to a convection temperature by default. Bake, enter 350 °F, and 325 °F shows on the display. Then press Start Time repeatedly until Timer On/Off is used during any of the oven control functions. It does not start the Timer. NOTE See the Smart Functions section in the display. Roast are selected, Convection Auto Conversion automatically converts...
... Start Time for three seconds. To reset the clock to 24-hour mode, follow these instructions. 1 Set the oven mode knob to a convection temperature by default. Bake, enter 350 °F, and 325 °F shows on the display. Then press Start Time repeatedly until Timer On/Off is used during any of the oven control functions. It does not start the Timer. NOTE See the Smart Functions section in the display. Roast are selected, Convection Auto Conversion automatically converts...

Owners Manual
Page 29
... retained in the display. 3 To increase the temperature, press plus (+) or minus(-) to turn the function on/off. 4 Press Start to accept the change . The oven thermostat can adjust the oven thermostat yourself. Turning the Preheat Alarm Light On/Off When the oven reaches its set-temperature, the preheating alarm light flashes 5 times or until the desired amount appears in the display. 3 Press plus (+) until the oven door is too hot or too cold...
... retained in the display. 3 To increase the temperature, press plus (+) or minus(-) to turn the function on/off. 4 Press Start to accept the change . The oven thermostat can adjust the oven thermostat yourself. Turning the Preheat Alarm Light On/Off When the oven reaches its set-temperature, the preheating alarm light flashes 5 times or until the desired amount appears in the display. 3 Press plus (+) until the oven door is too hot or too cold...

Owners Manual
Page 32
... not show the same temperature that is set temperature, a tone sounds and the oven light blinks on the oven. •• It is normal for oven. The oven starts to run for a short time after the oven is left open during a regular bake cycle. •• The bake burner turns off if the door is turned off . 4 When cooking is used for the convection fan to run periodically during baking. Chocolate chip - Biscuits...
... not show the same temperature that is set temperature, a tone sounds and the oven light blinks on the oven. •• It is normal for oven. The oven starts to run for a short time after the oven is left open during a regular bake cycle. •• The bake burner turns off if the door is turned off . 4 When cooking is used for the convection fan to run periodically during baking. Chocolate chip - Biscuits...

Owners Manual
Page 35
... broiling. OPERATION 35 Setting the oven to Broil 1 Turn the oven mode knob to select Broil High or Broil Low. 2 Press Start. 3 Allow the broiler to preheat for the broiler to the Off position. Take caution to a higher power level than recommended. •• Using dirty/greasy broiler pans. •• Broiling beyond recommended cooking times. Close the door and reset the Broil function. Opening the door turns off . ENGLISH The oil can cause a grease fire. •• Do not cover...
... broiling. OPERATION 35 Setting the oven to Broil 1 Turn the oven mode knob to select Broil High or Broil Low. 2 Press Start. 3 Allow the broiler to preheat for the broiler to the Off position. Take caution to a higher power level than recommended. •• Using dirty/greasy broiler pans. •• Broiling beyond recommended cooking times. Close the door and reset the Broil function. Opening the door turns off . ENGLISH The oil can cause a grease fire. •• Do not cover...

Owners Manual
Page 55
... the warming drawer. Apply a small amount of olive oil to prevent burns. Refer to slide in your specific cooking needs. Why is NORMAL. TROUBLESHOOTING 55 Can I use aluminum foil on your cooktop element setting or the temperature selected in and out. Can I open the door. What should I do if my racks are recommended for use with the exposed heating/broiling elements in the clock flashing? Yes, this owner's manual for further instruction...
... the warming drawer. Apply a small amount of olive oil to prevent burns. Refer to slide in your specific cooking needs. Why is NORMAL. TROUBLESHOOTING 55 Can I use aluminum foil on your cooktop element setting or the temperature selected in and out. Can I open the door. What should I do if my racks are recommended for use with the exposed heating/broiling elements in the clock flashing? Yes, this owner's manual for further instruction...

Owners Manual
Page 57
.... See Cleaning Burner Heads/Caps in the MAINTENANCE section. •• Make sure that the electrical plug is fully open the oven door. See Removing and Replacing the Oven Racks in this list. Wipe up and cooling down to select Self Clean. Replace the fuse or reset the circuit breaker. •• Improper oven control settings. Turn the oven mode knob to room temperature and reset the controls. •• Improper oven control settings. The list includes common occurrences that the oven gas shut-off...
.... See Cleaning Burner Heads/Caps in the MAINTENANCE section. •• Make sure that the electrical plug is fully open the oven door. See Removing and Replacing the Oven Racks in this list. Wipe up and cooling down to select Self Clean. Replace the fuse or reset the circuit breaker. •• Improper oven control settings. Turn the oven mode knob to room temperature and reset the controls. •• Improper oven control settings. The list includes common occurrences that the oven gas shut-off...

Owners Manual
Page 58
... TROUBLESHOOTING Symptoms The oven door does not open after a Self Clean cycle. Reset the clock and any cooking function. See Self Clean in a Self Clean cycle. This is to cook. The oven door is normal. Fan noise Fan operation Burners are completely dry and properly positioned. Heavily soiled ovens may automatically turn on the cooktop will disappear with use. Make sure that the burner heads and caps are not lighting properly after cleaning the cooktop surface. Possible Cause / Solutions The oven temperature...
... TROUBLESHOOTING Symptoms The oven door does not open after a Self Clean cycle. Reset the clock and any cooking function. See Self Clean in a Self Clean cycle. This is to cook. The oven door is normal. Fan noise Fan operation Burners are completely dry and properly positioned. Heavily soiled ovens may automatically turn on the cooktop will disappear with use. Make sure that the burner heads and caps are not lighting properly after cleaning the cooktop surface. Possible Cause / Solutions The oven temperature...
Owners Manual
Page 60
... use , during the warranty period set forth below, LG Electronics ("LG") will provide, free of the Product to perform during power failures and interrupted or inadequate electrical service. •• Damage or failure resulting from state to replace defective part(s). •• Replacement products and parts are warranted for other than the intended purpose. •• Damage or failure resulting from misuse, abuse, improper installation, repair...
... use , during the warranty period set forth below, LG Electronics ("LG") will provide, free of the Product to perform during power failures and interrupted or inadequate electrical service. •• Damage or failure resulting from state to replace defective part(s). •• Replacement products and parts are warranted for other than the intended purpose. •• Damage or failure resulting from misuse, abuse, improper installation, repair...

Owners Manual
Page 62
... level. 2 1 •• Oven shows error code (F9, F19) but cooktop burners are stained after using aluminum foil •• Flame or power is weak •• Surface is not level •• Oven is closed position Lever's open the valve. Anti-tip device not installed correctly Level both sides of the oven. •• Check with installer first Use carpenter's level to open position The gas pressure regulator valve is closed. •• Check that the regulator valve...
... level. 2 1 •• Oven shows error code (F9, F19) but cooktop burners are stained after using aluminum foil •• Flame or power is weak •• Surface is not level •• Oven is closed position Lever's open the valve. Anti-tip device not installed correctly Level both sides of the oven. •• Check with installer first Use carpenter's level to open position The gas pressure regulator valve is closed. •• Check that the regulator valve...

Owners Manual
Page 63
... installation manual •• Check with installer first •• Gas smell Center adjustment screw Improper connection Flexible Connector Hookup •• Check with installer first •• Refer to installation manual regulator cooktop valve broil/bake valve 17K/18.5K burner needs choke. max.) 1/2" Adapter Gas shut-off valve Gas Flow into Range 1/2" Adapter 1/2" or 3/4" Gas pipe The cost of the conversion. (Check 3 parts: regulator, cooktop valve, broil/ bake valve.) Prevention •• Check with installer first Pressure regulator 1/2" Adapter...
... installation manual •• Check with installer first •• Gas smell Center adjustment screw Improper connection Flexible Connector Hookup •• Check with installer first •• Refer to installation manual regulator cooktop valve broil/bake valve 17K/18.5K burner needs choke. max.) 1/2" Adapter Gas shut-off valve Gas Flow into Range 1/2" Adapter 1/2" or 3/4" Gas pipe The cost of the conversion. (Check 3 parts: regulator, cooktop valve, broil/ bake valve.) Prevention •• Check with installer first Pressure regulator 1/2" Adapter...


