Service Manual
Page 3
..., or damage to prevent accident or injury when servicing. 1. Do not put anything on top of it where children are not likely to manually turn the ice maker even when turned off. 11. Remove dust and foreign materials from wall outlet and wait for evidence of the icemaker ..., run over, kink, bend, pull out, or twist the power cord. 9. Stay clear of moisture intrusion in the refrigerator. 13. Customers should not repair the refrigerator themselves. Before touching the power cord, make sure the outlet is confirmed. 10. If the power cord is not damaged. Do not try...
..., or damage to prevent accident or injury when servicing. 1. Do not put anything on top of it where children are not likely to manually turn the ice maker even when turned off. 11. Remove dust and foreign materials from wall outlet and wait for evidence of the icemaker ..., run over, kink, bend, pull out, or twist the power cord. 9. Stay clear of moisture intrusion in the refrigerator. 13. Customers should not repair the refrigerator themselves. Before touching the power cord, make sure the outlet is confirmed. 10. If the power cord is not damaged. Do not try...

Service Manual
Page 30
... code. 6. When you have finished using the test mode, reset the appliance manually by unplugging it for (A): 22 (B): 22 LEDs. Reset the appliance manually to the normal operation mode if not reset manually. 3. Stepping motor damper is completely closed. 6. Compressor OFF 2. Optichill stepping motor...LEDs or LCD graphics turn off when door is showing failure codes. The test function is above +5°C Return to make diagnosis and repair easier and quicker. 2. Continuous operation of compressor 2. Freezing BLDC motor and cooling BLDC motor turn on 4. All display LEDs or ...
... code. 6. When you have finished using the test mode, reset the appliance manually by unplugging it for (A): 22 (B): 22 LEDs. Reset the appliance manually to the normal operation mode if not reset manually. 3. Stepping motor damper is completely closed. 6. Compressor OFF 2. Optichill stepping motor...LEDs or LCD graphics turn off when door is showing failure codes. The test function is above +5°C Return to make diagnosis and repair easier and quicker. 2. Continuous operation of compressor 2. Freezing BLDC motor and cooling BLDC motor turn on 4. All display LEDs or ...
Service Manual
Page 74
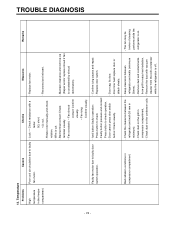
...8734;Ω: cut . - Fan shroud contact: Confirm visually. - Fan icing: Confirm visually. - Confirm icing causes and repair. Faulty button pressure and contact: Press button to check - button: Check visually. - Remove dust and contaminants compressor compartment. Maintain ...clearance and remove ice (Repair and/or replace shroud if fan is off. - Door cannot press door switch - Remove the dust with a fan motor. Rotate rotor manually and check rotation. - Fan constraint. - Iced button (...
...8734;Ω: cut . - Fan shroud contact: Confirm visually. - Fan icing: Confirm visually. - Confirm icing causes and repair. Faulty button pressure and contact: Press button to check - button: Check visually. - Remove dust and contaminants compressor compartment. Maintain ...clearance and remove ice (Repair and/or replace shroud if fan is off. - Door cannot press door switch - Remove the dust with a fan motor. Rotate rotor manually and check rotation. - Fan constraint. - Iced button (...

Service Manual
Page 77
... into the formula. Impurities. 2. Wrong heater rating (or wrong assembly). 1. Confirm the capacity after - How to replace : substituting the resistance value Refer to suction duct manually and assemble the disconnected parts. Defrosting failure Problems Causes Checks Measures Remarks No defrosting. TROUBLE DIAGNOSIS - 77 - 15. Check the resistance between Suction duct and... is severe.) (check drains outside). 2) Put in the gap). 1. Tens to parts explanations. Suction tube and discharge orifice: 1. into the drain frost is accessible to repair.
... into the formula. Impurities. 2. Wrong heater rating (or wrong assembly). 1. Confirm the capacity after - How to replace : substituting the resistance value Refer to suction duct manually and assemble the disconnected parts. Defrosting failure Problems Causes Checks Measures Remarks No defrosting. TROUBLE DIAGNOSIS - 77 - 15. Check the resistance between Suction duct and... is severe.) (check drains outside). 2) Put in the gap). 1. Tens to parts explanations. Suction tube and discharge orifice: 1. into the drain frost is accessible to repair.
Service Manual
Page 91
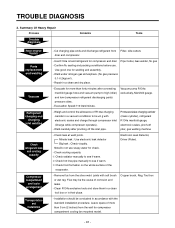
...welder, N2 gas - Weld carefully after connecting manifold gauge hose and vacuum pump to see if warm. ➁ Check hot line pipe manually to high (drier) and low (compressor refrigerant discharging parts) pressure sides. - Minute leak : Use electronic leak detector Big leak : ...Check visually. Check cooling capacity ➀ Check radiator manually to see if warm. ➂ Check frost formation on the whole surface of the evaporator. Summary Of Heavy Repair Process Trouble diagnosis Contents Tools Remove refrigerant Residuals Parts replacement and welding Vacuum ...
...welder, N2 gas - Weld carefully after connecting manifold gauge hose and vacuum pump to see if warm. ➁ Check hot line pipe manually to high (drier) and low (compressor refrigerant discharging parts) pressure sides. - Minute leak : Use electronic leak detector Big leak : ...Check visually. Check cooling capacity ➀ Check radiator manually to see if warm. ➂ Check frost formation on the whole surface of the evaporator. Summary Of Heavy Repair Process Trouble diagnosis Contents Tools Remove refrigerant Residuals Parts replacement and welding Vacuum ...


