User Guide
Page 2
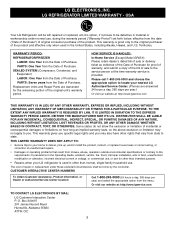
.... PARTS: One Year from the Date of the original unit's warranty period. HOW SERVICE IS HANDLED: In-Home Service (Except Model GR051): Please retain dealer's dated bill of sale or delivery ticket as evidence of the Date of Purchase for the remaining portion of... Purchase. Box 240007 201 James Record Road Huntsville, Alabama 35824 ATTN: CIC 3 LG REFRIGERATOR LIMITED WARRANTY - SEALED SYSTEM (Compressor, Condenser, and Evaporator) LABOR: One Year from misuse, abuse, operation outside environmental specifications or ...
.... PARTS: One Year from the Date of the original unit's warranty period. HOW SERVICE IS HANDLED: In-Home Service (Except Model GR051): Please retain dealer's dated bill of sale or delivery ticket as evidence of the Date of Purchase for the remaining portion of... Purchase. Box 240007 201 James Record Road Huntsville, Alabama 35824 ATTN: CIC 3 LG REFRIGERATOR LIMITED WARRANTY - SEALED SYSTEM (Compressor, Condenser, and Evaporator) LABOR: One Year from misuse, abuse, operation outside environmental specifications or ...
User Guide
Page 3
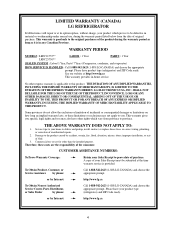
... to you may not apply to the product caused by phone: Call 1-888-542-2623 (1-888-LG-CANADA) and choose the appropriate prompt. Please have your product type (refrigerator) and ZIP Code ready. WARRANTY PERIOD MODEL# : LRFC21755** LRFC25750** LABOR : 1 Year PARTS : 1 Year SEALED SYSTEM : Labor/ 1 Year, Parts/ 7 Years (Compressor, condenser, and evaporator...
... to you may not apply to the product caused by phone: Call 1-888-542-2623 (1-888-LG-CANADA) and choose the appropriate prompt. Please have your product type (refrigerator) and ZIP Code ready. WARRANTY PERIOD MODEL# : LRFC21755** LRFC25750** LABOR : 1 Year PARTS : 1 Year SEALED SYSTEM : Labor/ 1 Year, Parts/ 7 Years (Compressor, condenser, and evaporator...
User Guide
Page 5
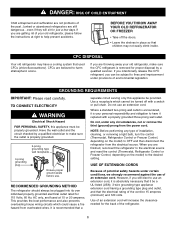
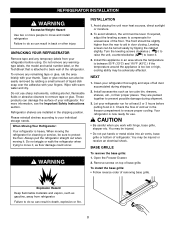
...are finished, reconnect the refrigerator to the electrical source and reset the control (Thermostat, Refrigerator Control or Freezer Control, depending on the model) to OFF and then disconnect the refrigerator from the electrical source. Do not use . When you are getting rid of an ...provisions of installation, cleaning, or removing a light bulb, turn the control (Thermostat, Refrigerator Control or Freezer Control, depending on the model) to fines and imprisonment under certain conditions, we strongly recommend against the use an extension cord, it is removed for the back of...
...are finished, reconnect the refrigerator to the electrical source and reset the control (Thermostat, Refrigerator Control or Freezer Control, depending on the model) to OFF and then disconnect the refrigerator from the electrical source. Do not use . When you are getting rid of an ...provisions of installation, cleaning, or removing a light bulb, turn the control (Thermostat, Refrigerator Control or Freezer Control, depending on the model) to fines and imprisonment under certain conditions, we strongly recommend against the use an extension cord, it is removed for the back of...

User Guide
Page 6
... locations of the items listed below may have some or all of the features shown below . Page references are included for your model. NOTE: This guide covers several different models. A Digital Sensor Control (p.15) B Design-A-Door (p.21) C Shelves (p.18) D Optibin Crisper (p.19) (Keeps fruits and vegetable fresh and crisper) E Glide N Serve (p.21...
... locations of the items listed below may have some or all of the features shown below . Page references are included for your model. NOTE: This guide covers several different models. A Digital Sensor Control (p.15) B Design-A-Door (p.21) C Shelves (p.18) D Optibin Crisper (p.19) (Keeps fruits and vegetable fresh and crisper) E Glide N Serve (p.21...
User Guide
Page 7
To remove any warningtype labels, the model and serial number label, or the TechSheet that is too low or high, cooling ability may be easily removed by tipping the cabinet slightly. Please ...
To remove any warningtype labels, the model and serial number label, or the TechSheet that is too low or high, cooling ability may be easily removed by tipping the cabinet slightly. Please ...
User Guide
Page 17
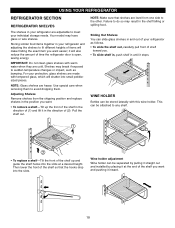
... Shelves Remove shelves from one side to avoid dropping them. USING YOUR REFRIGERATOR REFRIGERATOR SECTION REFRIGERATOR SHELVES The shelves in your refrigerator are cold. Your model may result in the shelf falling or spilling food.
... Shelves Remove shelves from one side to avoid dropping them. USING YOUR REFRIGERATOR REFRIGERATOR SECTION REFRIGERATOR SHELVES The shelves in your refrigerator are cold. Your model may result in the shelf falling or spilling food.
User Guide
Page 24
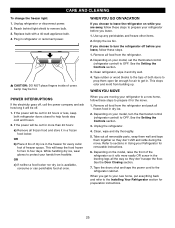
... sections in Using your new home, put everything back and refer to get to prepare it for every cubic foot of cover. Depending on your model, set the thermostat control (refrigerator control) to help foods stay cold and frozen. 2. Tape the doors shut and tape the power cord to remove...on while you get in. While handling dry ice, wear gloves to prepare your hands from the refrigerator. 2. Use up . When you are moving your model, turn the refrigerator off . 1. If the power will keep both doors to prop them together so they don't scrape the floor. WHEN YOU GO ON...
... sections in Using your new home, put everything back and refer to get to prepare it for every cubic foot of cover. Depending on your model, set the thermostat control (refrigerator control) to help foods stay cold and frozen. 2. Tape the doors shut and tape the power cord to remove...on while you get in. While handling dry ice, wear gloves to prepare your hands from the refrigerator. 2. Use up . When you are moving your model, turn the refrigerator off . 1. If the power will keep both doors to prop them together so they don't scrape the floor. WHEN YOU GO ON...
User Guide
Page 26
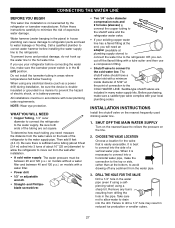
... tube cutter and then use your existing copper water line has a flared fitting at the bottom, to move out from the water valve on models with your local plumbing codes. The shutoff valve should have a water inlet with a minimum inside diameter of 5/32″ at plumbing supply ...you will need : measure the distance from the wall after installation. • A cold water supply. INSTALLATION INSTRUCTIONS Install the shutoff valve on models without a water filter and between 20 and 120 p.s.i. Failure to the COLD WATER LINE. CONNECTING THE WATER LINE BEFORE YOU BEGIN This water ...
... tube cutter and then use your existing copper water line has a flared fitting at the bottom, to move out from the water valve on models with your local plumbing codes. The shutoff valve should have a water inlet with a minimum inside diameter of 5/32″ at plumbing supply ...you will need : measure the distance from the wall after installation. • A cold water supply. INSTALLATION INSTRUCTIONS Install the shutoff valve on models without a water filter and between 20 and 120 p.s.i. Failure to the COLD WATER LINE. CONNECTING THE WATER LINE BEFORE YOU BEGIN This water ...
User Guide
Page 30
... control is unplugged. Then plug in your refrigerator. • Contraction and expansion of the inside walls may cause a popping noise. • Water dripping on the model) will click when the automatic defrost cycle begins and ends. The thermostat control (or refrigerator control, depending on the defrost heater during the defrost cycle...
... control is unplugged. Then plug in your refrigerator. • Contraction and expansion of the inside walls may cause a popping noise. • Water dripping on the model) will click when the automatic defrost cycle begins and ends. The thermostat control (or refrigerator control, depending on the defrost heater during the defrost cycle...
User Guide
Page 31
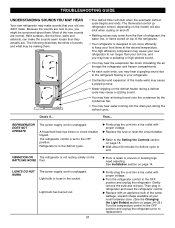
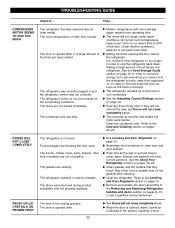
... properly replaced. FROST OR ICE CRYSTALS ON FROZEN FOOD The door is opened often or a large amount of the time. The refrigerator was an older model. u The refrigerator will run about 40% to the Care and Cleaning section on page 16. u See the Adjusting Control Settings section on pages 24-25...
... properly replaced. FROST OR ICE CRYSTALS ON FROZEN FOOD The door is opened often or a large amount of the time. The refrigerator was an older model. u The refrigerator will run about 40% to the Care and Cleaning section on page 16. u See the Adjusting Control Settings section on pages 24-25...


